Here is a recently completed necklace of forged nickel on copper plate, featuring a 5mm African amethyst cabochon in a silver bezel mount. (sold)
A forged nickel/copper pendant with 5mm African amethyst
The stone in this piece comes from a recent parcel of 5,6, and 8mm rounds that I purchased from a dealer in Michigan. It includes blue, white, sky blue and green topaz, pale blue aquamarine, smoky quartz, prasiolite(which, I have just learned, is the correct name for green amethyst), rhodolite and red garnets, yellow and madeira citrine, and a goshenite. The goshenite (aka white beryl) is a pretty, colorless 5mm stone that I’m not familiar with, but it’s quite pretty… I’m always on the lookout for unusual gemstones, if they’re not too expensive. Look for some new pieces from this parcel coming soon.
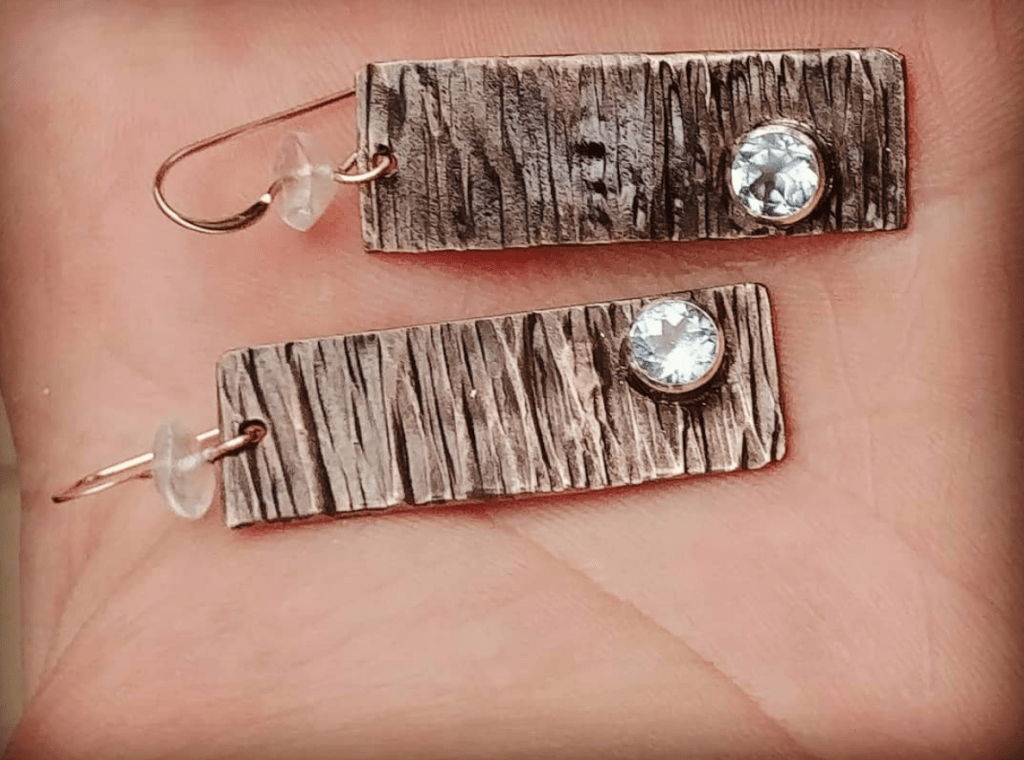
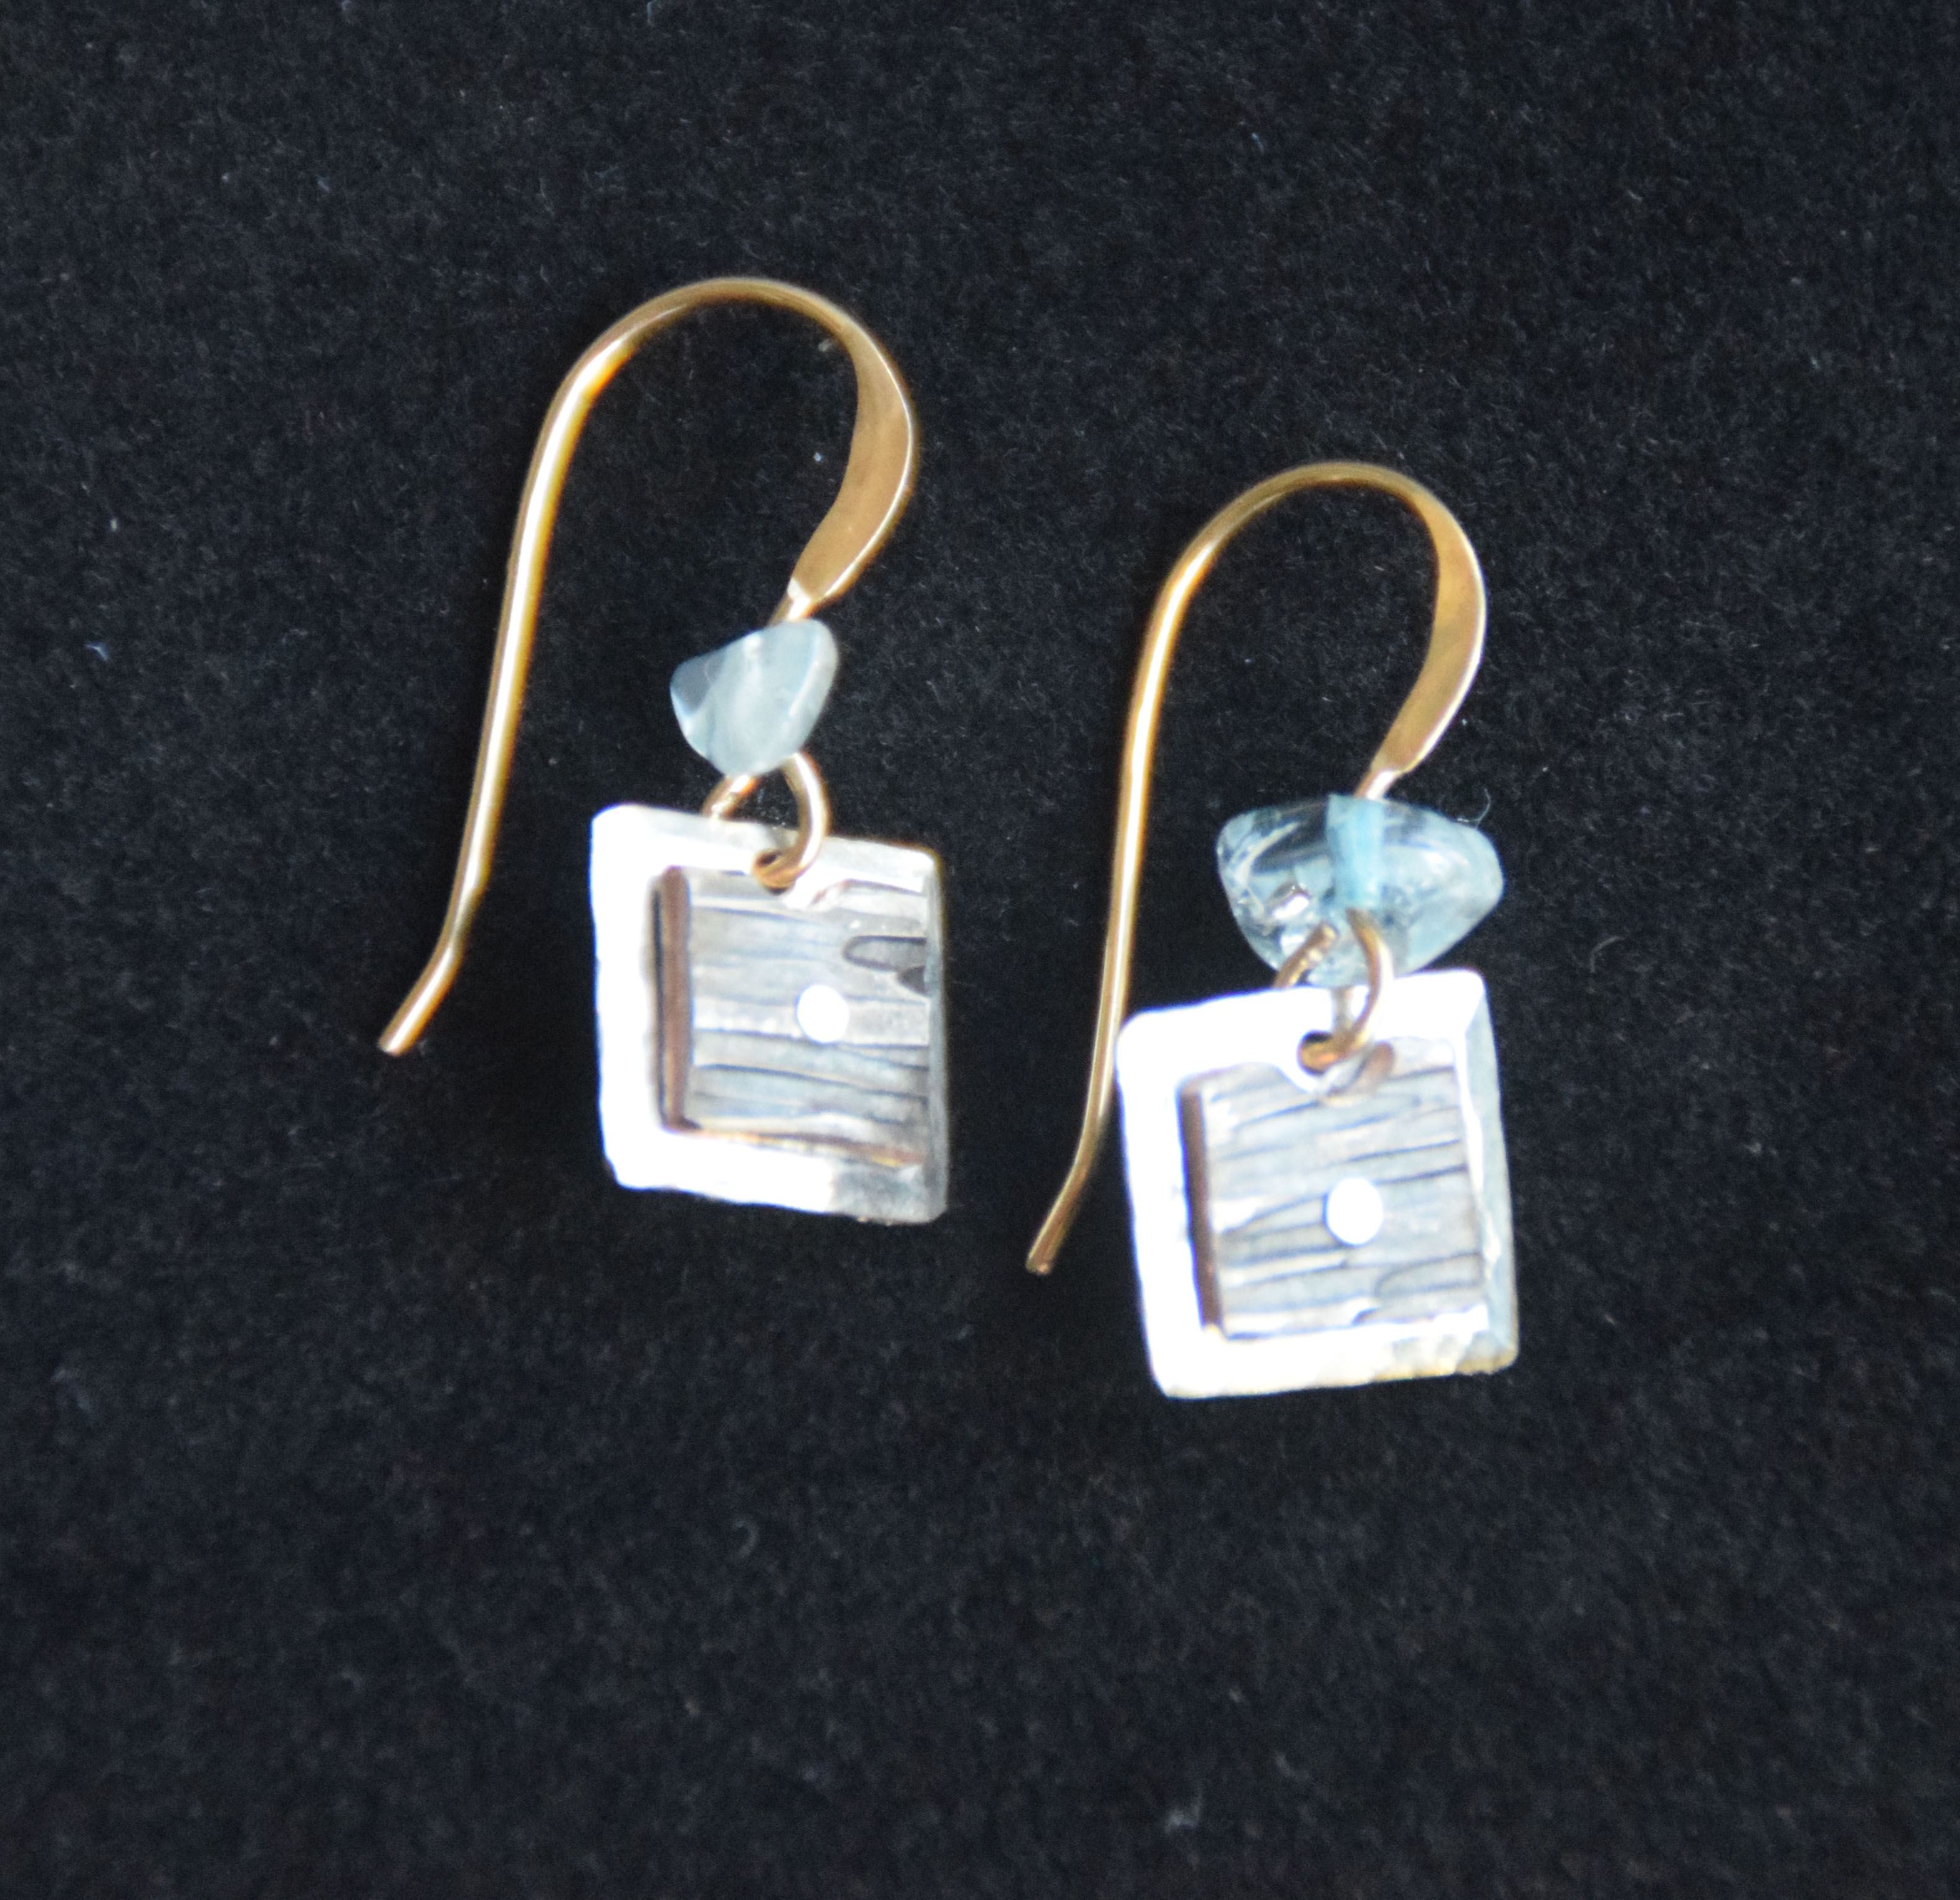
I’ve just completed this commission for gallery owner Sarah Bernzott(thanks, Sarah!). These earrings are hot-forged nickel on copper with 5mm baby blue topaz in fine silver bezels, with blue topaz beads on 14/20 gold-filled earwires. I used Halsteads to source the bezel settings and earwigs, and they’re high in quality… I’m glad I ordered a bunch of them!
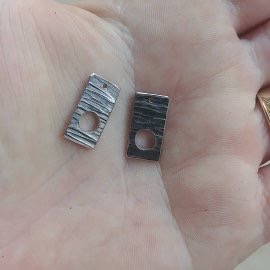
I started these earlier this week by forging some backs using three different hammers. They each resulted in some slightly different effects, but they all will make some nice jewelry. I selected one and cut it in two, then filed the edges and drilled it for stone mounting.
A single nickel/copper forging, cut and drilled for a pair of necklaces
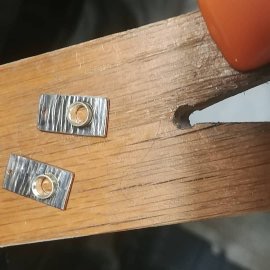
I then soldered in a 5mm fine silver bezel mount from Rio Grande, then made and soldered jump rings for the chain attachment.
Necklaces with bezel mounts soldered in.
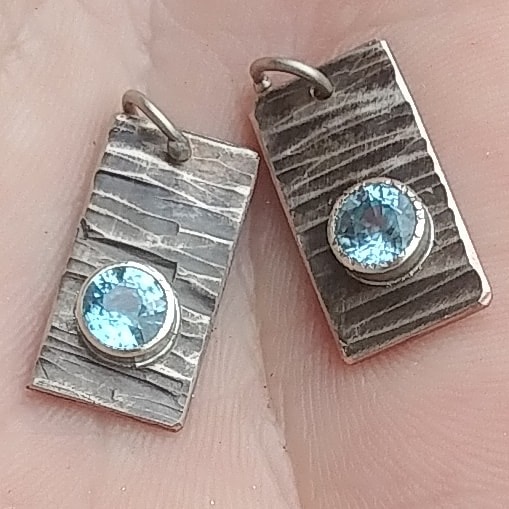
For the stones, I chose a pair of 5mm zircons that arrived recently. These are pale blue zircons from Cambodia. Many people confuse zircons with cubic zirconia, or CZ, but they’re totally different stones. CZs are manmade, lab-grown diamond substitutes. Zircons are naturally-occurring, mined stones. While some synthetic zircons exist, they’re comparatively rare. Natural stones are found in a variety of colors, including yellows, pinks, greens, “champagne” and blues. They are commonly heated to increase clarity and intensity of colors. Like all stones that I buy, I tested these with a polariscope to make sure they’re genuine… I find a lot of fakes with a polariscope. Zircons were traditionally used as a diamond substitute. While they are slightly softer than diamonds- 6-7.5 on the MOHS scale- they have a high level of dispersion and clarity, which makes them a very sparkly stone.
Cambodian blue zircons
I do a lot of jewelry with bezel settings, as the continuous band around the edge of the stone provides a level of protection. Prong settings would be fine for this stone, but opals are very rarely seen with a prong setting due to their softness.
The completed necklaces measure 10 x 18mm
The finished necklaces are small and delicate, and the bright stones contrast nicely with the fire-toned nickel backplates. Both are available for sale at $120 each.
This necklace features a 5mm Zambian rose garnet weighing .96 carats. I like these stones for several reasons. Since garnets are less expensive than rubies, it’s much more likely to be a genuine stone. While it’s certainly possible, it’s much less likely that gem sellers will try to pass a fake. Being less expensive, a better grade of stone is usually seen. This one shows nice clarity and reflects a lovely deep red color. Garnets achieve this naturally and are not typically heat treated. A similarly-sized ruby would be very, very expensive.
Necklace by Brian Gilbert. 5mm Zambian rose garnet, .96 carats, in a fine silver tube setting. Oxidized nickel on copper backplate.
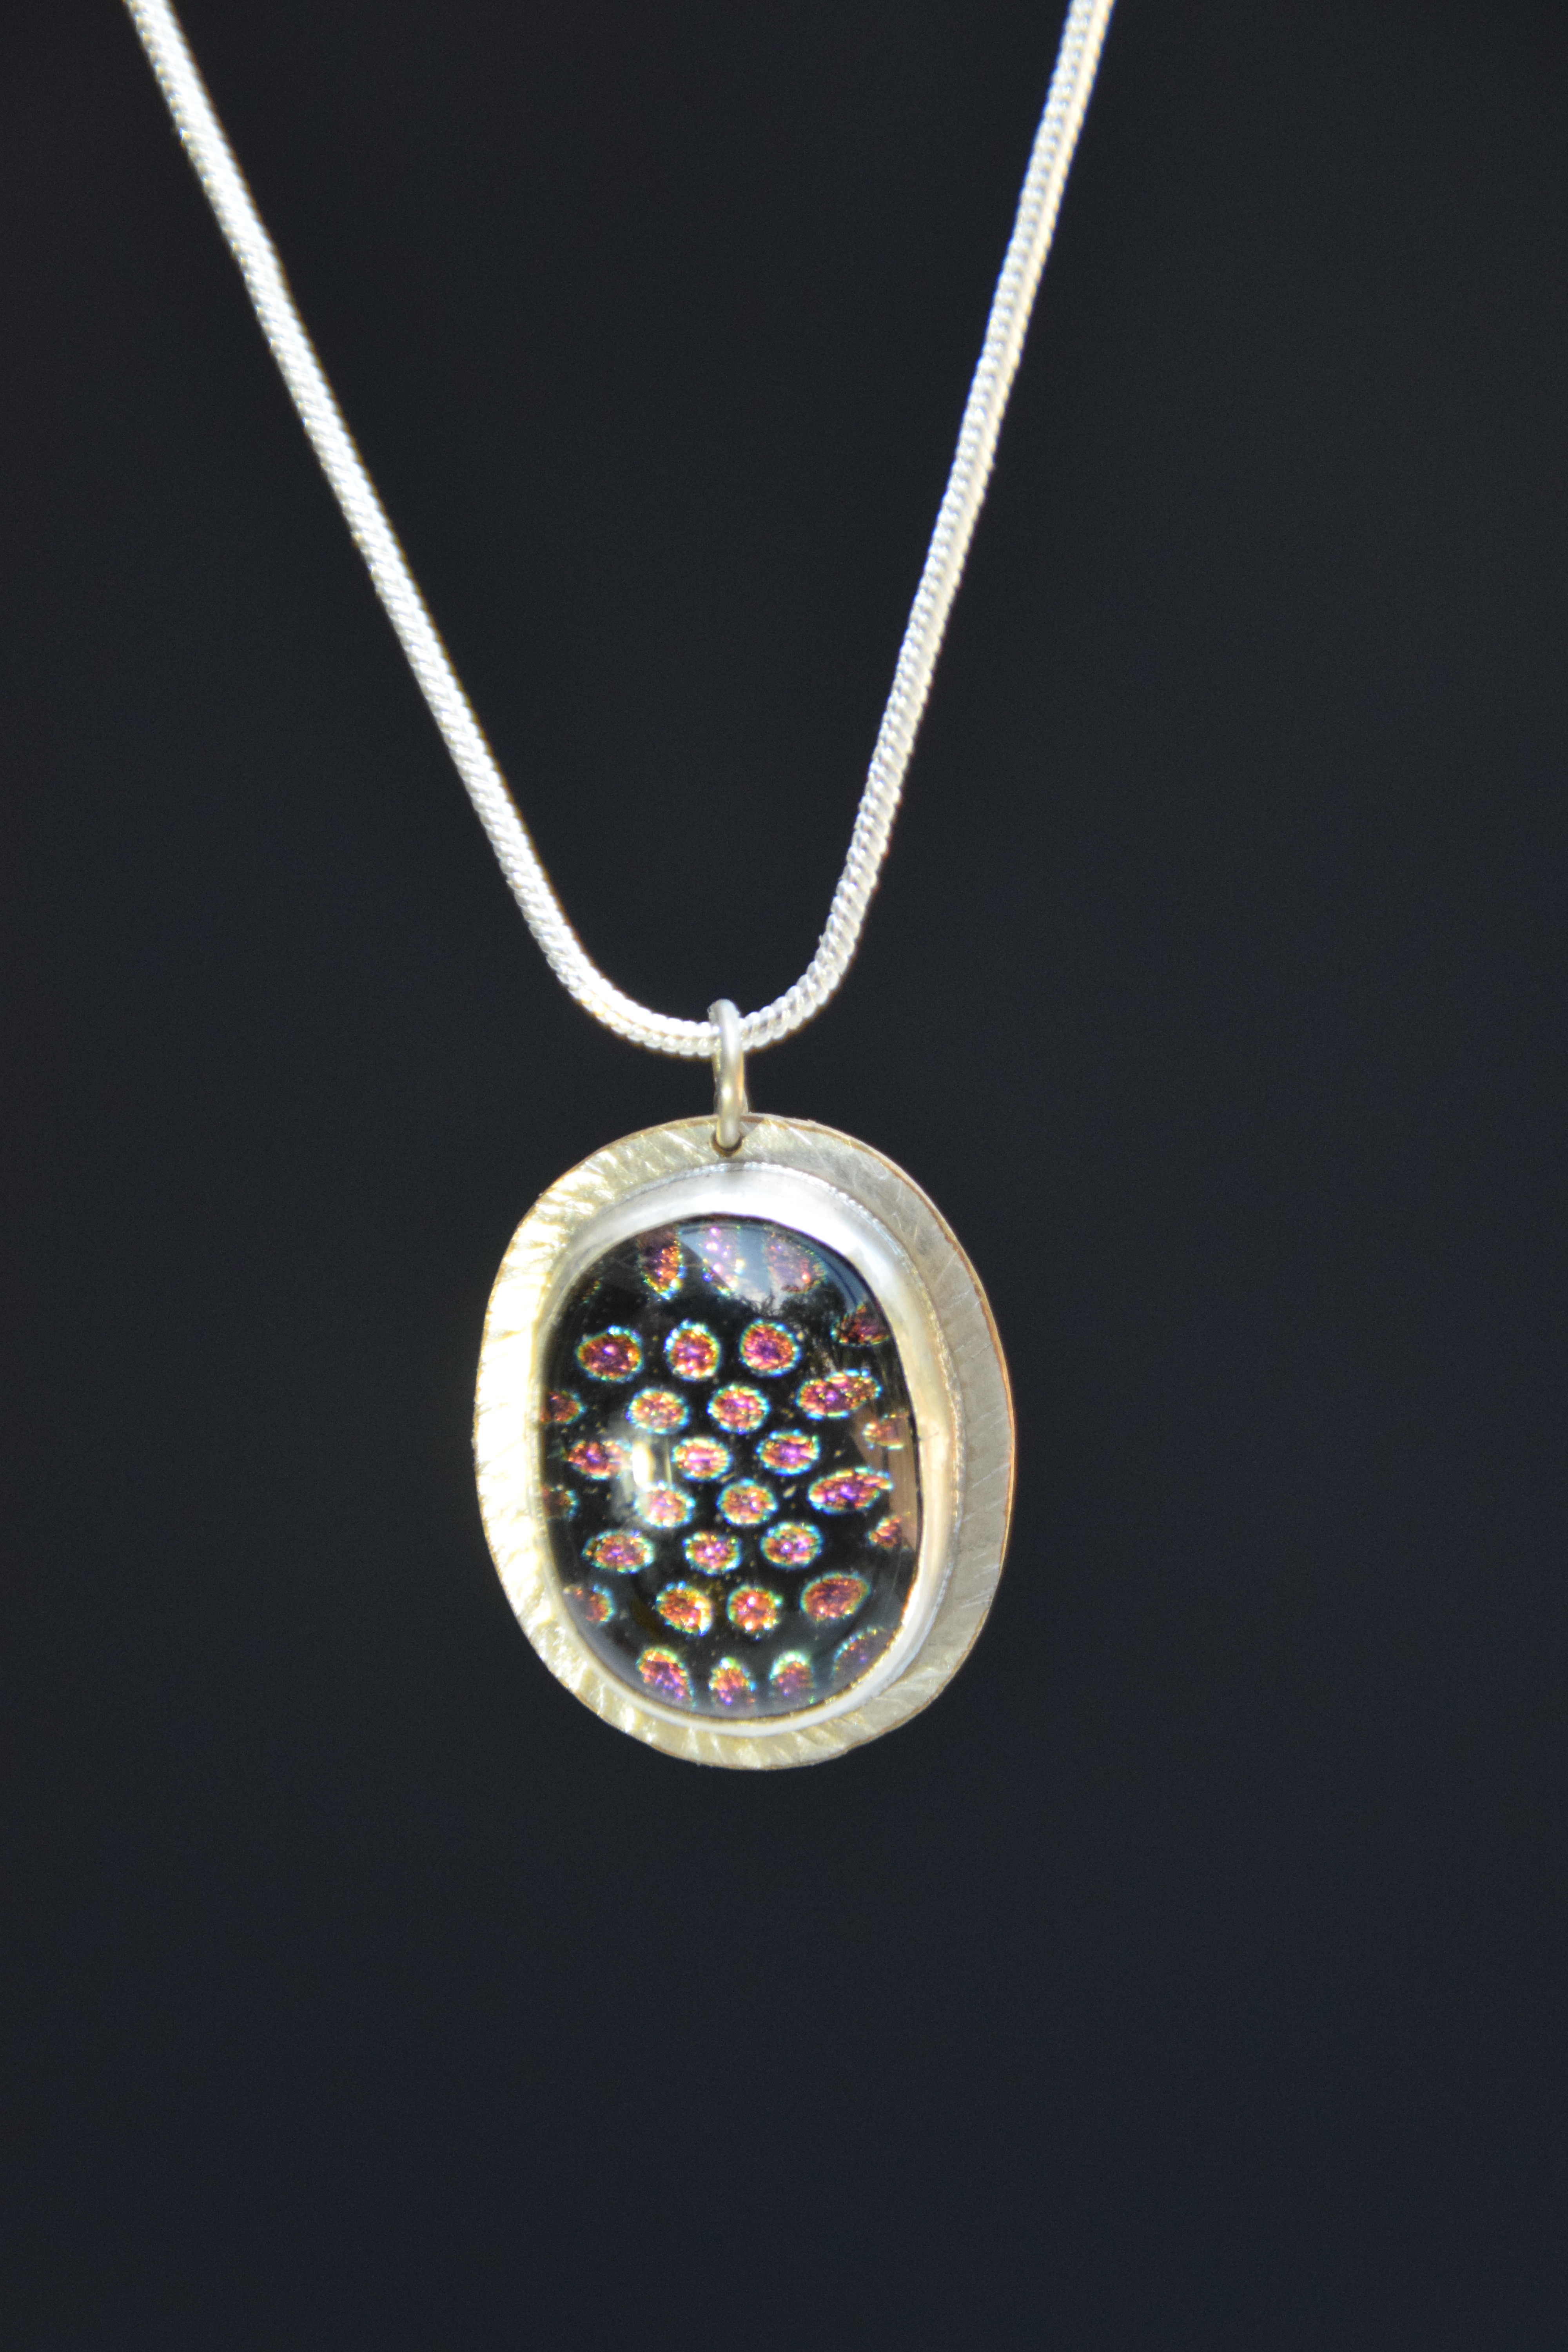
The second necklace completed this week is a dichroic glass pendant. This particular piece of glass was made by a student at the Appalachian Center for Craft, unfortunately I cannot remember her name. I purchased a number of pieces of glass from her somewhere around 2003 or so.
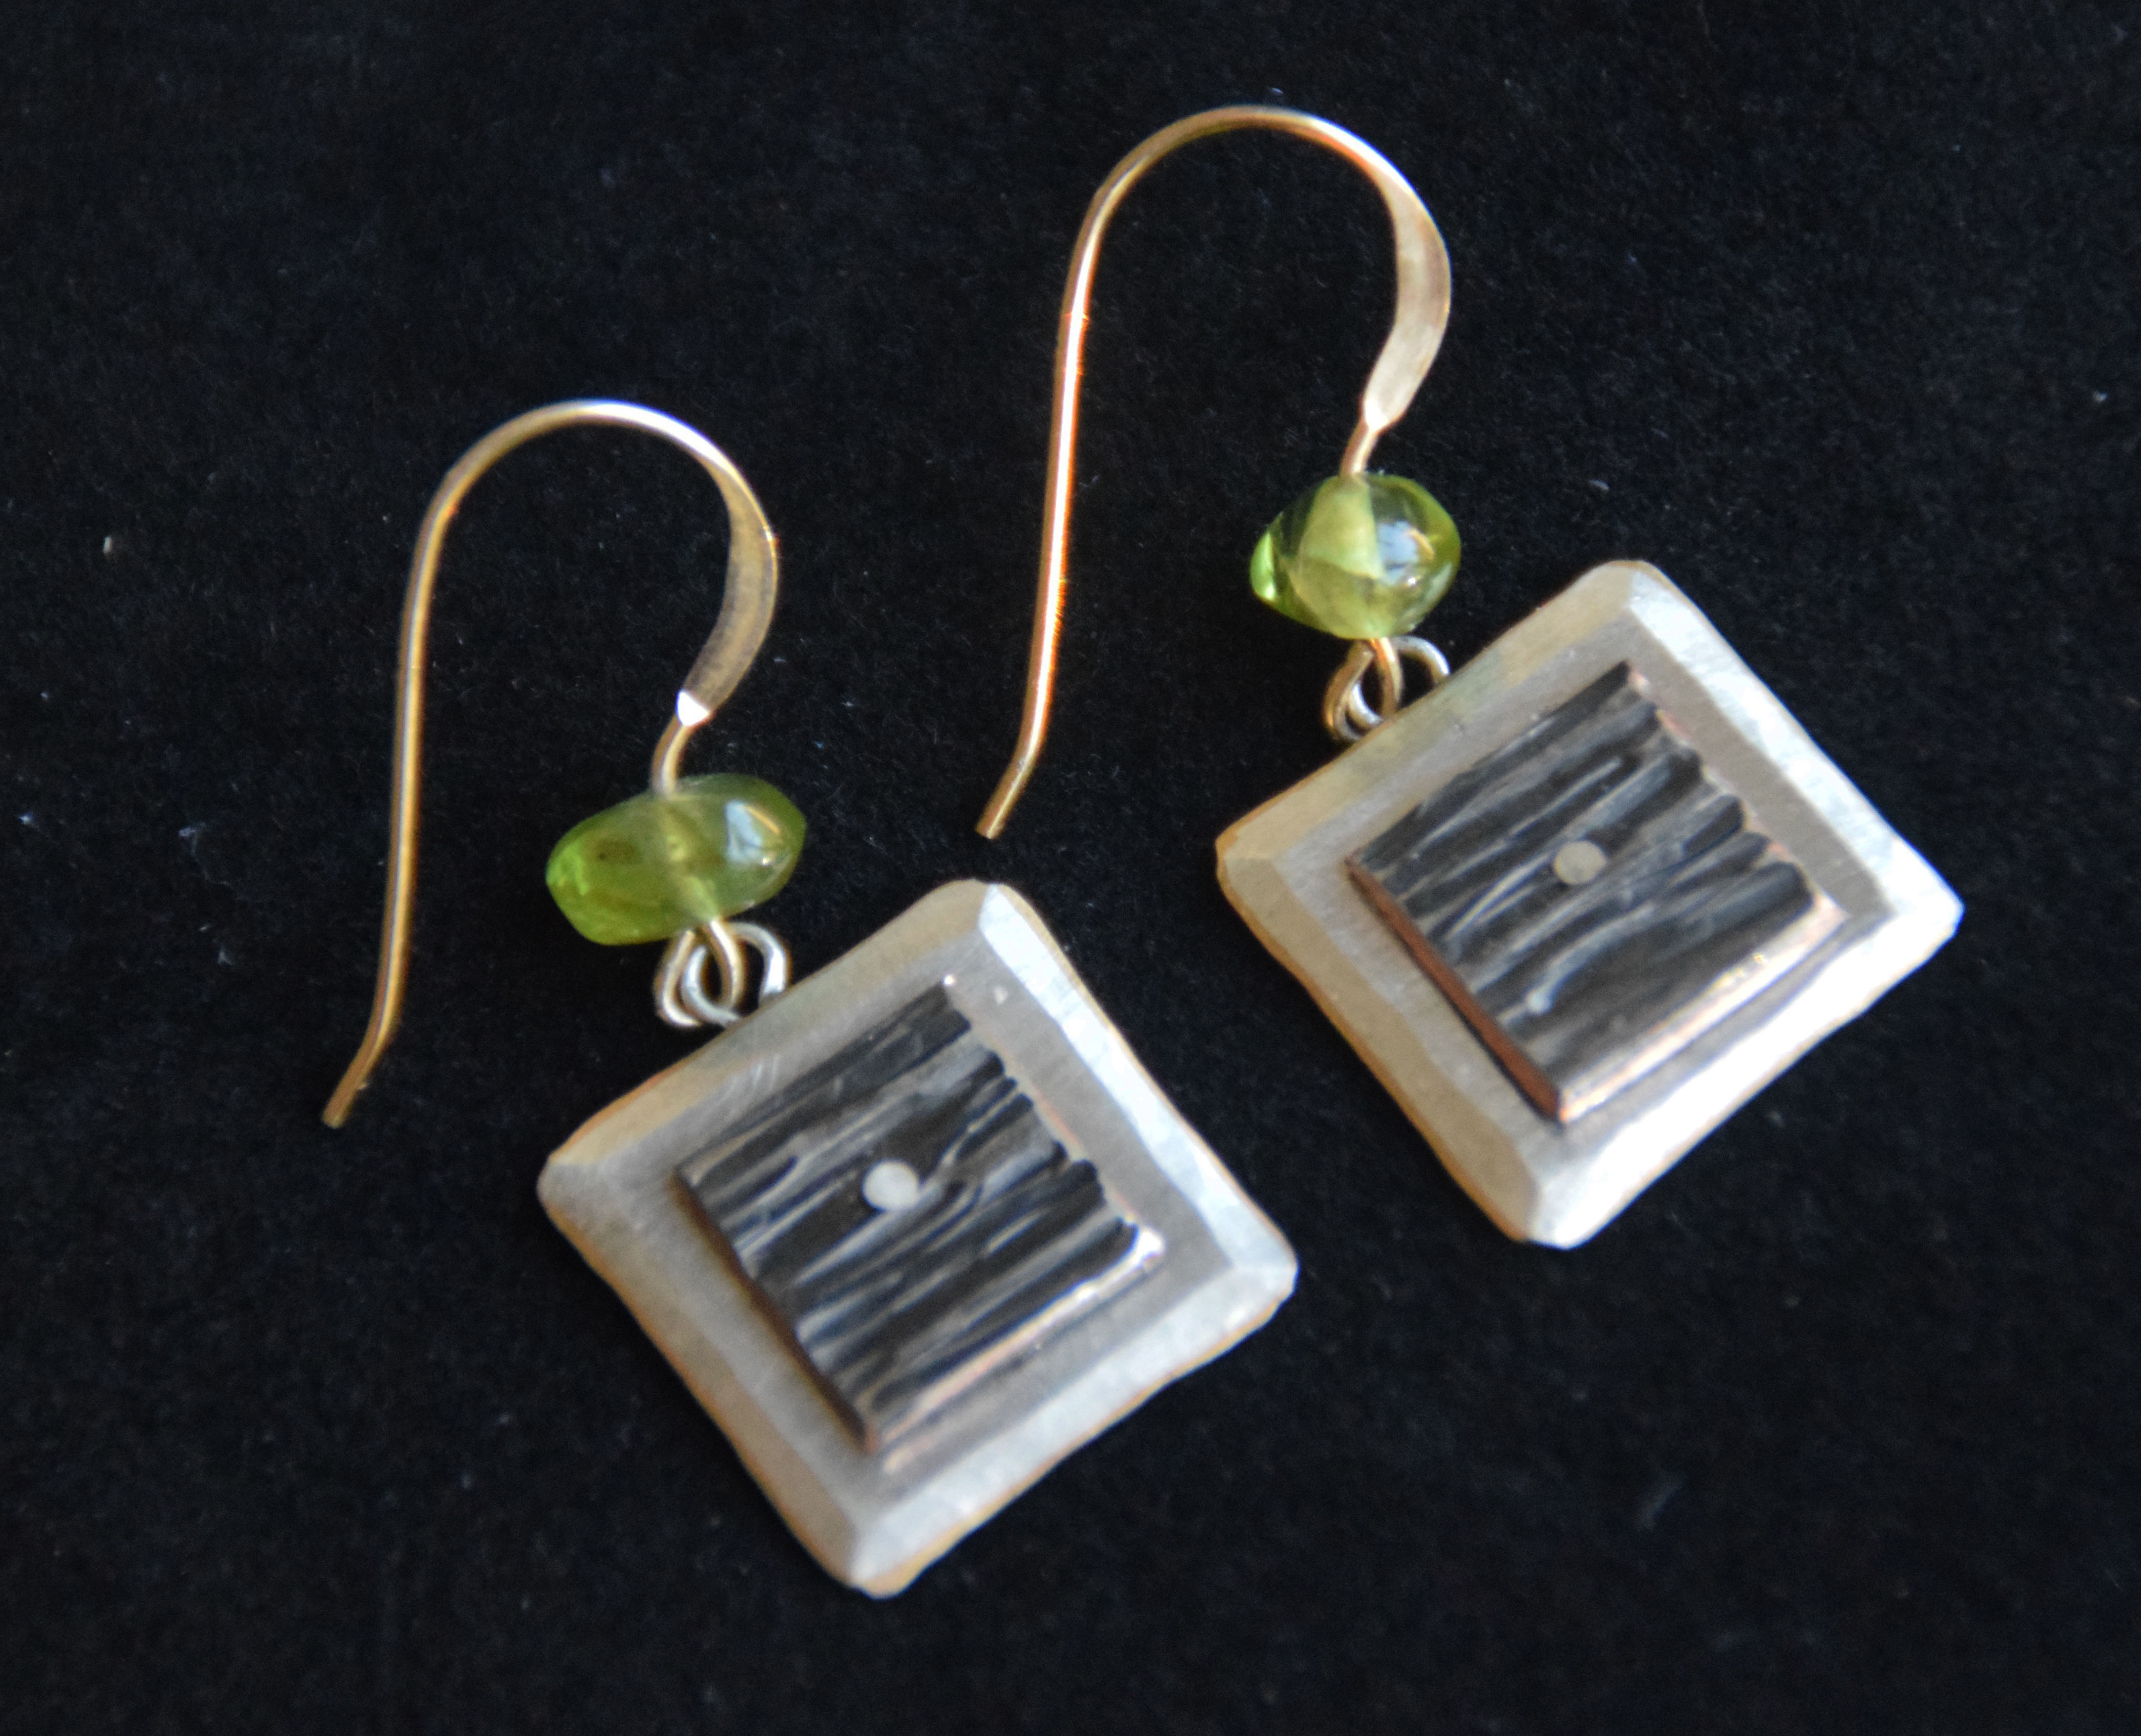
Here are some new earrings that I’ve recently finished. The square forms are something new, with the idea of being match for my necklaces… thanks to Sarah Bernzott at the Irritable Pelican Gallery for the suggestion. They’re made of hammered sterling silver plate with hot-forged nickel on copper trim, riveted together with a small piece of sterling silver wire. Accent beads on the earwires are blue topaz and peridot. I always use gold-filled earwires, as some folks are allergic to cheaper wires.
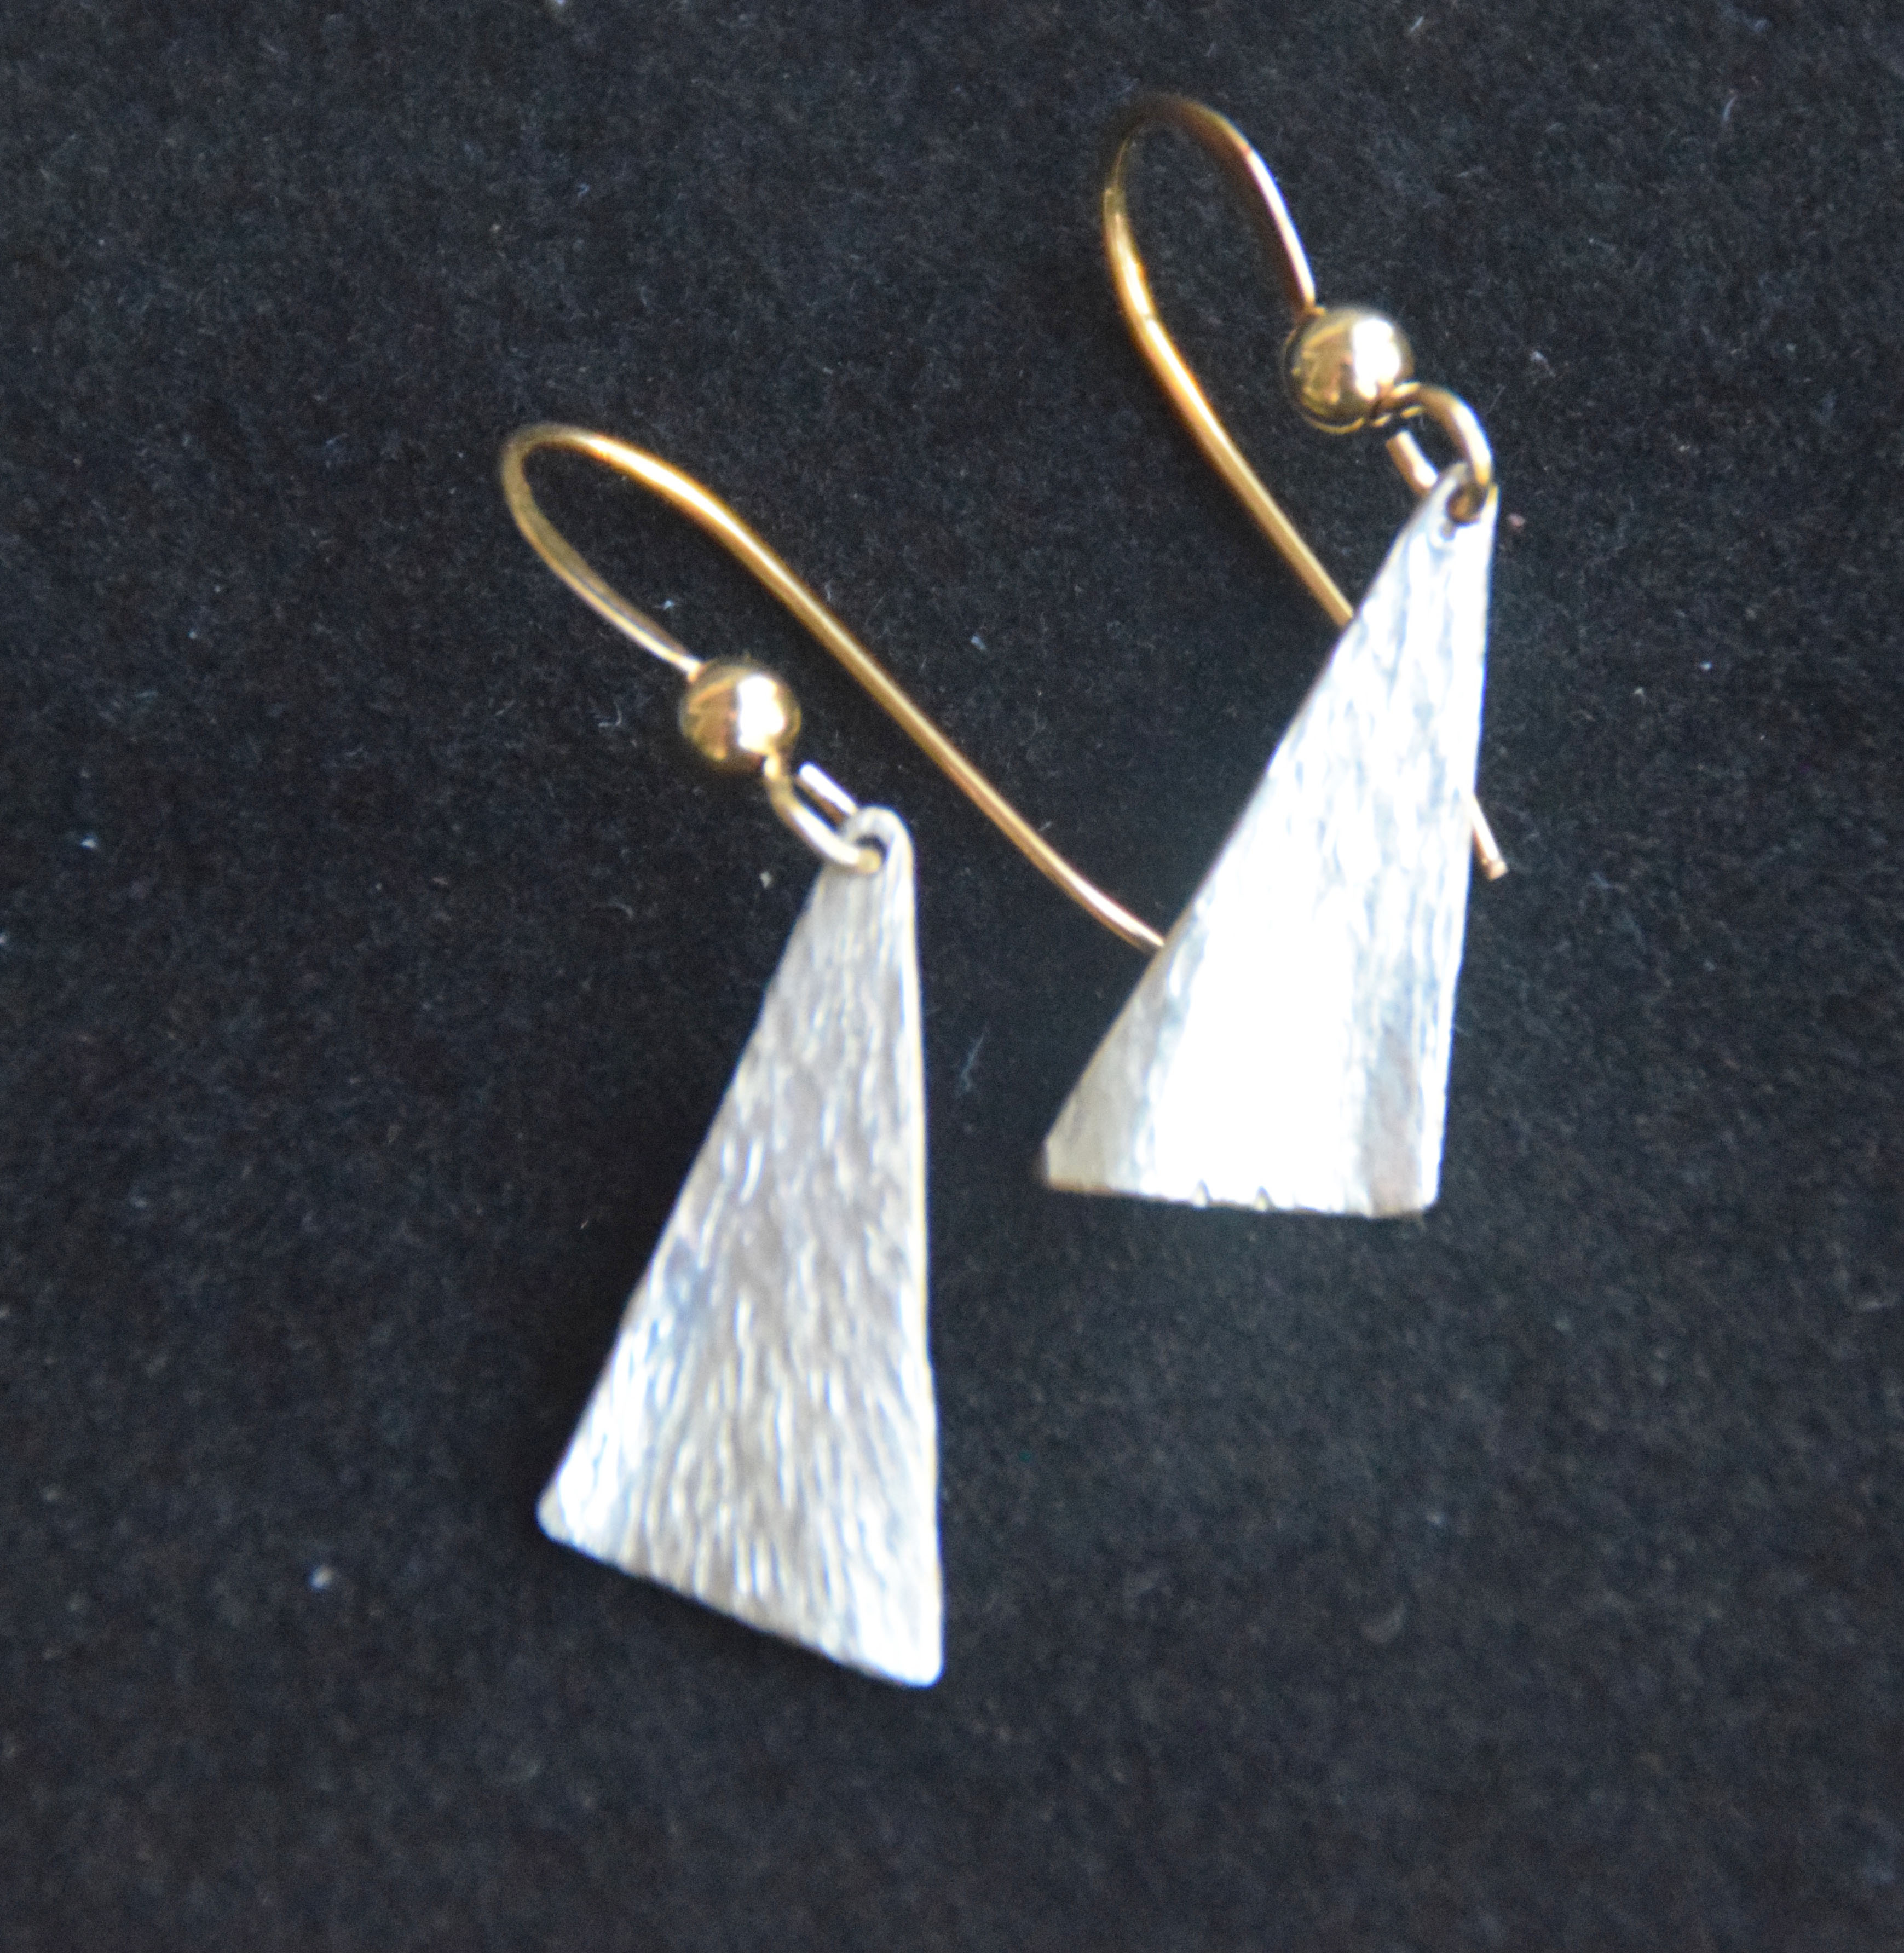
19 x 9mm cold-forged triangular dangles made from sterling silver on copper. Gold-filled beads and earwires, #E13
Larger 26mm x 15mm triangular dangles made from cold-forged sterling silver plate. Amethyst accent beads on gold-filled earwires, #E14
9mm square dangles. Sterling silver on copper backplates with hot-forged nickel trim, riveted together with silver wire. Blue topaz accent beads, gold-filled earwires. #E15
For many years, I was an artist-blacksmith and the editor for The Hammer’s Blow by ABANA. While I enjoyed the work very much, blacksmithing takes a toll on the body. The coal smoke was starting to exacerbate my childhood asthma, and making enough money to support a family was always elusive. But I also did a little jewelry on the side.
Jump ahead fifteen years, and we all find ourselves sheltering in place from the COVID pandemic. I’ve finally found time to address that big case of unfinished jewelry materials. While I have a small collection of semi-precious gemstones and quite a bit of low-grade opal rough, setting stones takes a lot of time. The resulting jewelry is a LOT more expensive than, say, a pair of pure silver forged earrings.
Forged fine silver studs on gold-filled posts, 5/28/2020
These are comparatively fast to create and a lot of fun. I use my blacksmithing experience to forge different surface treatments on simple geometric shapes. I like squares, triangles, and something I call “wings,” which are like triangles with a curved edge. Rectangles are usually reserved for necklaces, but that’s a shape that I like too.
In addition to pure silver, I also like to work in sterling and nickel on copper. Nickel gives a very durable, high-luster finish, sometimes almost a “dark and shiny” look. Sterling is useful for strength and light weight, but of course it will need to be cleaned occasionally.
Hot forged nickel on copper necklace with 1.5mm sterling silver box chain and a 5mm round opal. (sold)
If you see something that you like, feel free to contact me… most of these are for sale, though some are already sold. Prices for earrings are in the $30-$45 range, necklaces start at about $45 (with no chain) and go up from there. Plan on spending at least $120 for a solid natural opal, but of course, prices can go significantly higher depending on the stone.
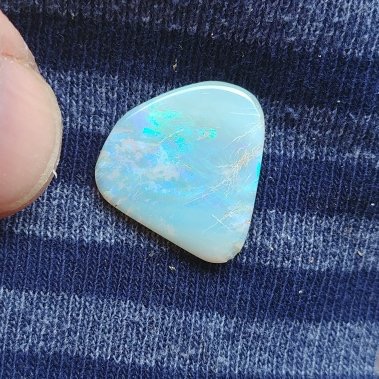
An in-house cut solid Mintabe opal from my collection
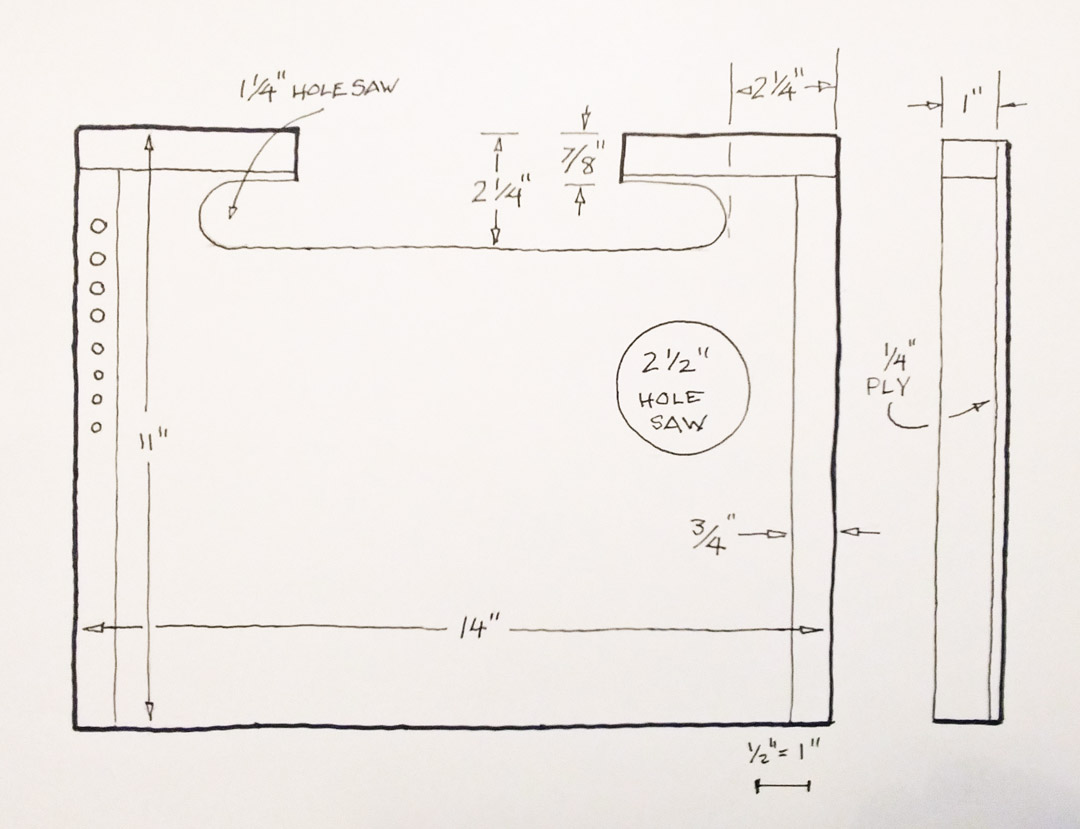
I’ve just completed a pochade box for plein air work. It was a straightforward build, and my box is fairly simple. This is Andy Beck’s design, with some minor modifications. There are some beautiful designs out there, and some are quite fancy. A skilled (and/or well-equipped) woodworker could go really crazy with these things. I like this one because it’s simple and functional.
Building one for yourself should be straightforward as long as you have some tools. In theory, it could be built without power tools, but that would require a good bit of additional time and patience, and (were I to try it with only hand tools) the results would be more crude. The major tools I used were a table saw, a drill press, a hole saw set, and a rechargeable impact driver. I used glue and screws for most parts. Glue alone would probably be strong enough, but I generally use some sort of mechanical fastener along with glue, i.e., nails or screws, for extra durability
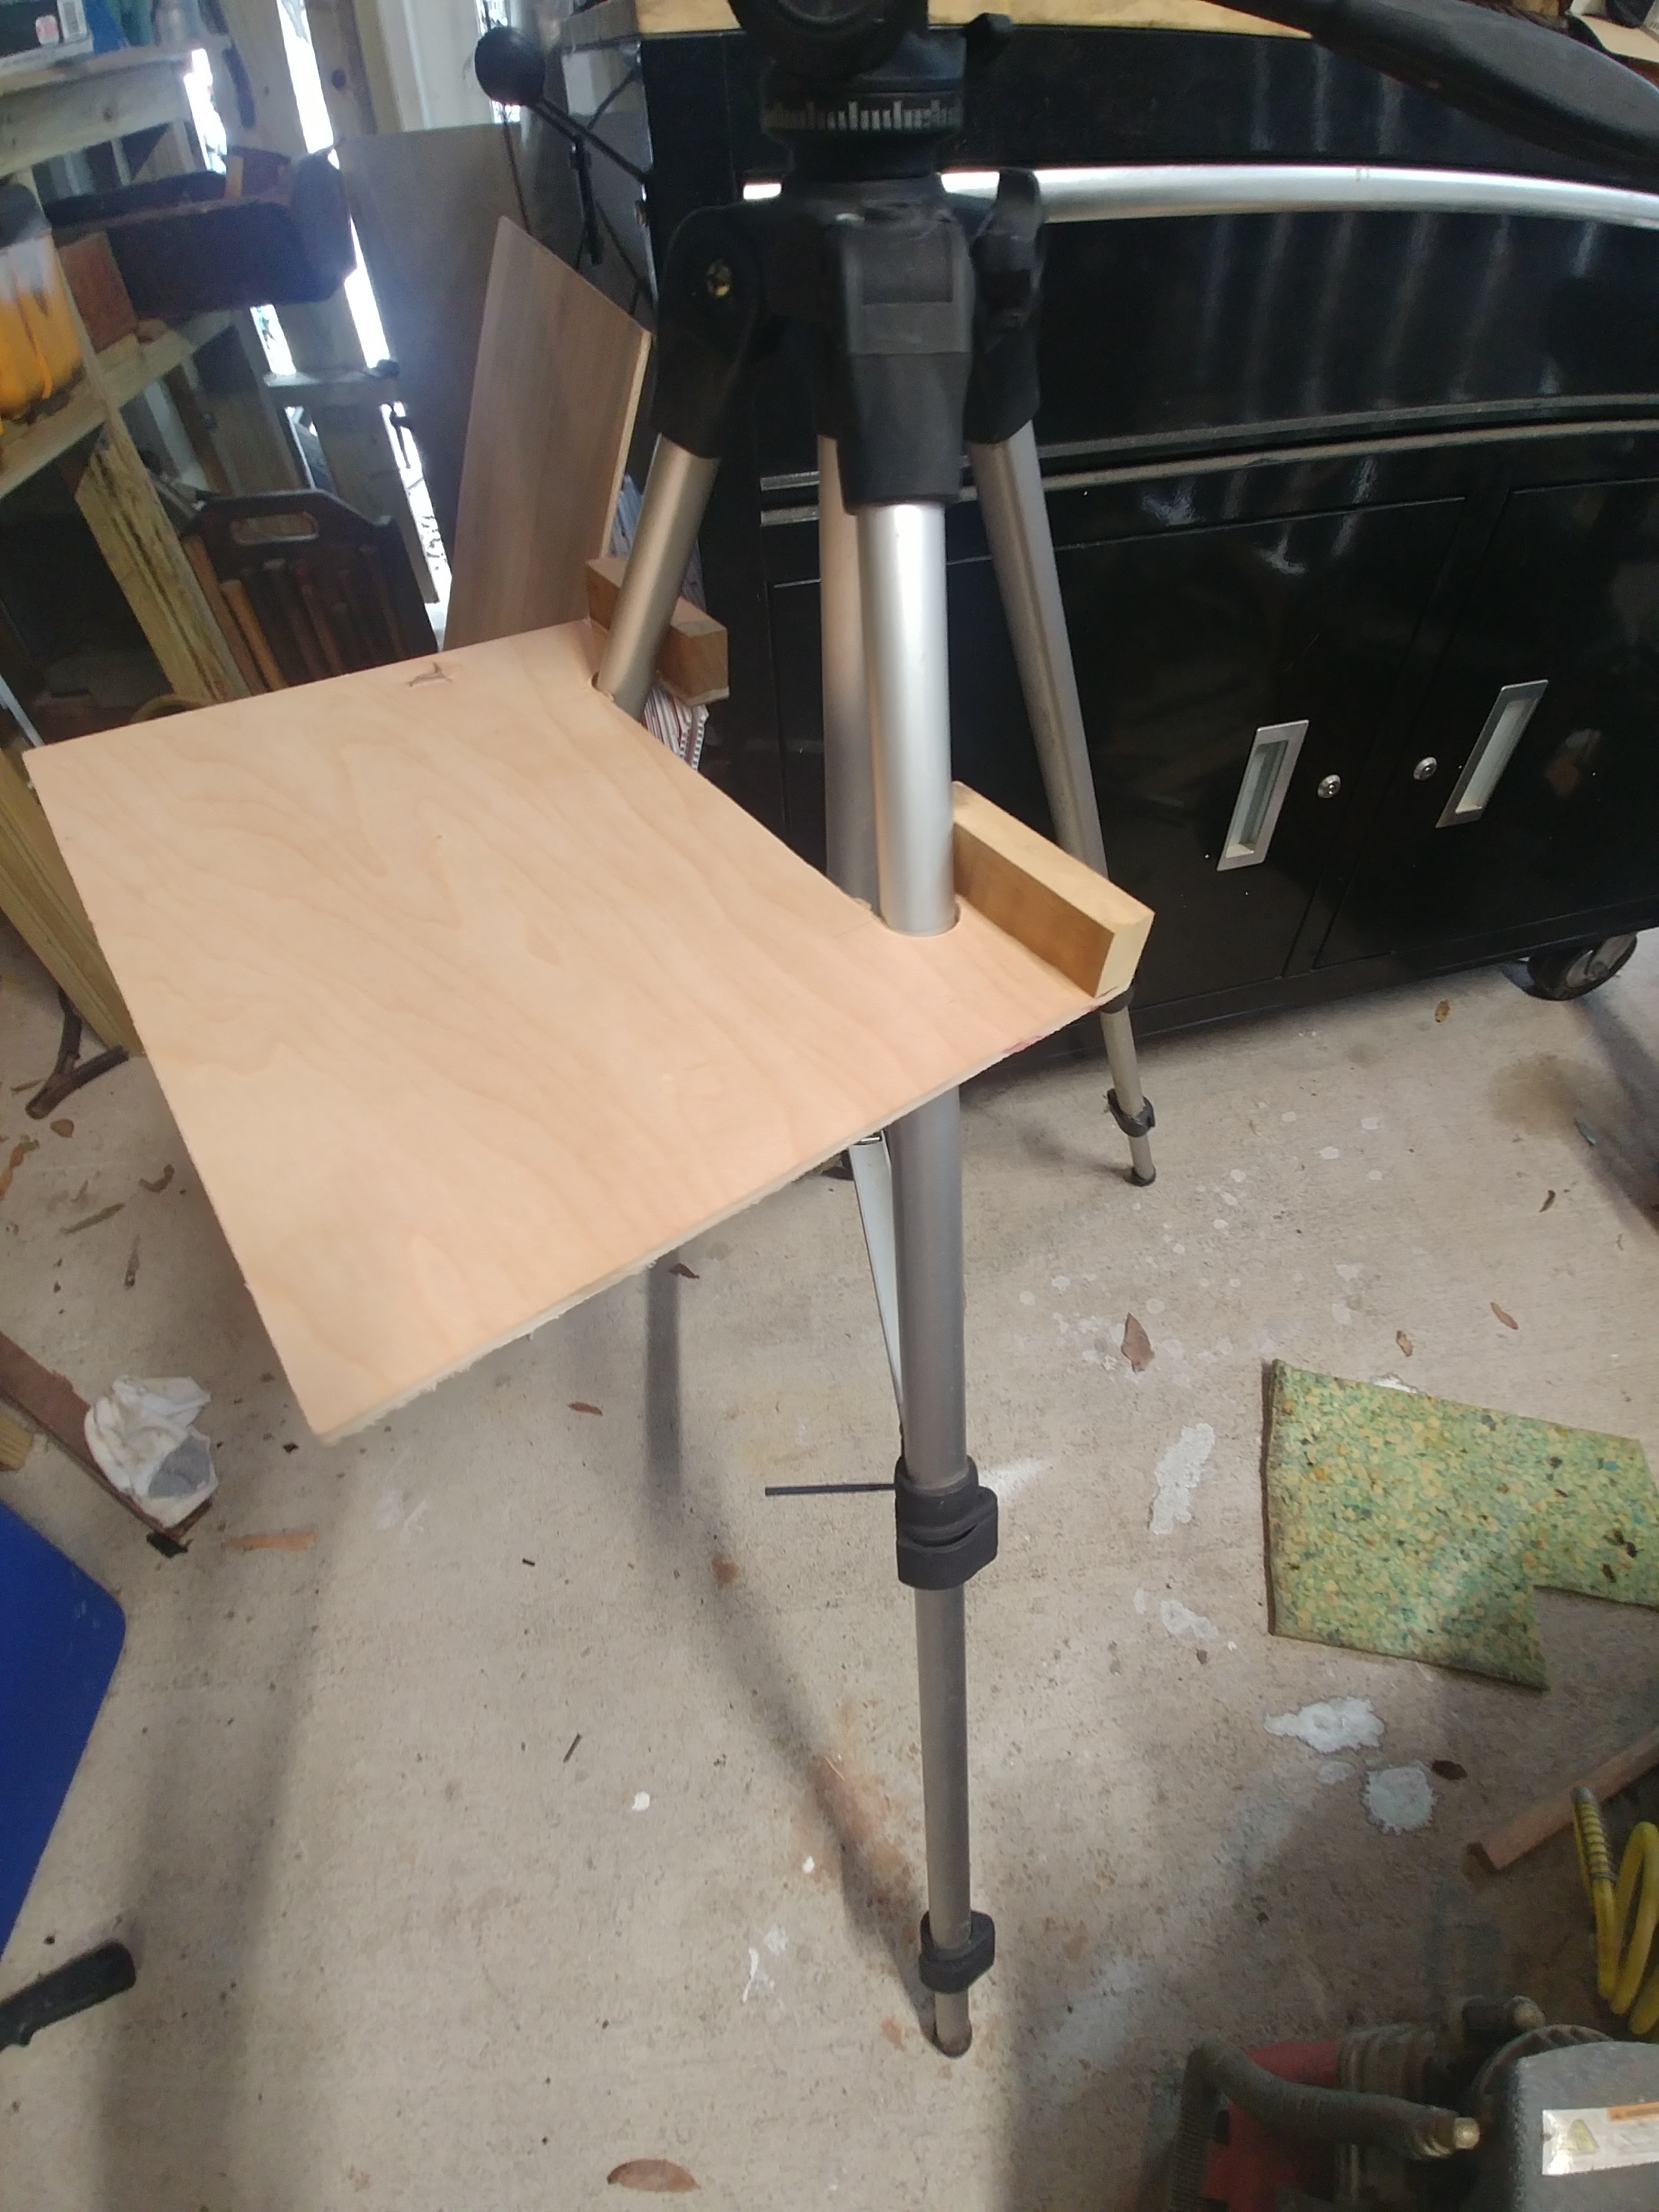
My pochade is basically a shallow box with two parts: a lid that becomes the painting surface, and a tray that hooks onto the tripod legs to hold your palette and water. There are some holes for brush storage as well.
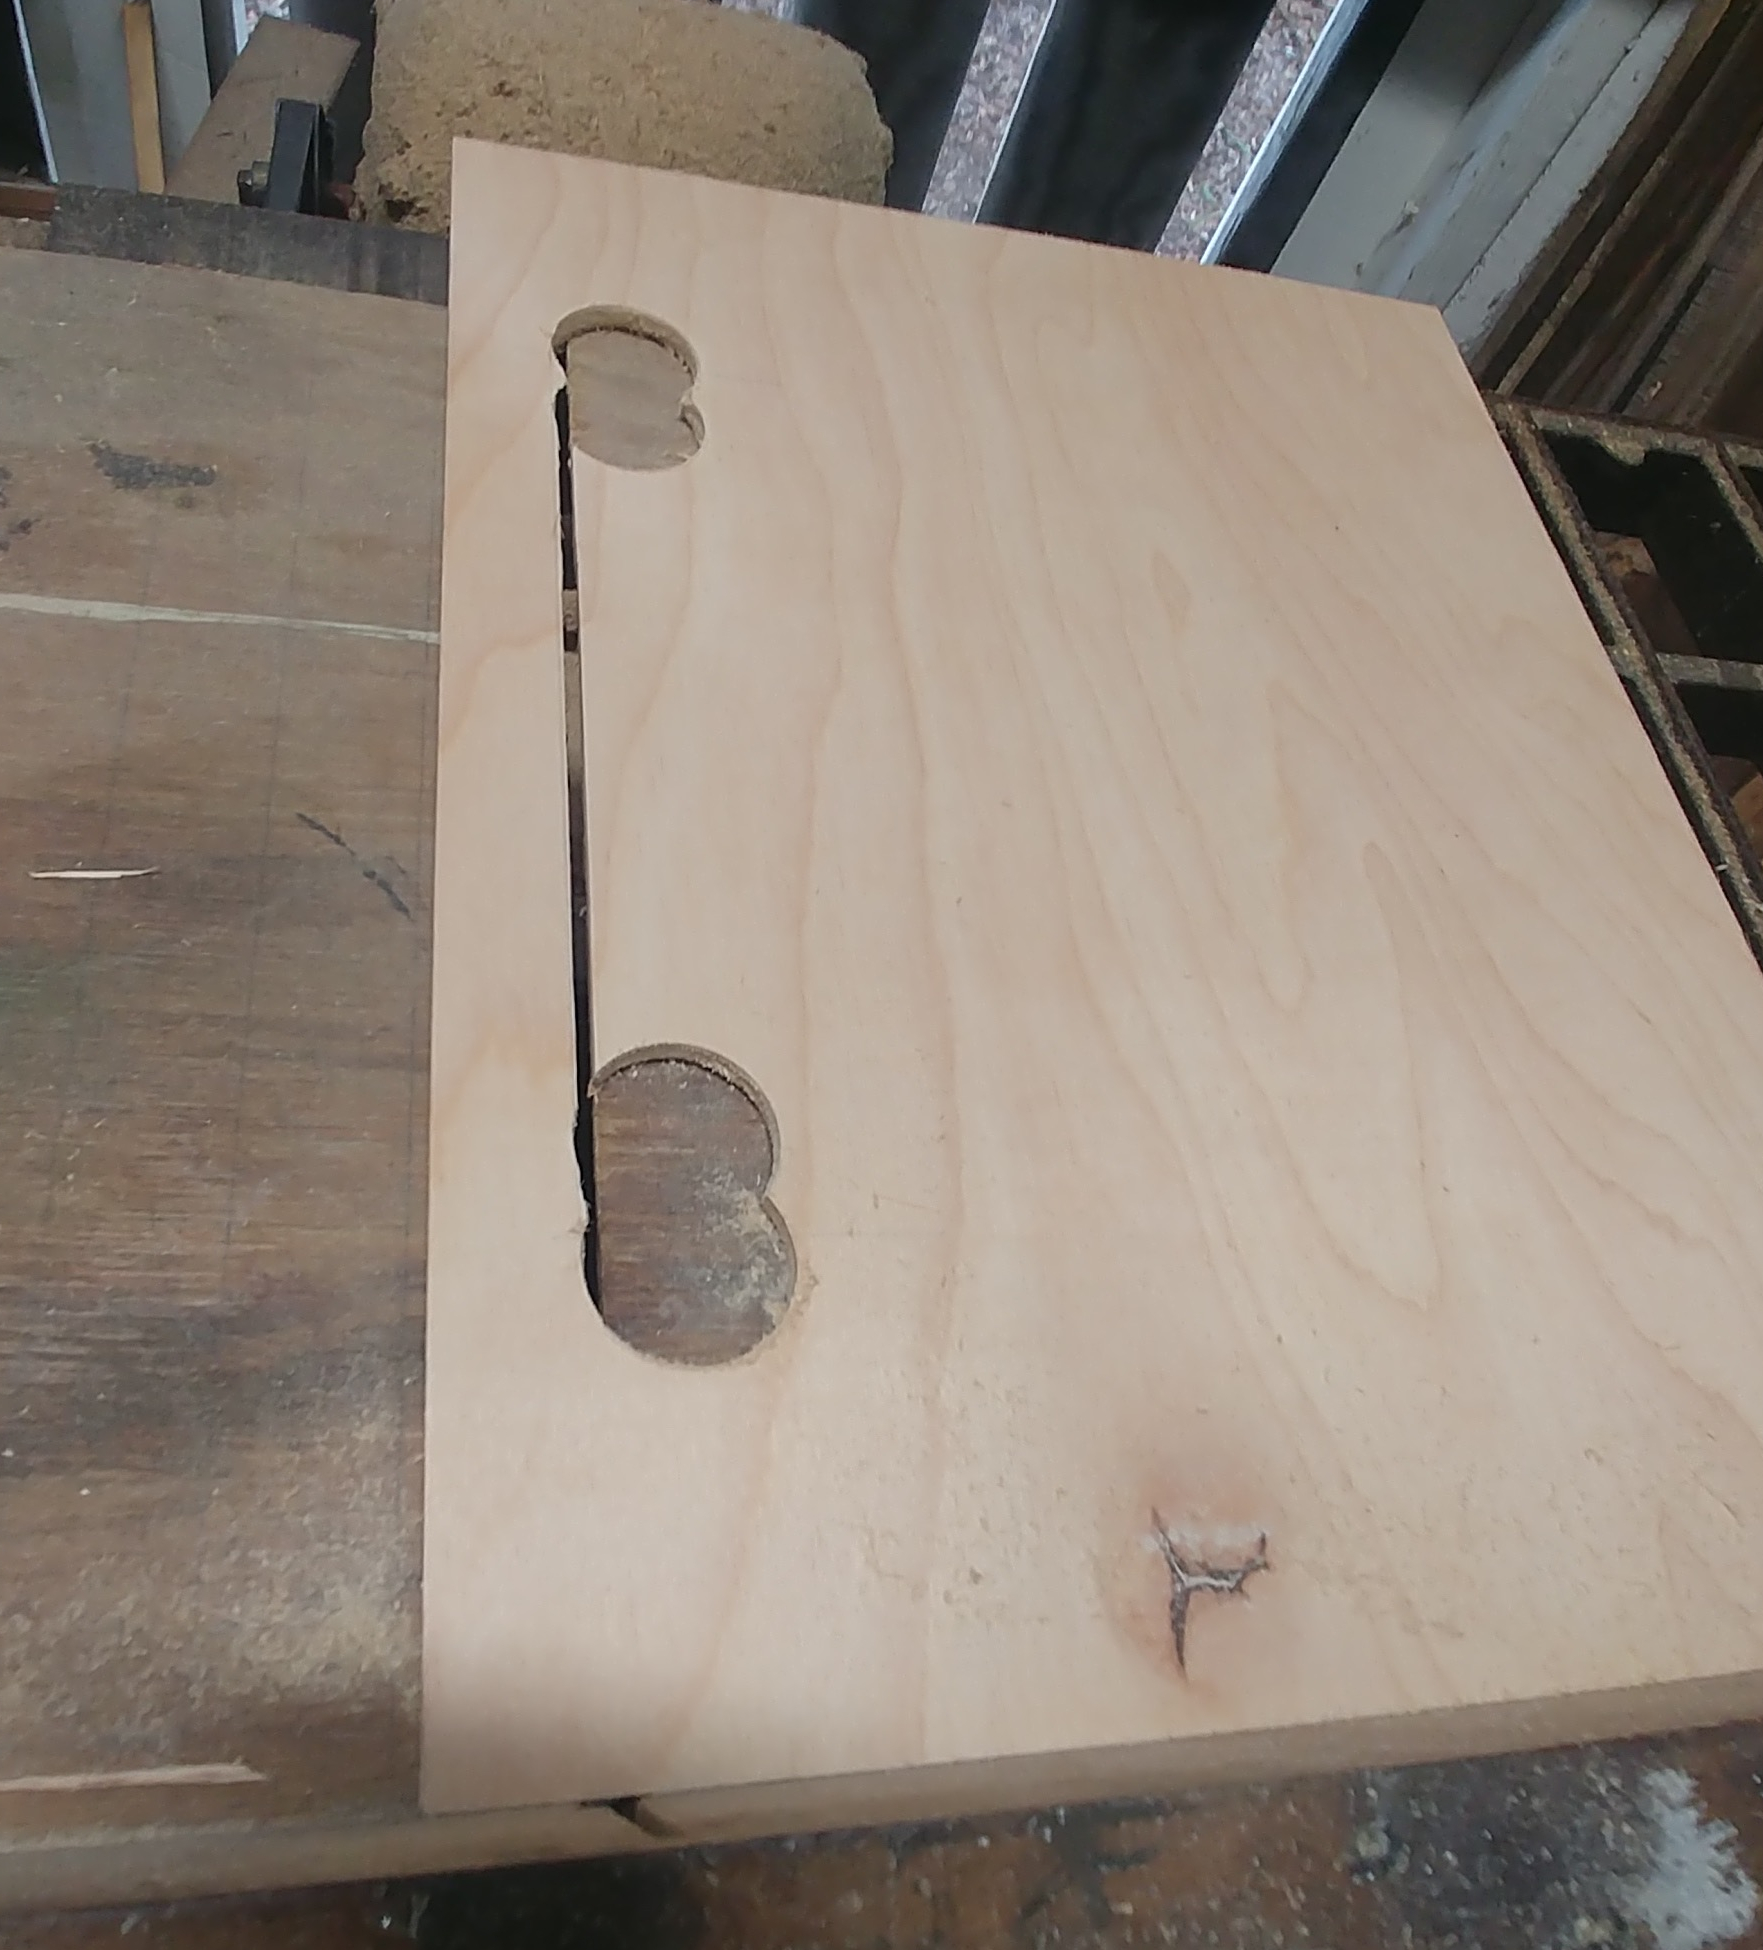
Cutting the slot for the tripod legs
I started my build with two essential things- one, a pad of watercolor paper of the correct size, 9×12 in my case, and two, a tripod. I was able to find an older used tripod locally for twenty bucks, it’s more substantial that the $17 version you can get on Amazon. That would probably work fine as well. The tray measurements given below are based on my tripod’s fat-ish legs… yours may be different. It’s unlikely that your palette tray will sit perfectly level, but it’s nice to get it close. One could easily size the whole box larger for a bigger pad of paper, but bigger isn’t always better in this case. A larger box will be more likely to blow over in a breeze, and there’s more stress on the little mounting nut that holds the top to the tripod. The parts list is short- you only need some plywood for the flat surfaces and some 3/4 x 1″ for the sides. I recycled some hardwood from an old shipping pallet, but anything would do. the other essential part is called a “T-nut,” which is a kind of threaded sleeve with spurs to bite into the wood. 1/4-20 is the thread size on most tripods.
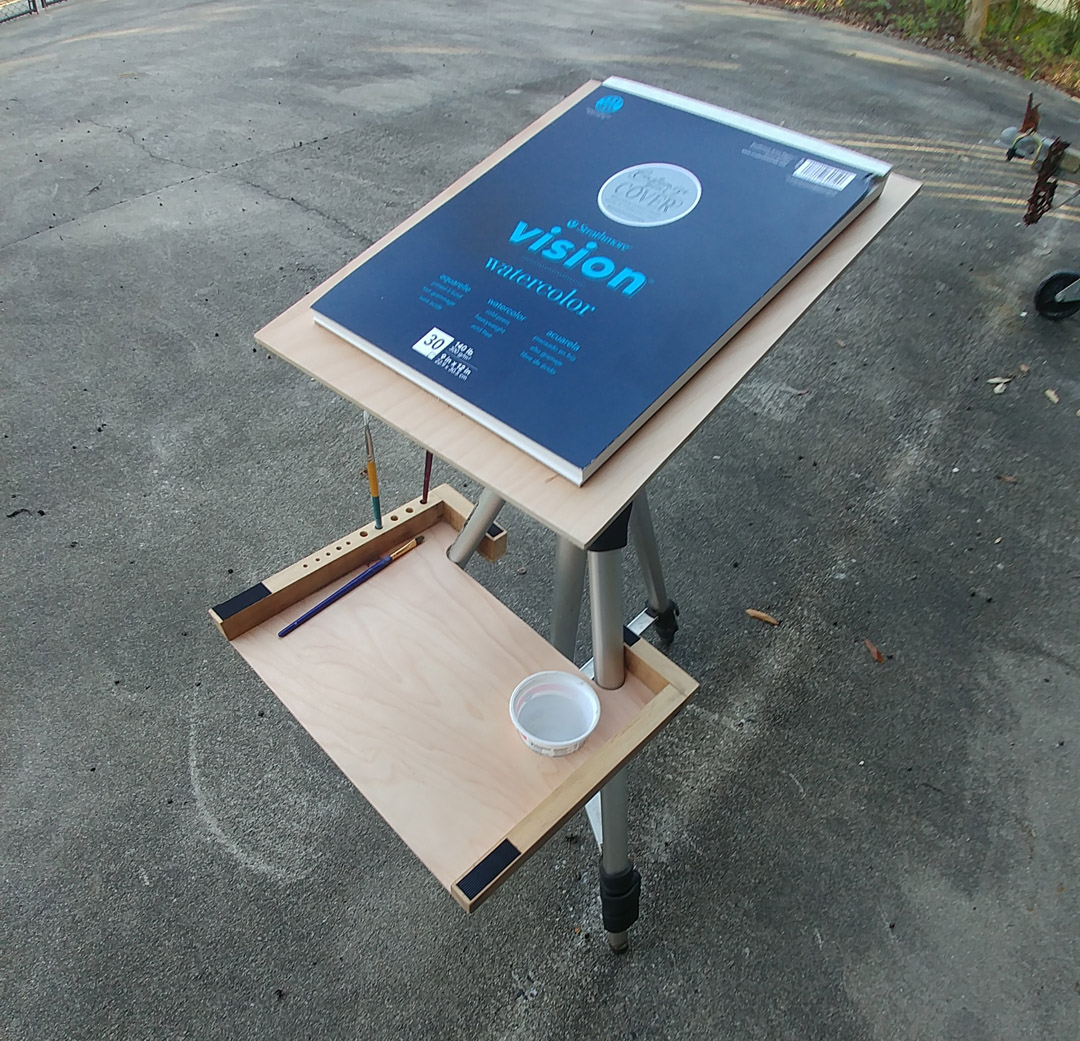
Fitting the tray onto the tripod. With the 1″ sides added, the tray was just about level. It’s a trial and error measurement, but by shifting those back blocks around, you can get it just right!
Just about the only tricky part is figuring out the gap for the tray. It needs to be calculated by trial and error, since it will depend on several things… the size of your tripod legs, the thickness of your box (or put another way, the height of your box sides) In my case, a 1 1/4″ hole saw cut a gap that was just about right. Pro Tip– if you clamp the 1″ blocks with a C-clamp, you can shift them around until the tray is perfectly level.
My lid is where I differed from Andy Beck’s design. I wanted a flat surface with no obstructions, since I normally tape my paper down to the board on all four sides. Andy uses one of the box sides to form a bottom lip, which may come in handy if you like to work at an angle. I figured I could add a small one later should I need it.
The T-nut reinforcement on the lid
A quick note about the lid and its mounting. T-nuts have to be mounted in a particular direction in order for them to work properly. The little spurs are designed to be pulled down into the wood as the screw on the tripod is tightened. They also need a bit more thickness. I cut a small piece of plywood and glued it to the underside of the lid in order to give the T-nut enough wood to bite into, I also countersunk the top surface a bit so the T-nut wouldn’t sit higher than the surface of the wood. After I hammered the T-nut into place, I taped and filled the surface with compound, the sanded for a smooth surface.
The whole thing was finished with a few coats of water-based flooring polyurethate. With a light sanding between coats, this gives a really nice and durable finish. I added some small velcro strips to secure the lid. Not bad overall… total investment was about $35 including $20 for the tripod, and I had it built in about two days off and on, allowing time for glue and finish to dry.
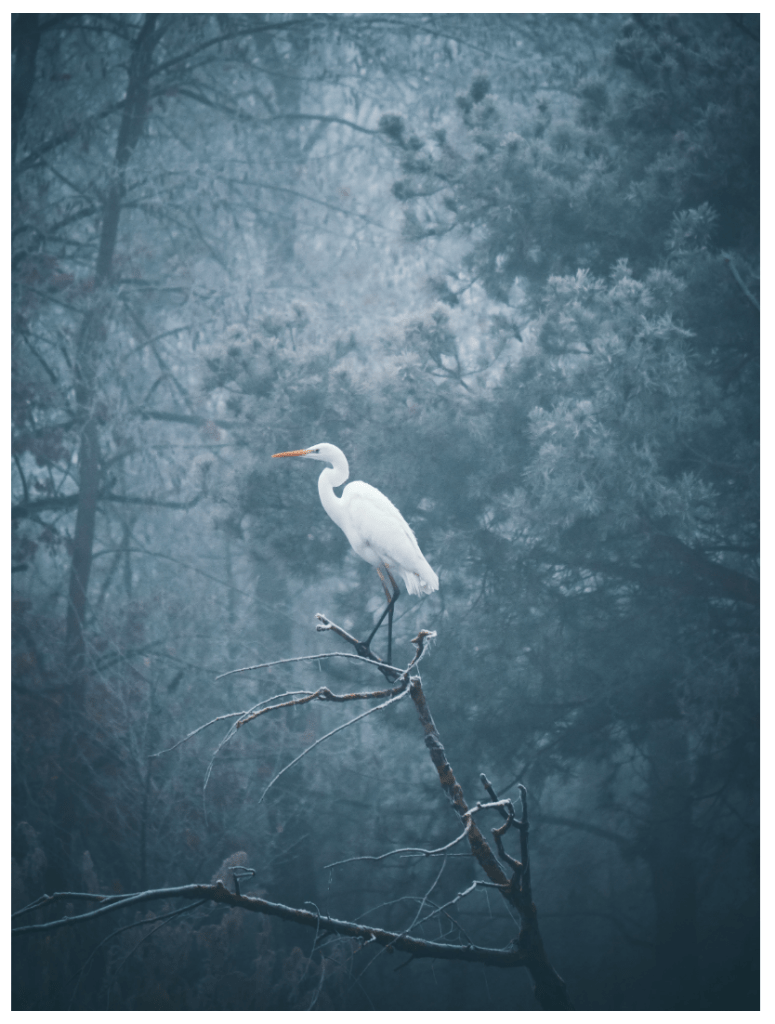
I like to paint from photographs, and I have a fairly substantial reference folder with a hundred-plus images that I’ve taken. I’ll occasionally supplement those with images from other sources. There are copyright questions regarding this practice- for an example, see the copyright case between the Associated Press and artist Shepard Fairey. Although the art that I produce is in a whole different ballpark than this example, still, I’d rather avoid that kind of problem. There is a good, copyright-free website called Unsplash that a very large selection of images that you can use as reference material, especially photos of birds.
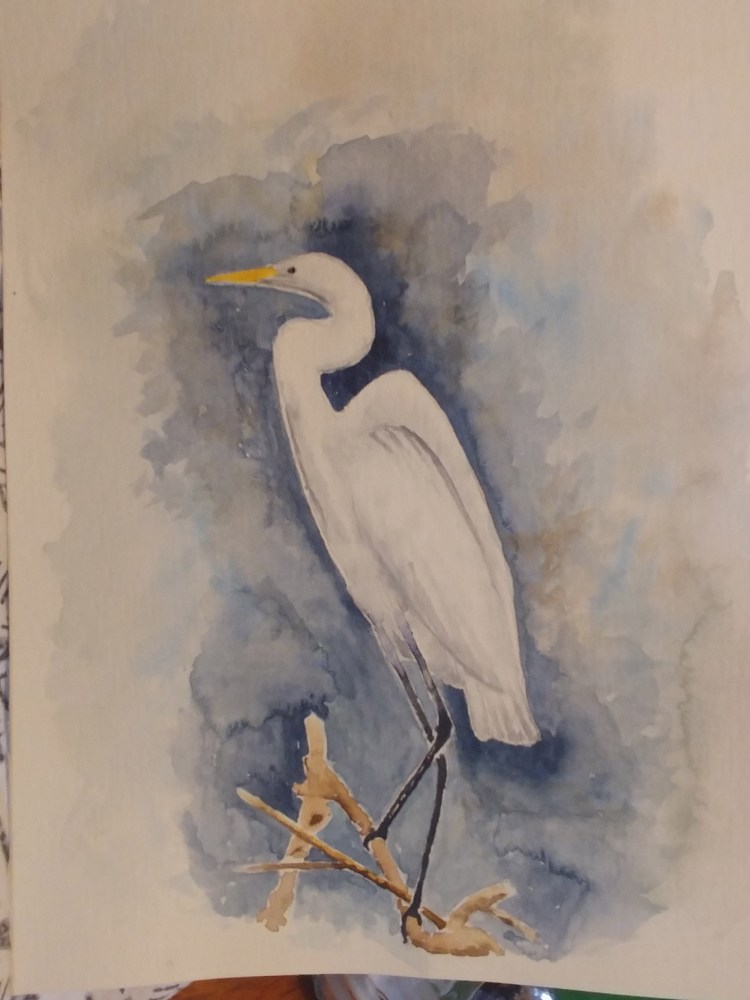
Bird photography is difficult. Ideally you need a good, powerful telephoto lens, and lots of time and patience. Fortunately, the birder community has this in spades, and they’ve posted some really nice images to unsplash. I used one to paint the study of a heron below. This one will stay in my files, as it has a rather obvious error that I didn’t see until it was completed… see if you can spot it!
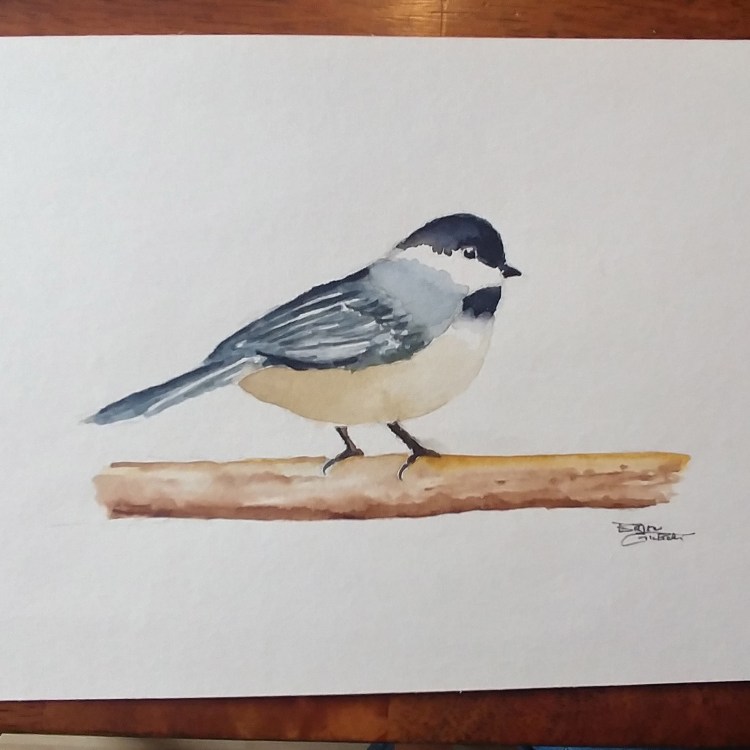
Here’s a look at a black-capped chickadee that I completed recently. We have a number of these little guys that visit our feeder. In real life, the eyes are almost invisible… perhaps I should darkened the reflection a touch. But I’ve ruined more paintings by adding just that one more little touch. I’d also like to refine the feathers just a little bit, but again, I wanted to quit while I was more or less ahead.
Here is a practice painting that I did, with special thanks to Keith Whitelock’s Watercolor Workshop. These are a series of videos that Keith has been kind enough to post on YouTube, and I just followed along (starting and stopping the video frequently). He’s a good teacher, even though some of the paintings I’ve done have varied in terms of the end result. I like to use these videos as a morale booster… when I’ve painted a complete boner, I’ll toss it in the recycling bin, fire up one of his videos, and paint along with Keith. I always learn something useful.