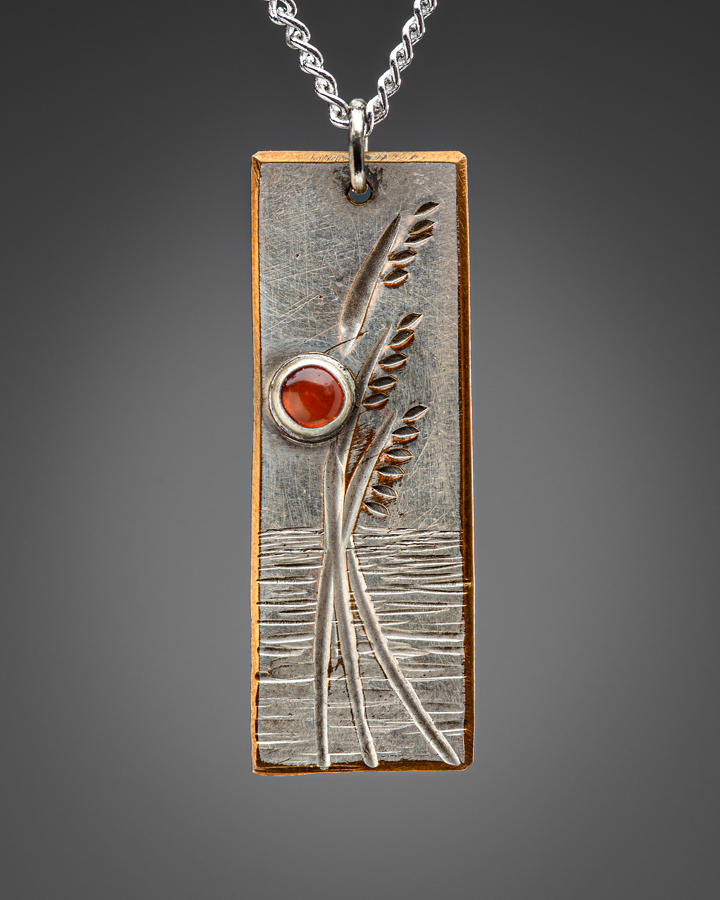
After FINALLY resolving an “expired security certificate” issue that wasn’t expired, I’m finally able to post again. This necklace was completed on Sept 7th and features a 5mm carnelian cabochon. The photograph was taken by Sandy Andrews Photography in Columbia, SC.
“Sea Oats” necklace #90721.2, silver plate on copper
I will readily admit that an inventory system isn’t the most sexy-hip-glamourous thing to write about, but it is very essential for a working jewelry business. I’ve been through a couple ways of numbering the pieces I produce, and I’m on a continual process improvement. Ideally, you want to start with a good system, as changing it midstream is an invitation to confusion.
At first, everything was an experiment… I didn’t know if anything would sell, and if it didn’t, I’d need to find some other form of gainful activity. So I just numbered the necklaces N1, N2, etc, and the earrings E1, E2, etc. As it stands right now, I don’t make a lot of rings, bracelets, or anything else. So that method worked for awhile.
But my current gallery, the Irritable Pelican here on Tybee Island (more on that later) used a different system. They assign everyone an artist number- mine is 523- and then go up from there. So the first piece I placed there is #523-001. Currently, I’m somewhere around 523-055. I adopted their numbering system to use with my internal recordkeeping.
This system works fine- if I only want to have a single gallery. if I add a second gallery, that throws everything off. So I’ve developed a new numbering system, with an excel spreadsheet to match. My new number is just the date followed by a decimal point, and then a sequential number that matches the number of pieces that I’ve finished that day, for example, #091721.1 will go on the first piece that I finished on September 17th. I finished six pieces that day, so the last piece got #091721.6. I then take some quick pictures on the same day, and the metadata for the photos is automatically recorded at 09/17/21, so that helps me to figure out which photo file matches what inventory number based on the description. A detailed written description is recorded in the excel spreadsheet, that includes things like the size in millimeters, the stone or bead, stone size if applicable.
There is a space in the spreadsheet to add the gallery and the gallery number when I deliver a piece for sale. If a different gallery wants to use a different numbering system, that’s fine- my spreadsheet should accomodate that. There’s a column for the date placed on sale, a column for the date sold, and another for the number of days on sale. Right now I calculate that in my head, but I’m pretty sure that I can get Excel to calculate that for me. Over time- and given enough sales data- these columns might show sales trends to say if a particular design or price point outsells another. But the main reason the spreadsheet was designed is to tell at a glance what pieces are at which gallery and which ones have sold. We’ll see if it works- if not, we’ll try something else!
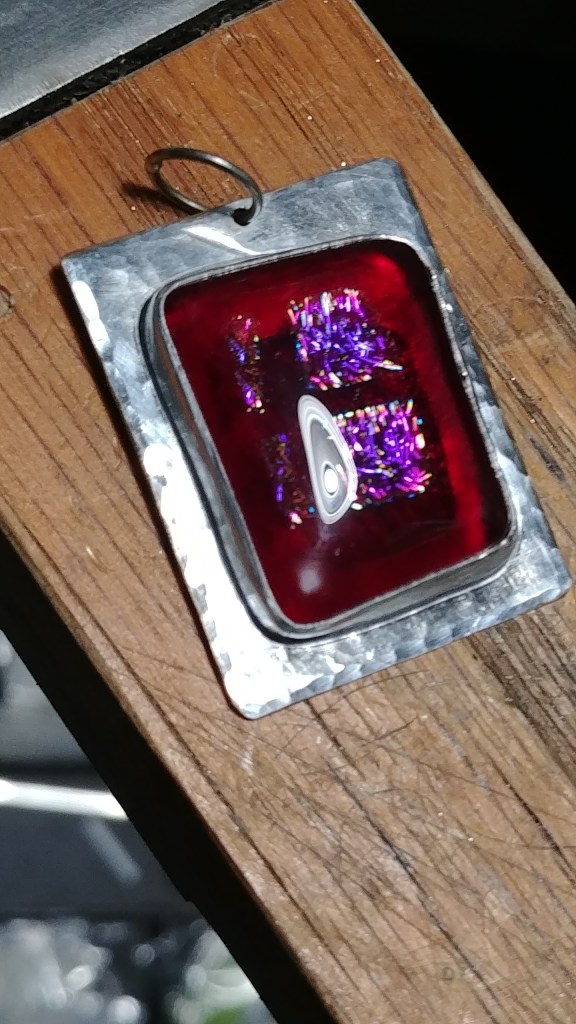
Just completed today is this necklace in red dichroic glass. Set in a 34mm x 27mm plated silver backplate, with a fine silver bezel. It’s available for sale at $85.
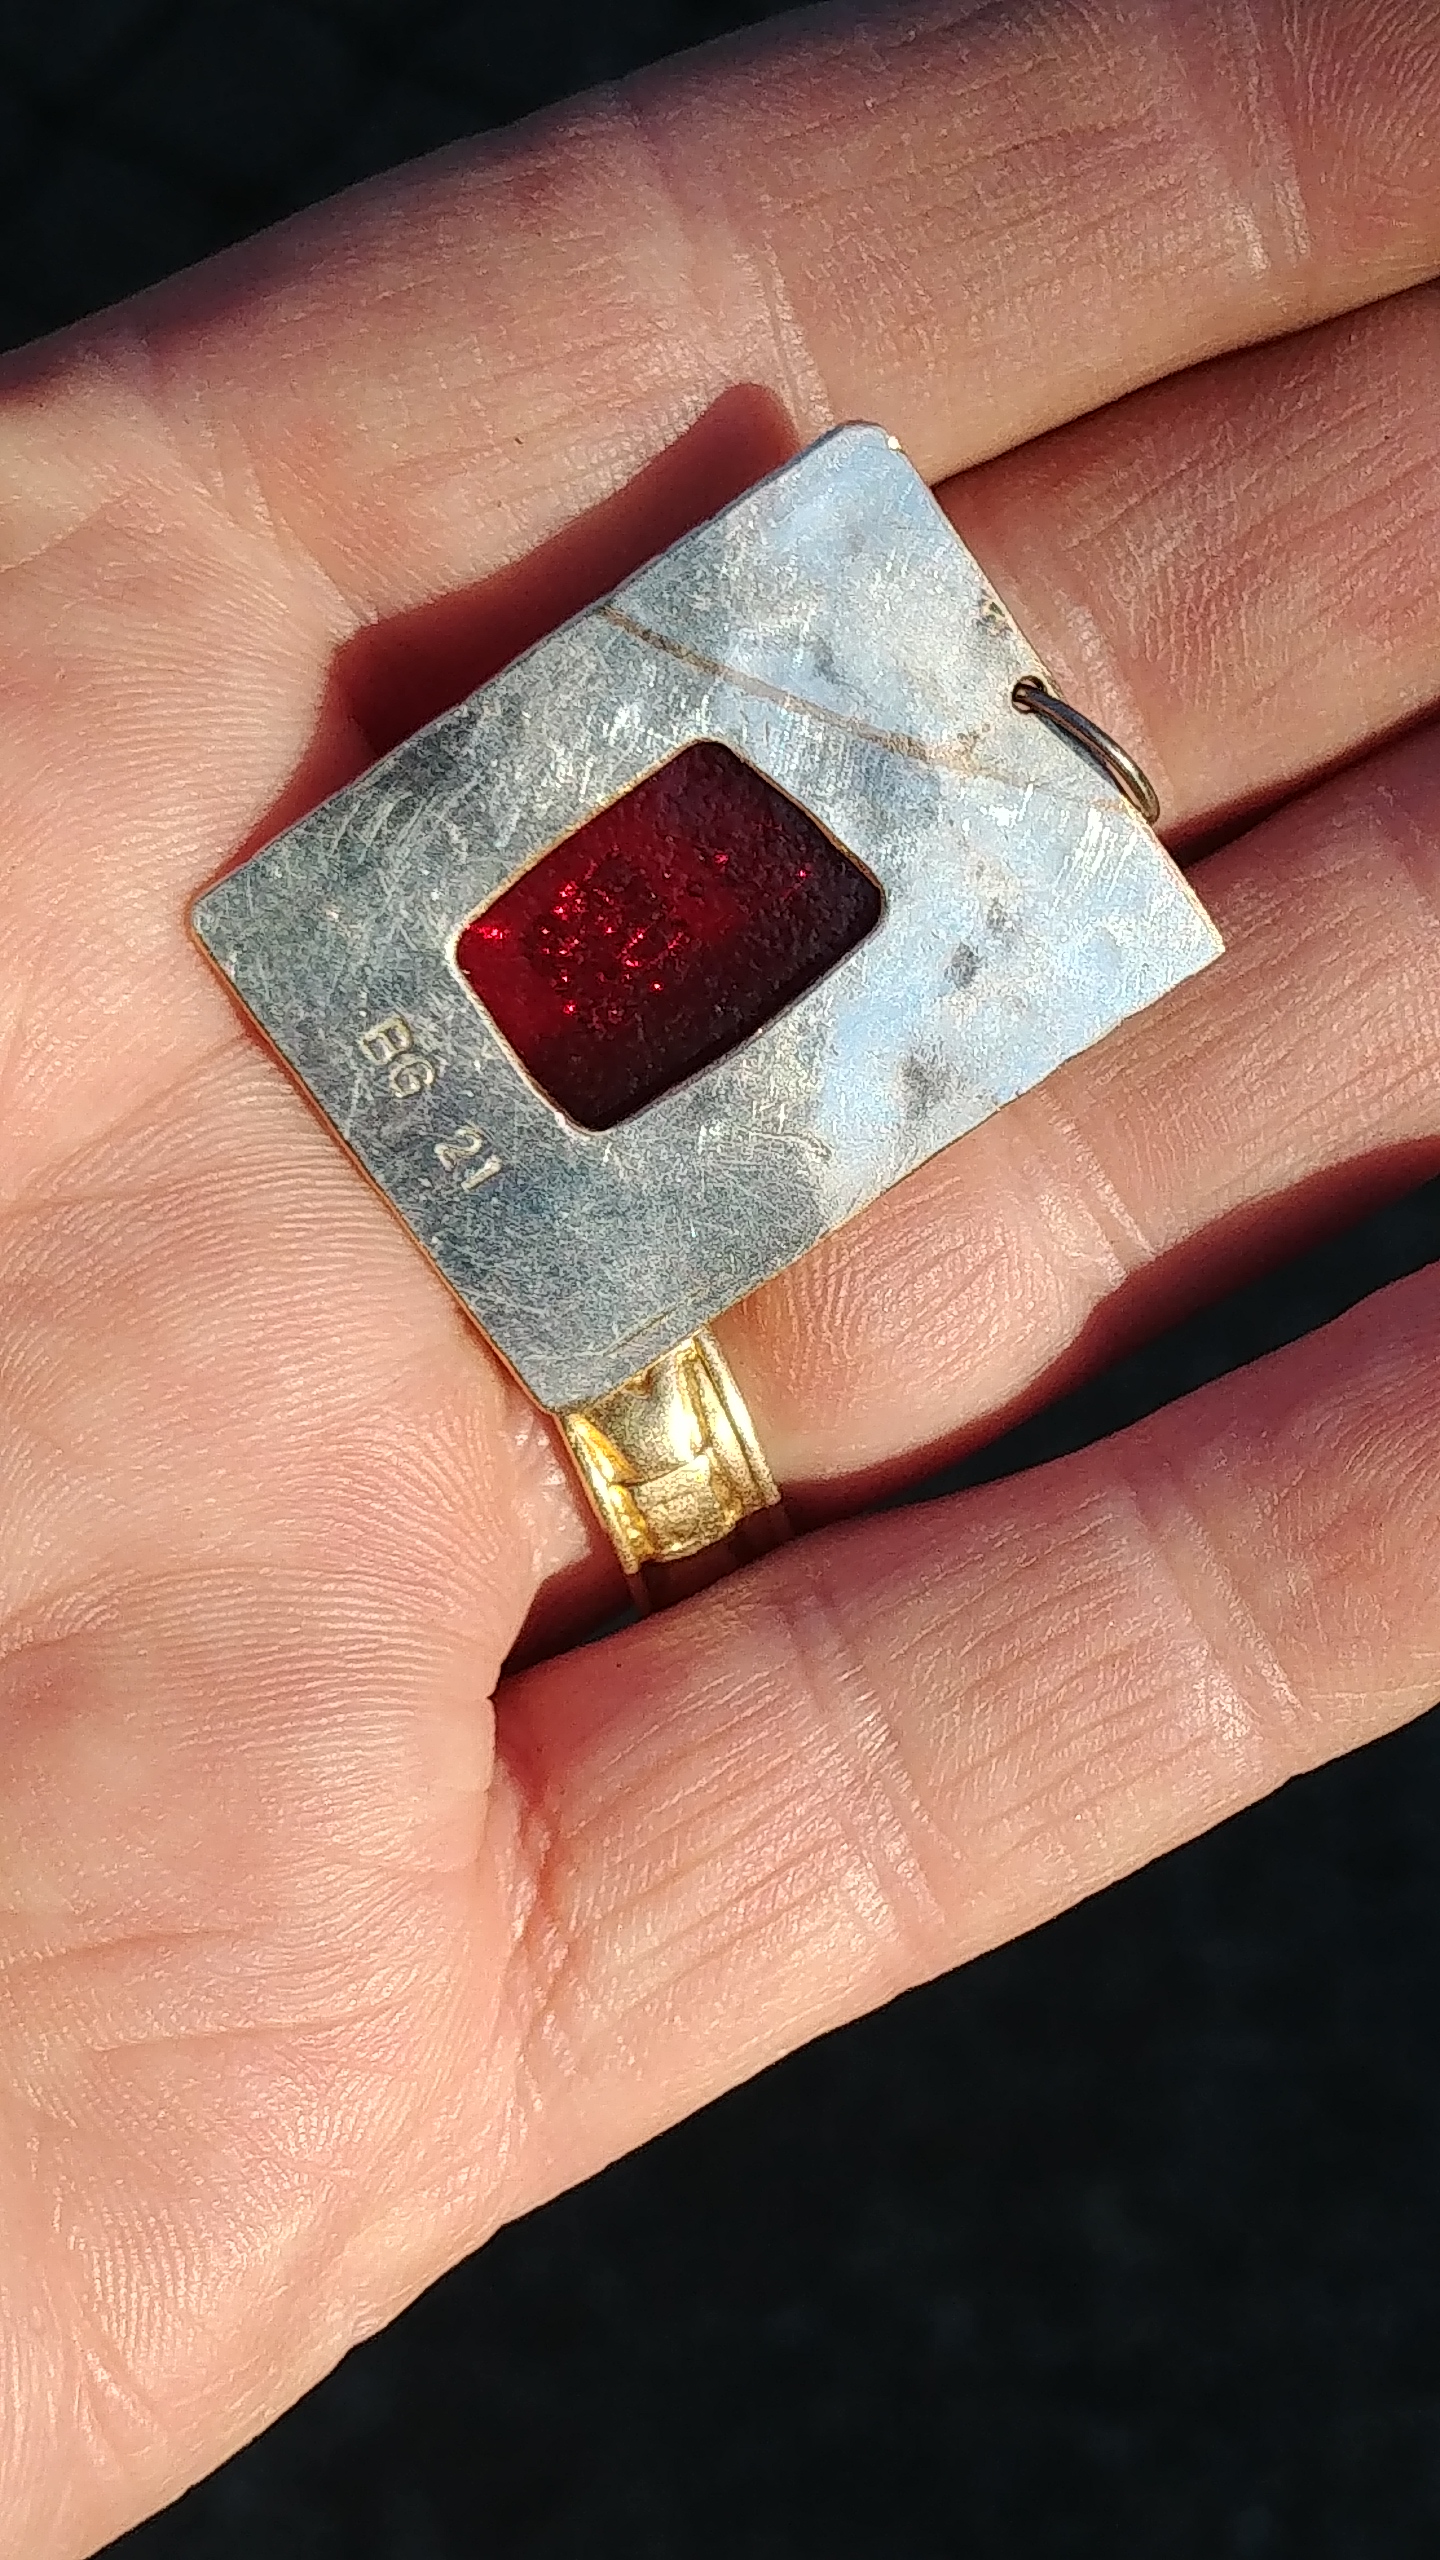
Image taken under daylight balanced LED lightThe same pendant in sunlightA look at the back. It’s open so light can pass through, signed & dated.
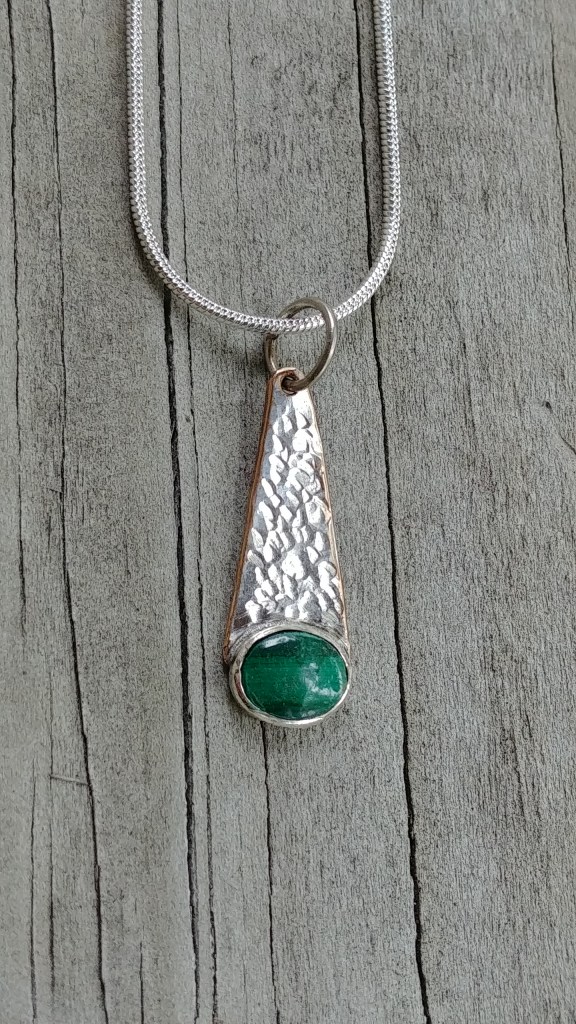
Another recent piece, this necklace features a 6mm x 8mm undyed natural malachite. Fake malachite is fairly common and can often be spotted by high-contrast banding with sharp borders in the bands. Real malachite has banding that is more subtle, with diffusion at the borders.
This one is set in a silver bezel cup soldered to a hammer-textured silver on copper backplate and measures 24mm x 9mm
I had initially darkened the whole piece with liver of sulfur, but I didn’t care for the result, so I repolished the whole thing back to bright silver. As usual, setting the stone was a pain since the sides were straight, rather than curved, so it required a lot of settling before a nice tight fit was achieved.
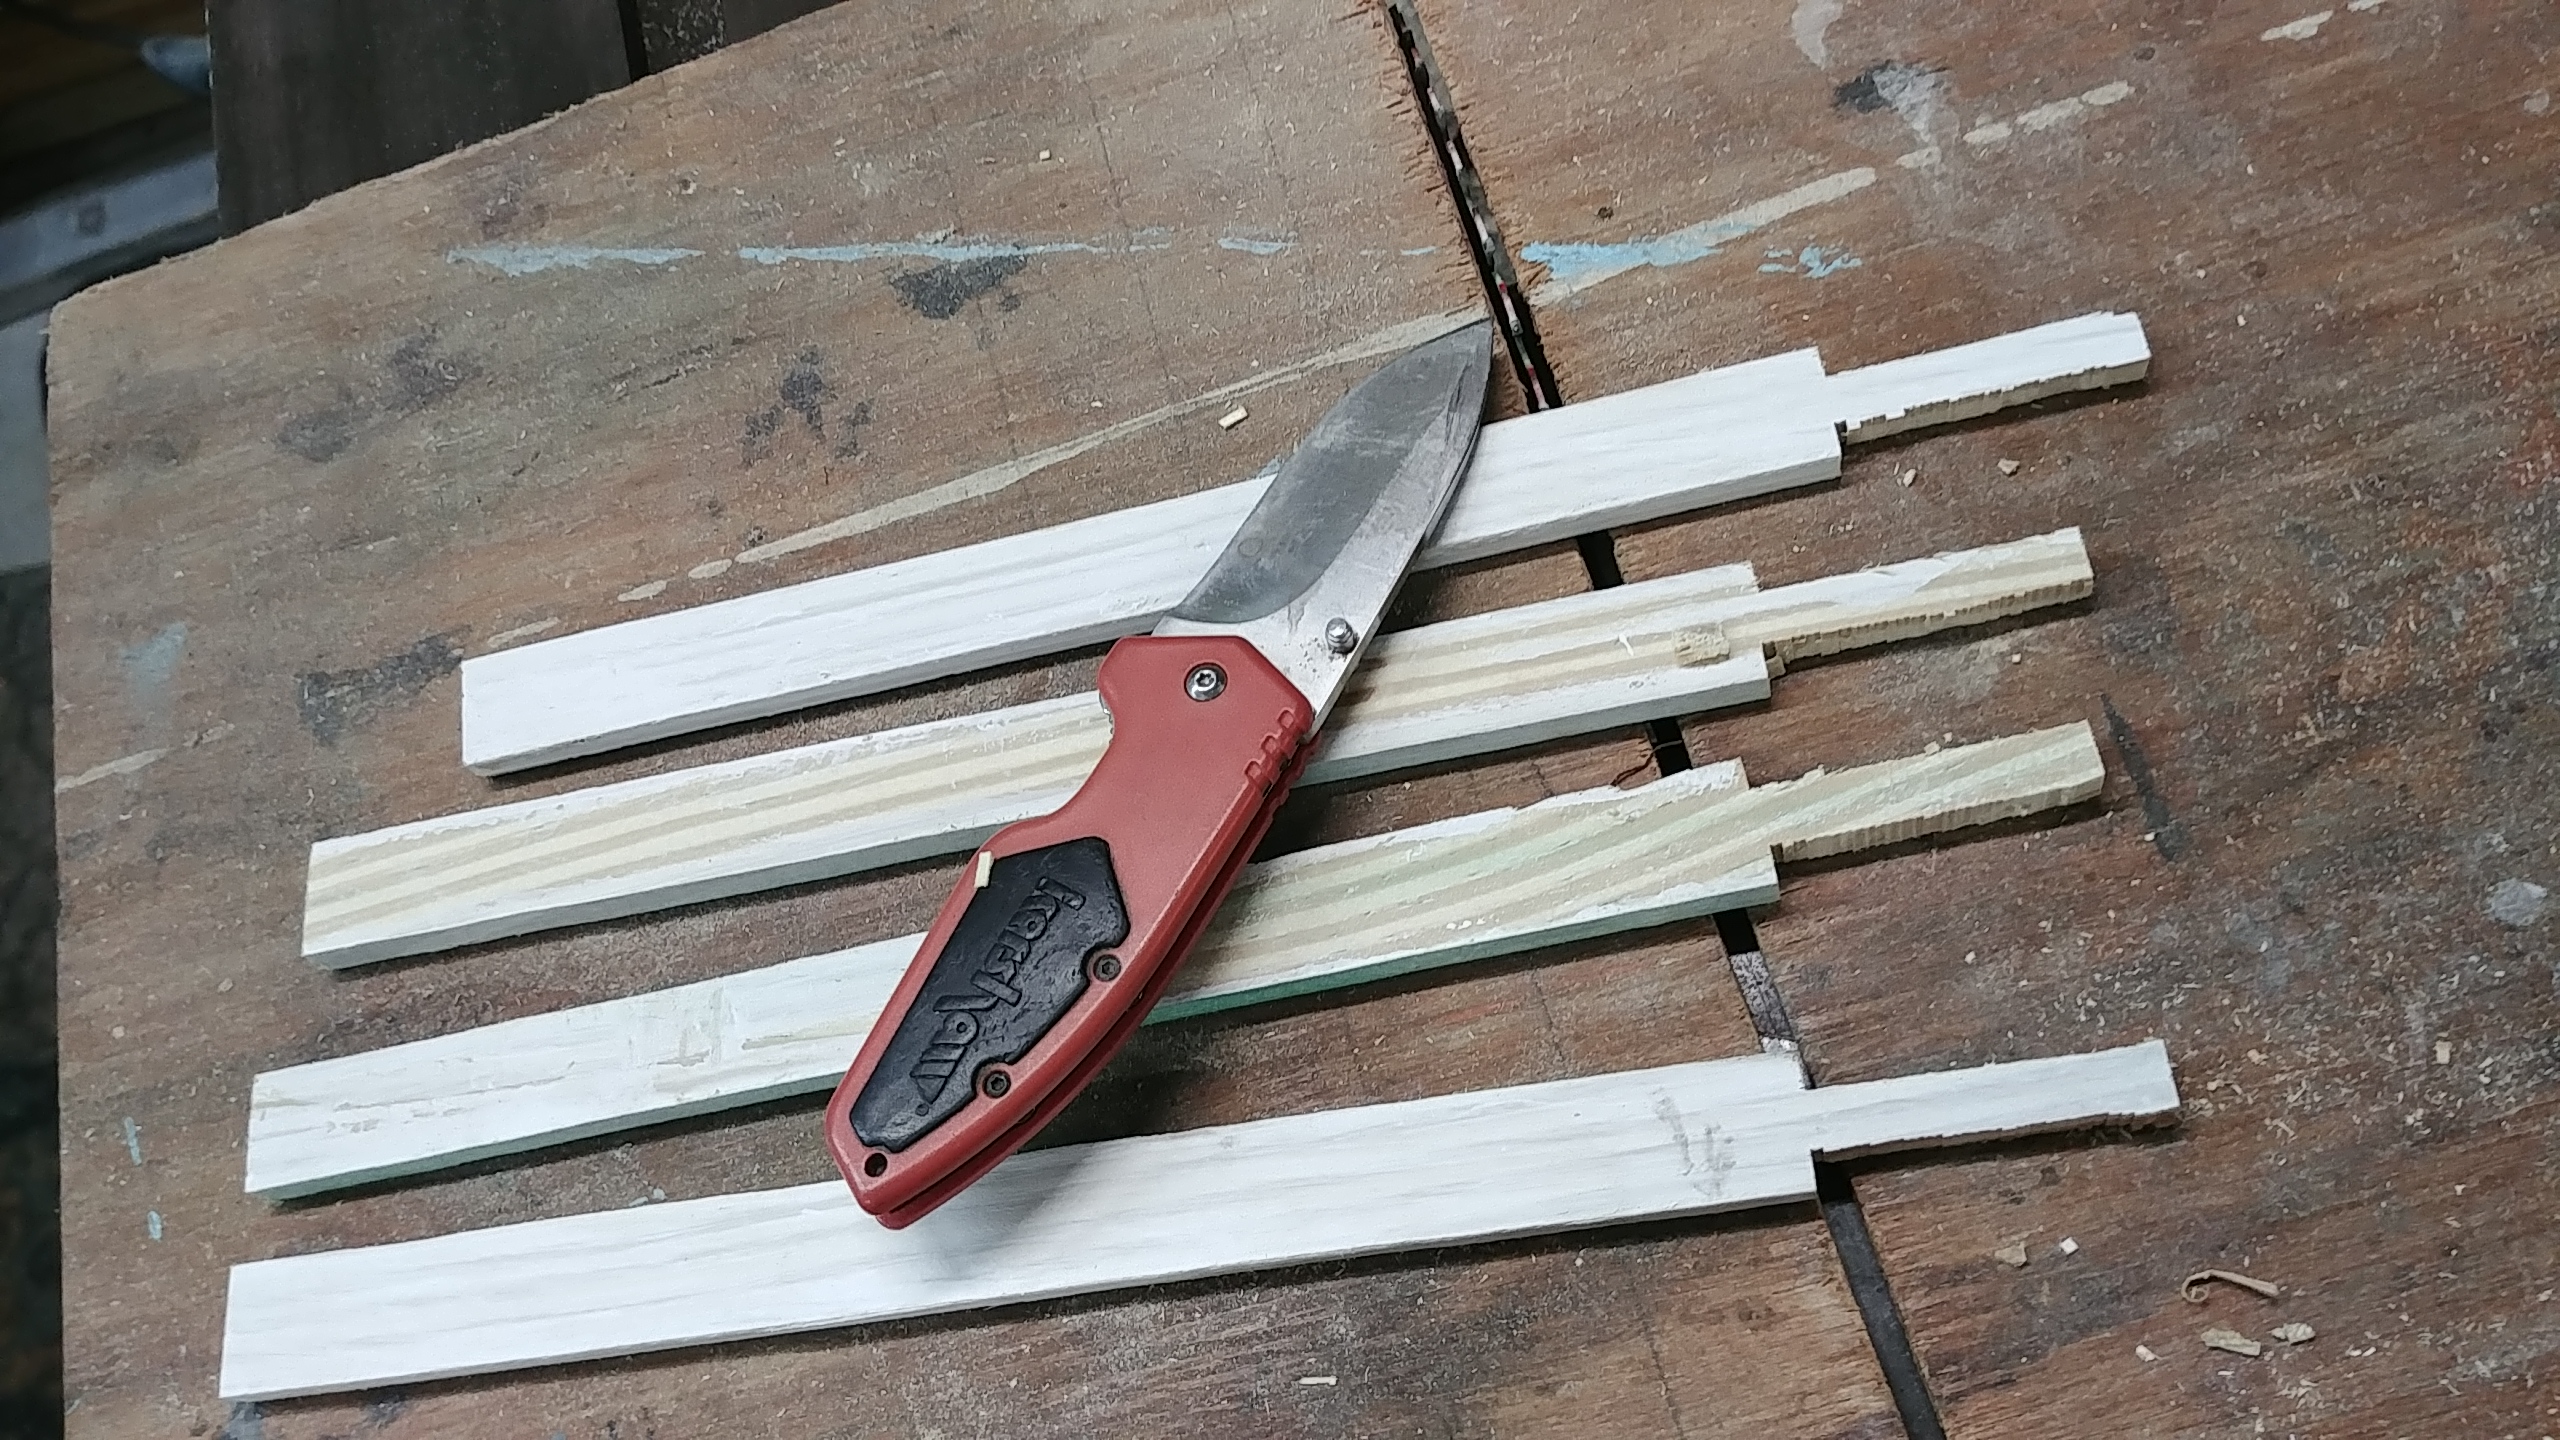
I hate to admit this, but my jewelry bench is an absolute mess. As part of my ongoing effort to fix this, I noticed that my emery sticks (which are just different grades of sandpaper glued to a piece of wood, a cheap and useful tool at the bench) were laying about, tossed in coffee cups, etc. So I thought of a quick modification to give these a more permanent, easy-to-find-and-put-away home on the bench. To help organize other things like files, punches, pliers, etc., I use several hardwood blocks with varying-sized holes in them, so I thought that cutting down the sticks to provide a sort of handle, and then sticking the “handle” in a hardwood block would be a reasonable solution (although since then, I’ve come up with a possibly better way to make the blocks, more on that later.)
I started by standardizing the size and thickness, which happened to be the same size of some scrap wood that I had left over from a recent deck project. Then on my table saw (everyone should have a table saw… though this could be done with a pocketknife) I cut down the edges by about a third, leaving a roughly 1/4″ square stem. This I sanded to an octagon shape using a bench belt grinder, but this could also be done with a fine file or even another emery stick.
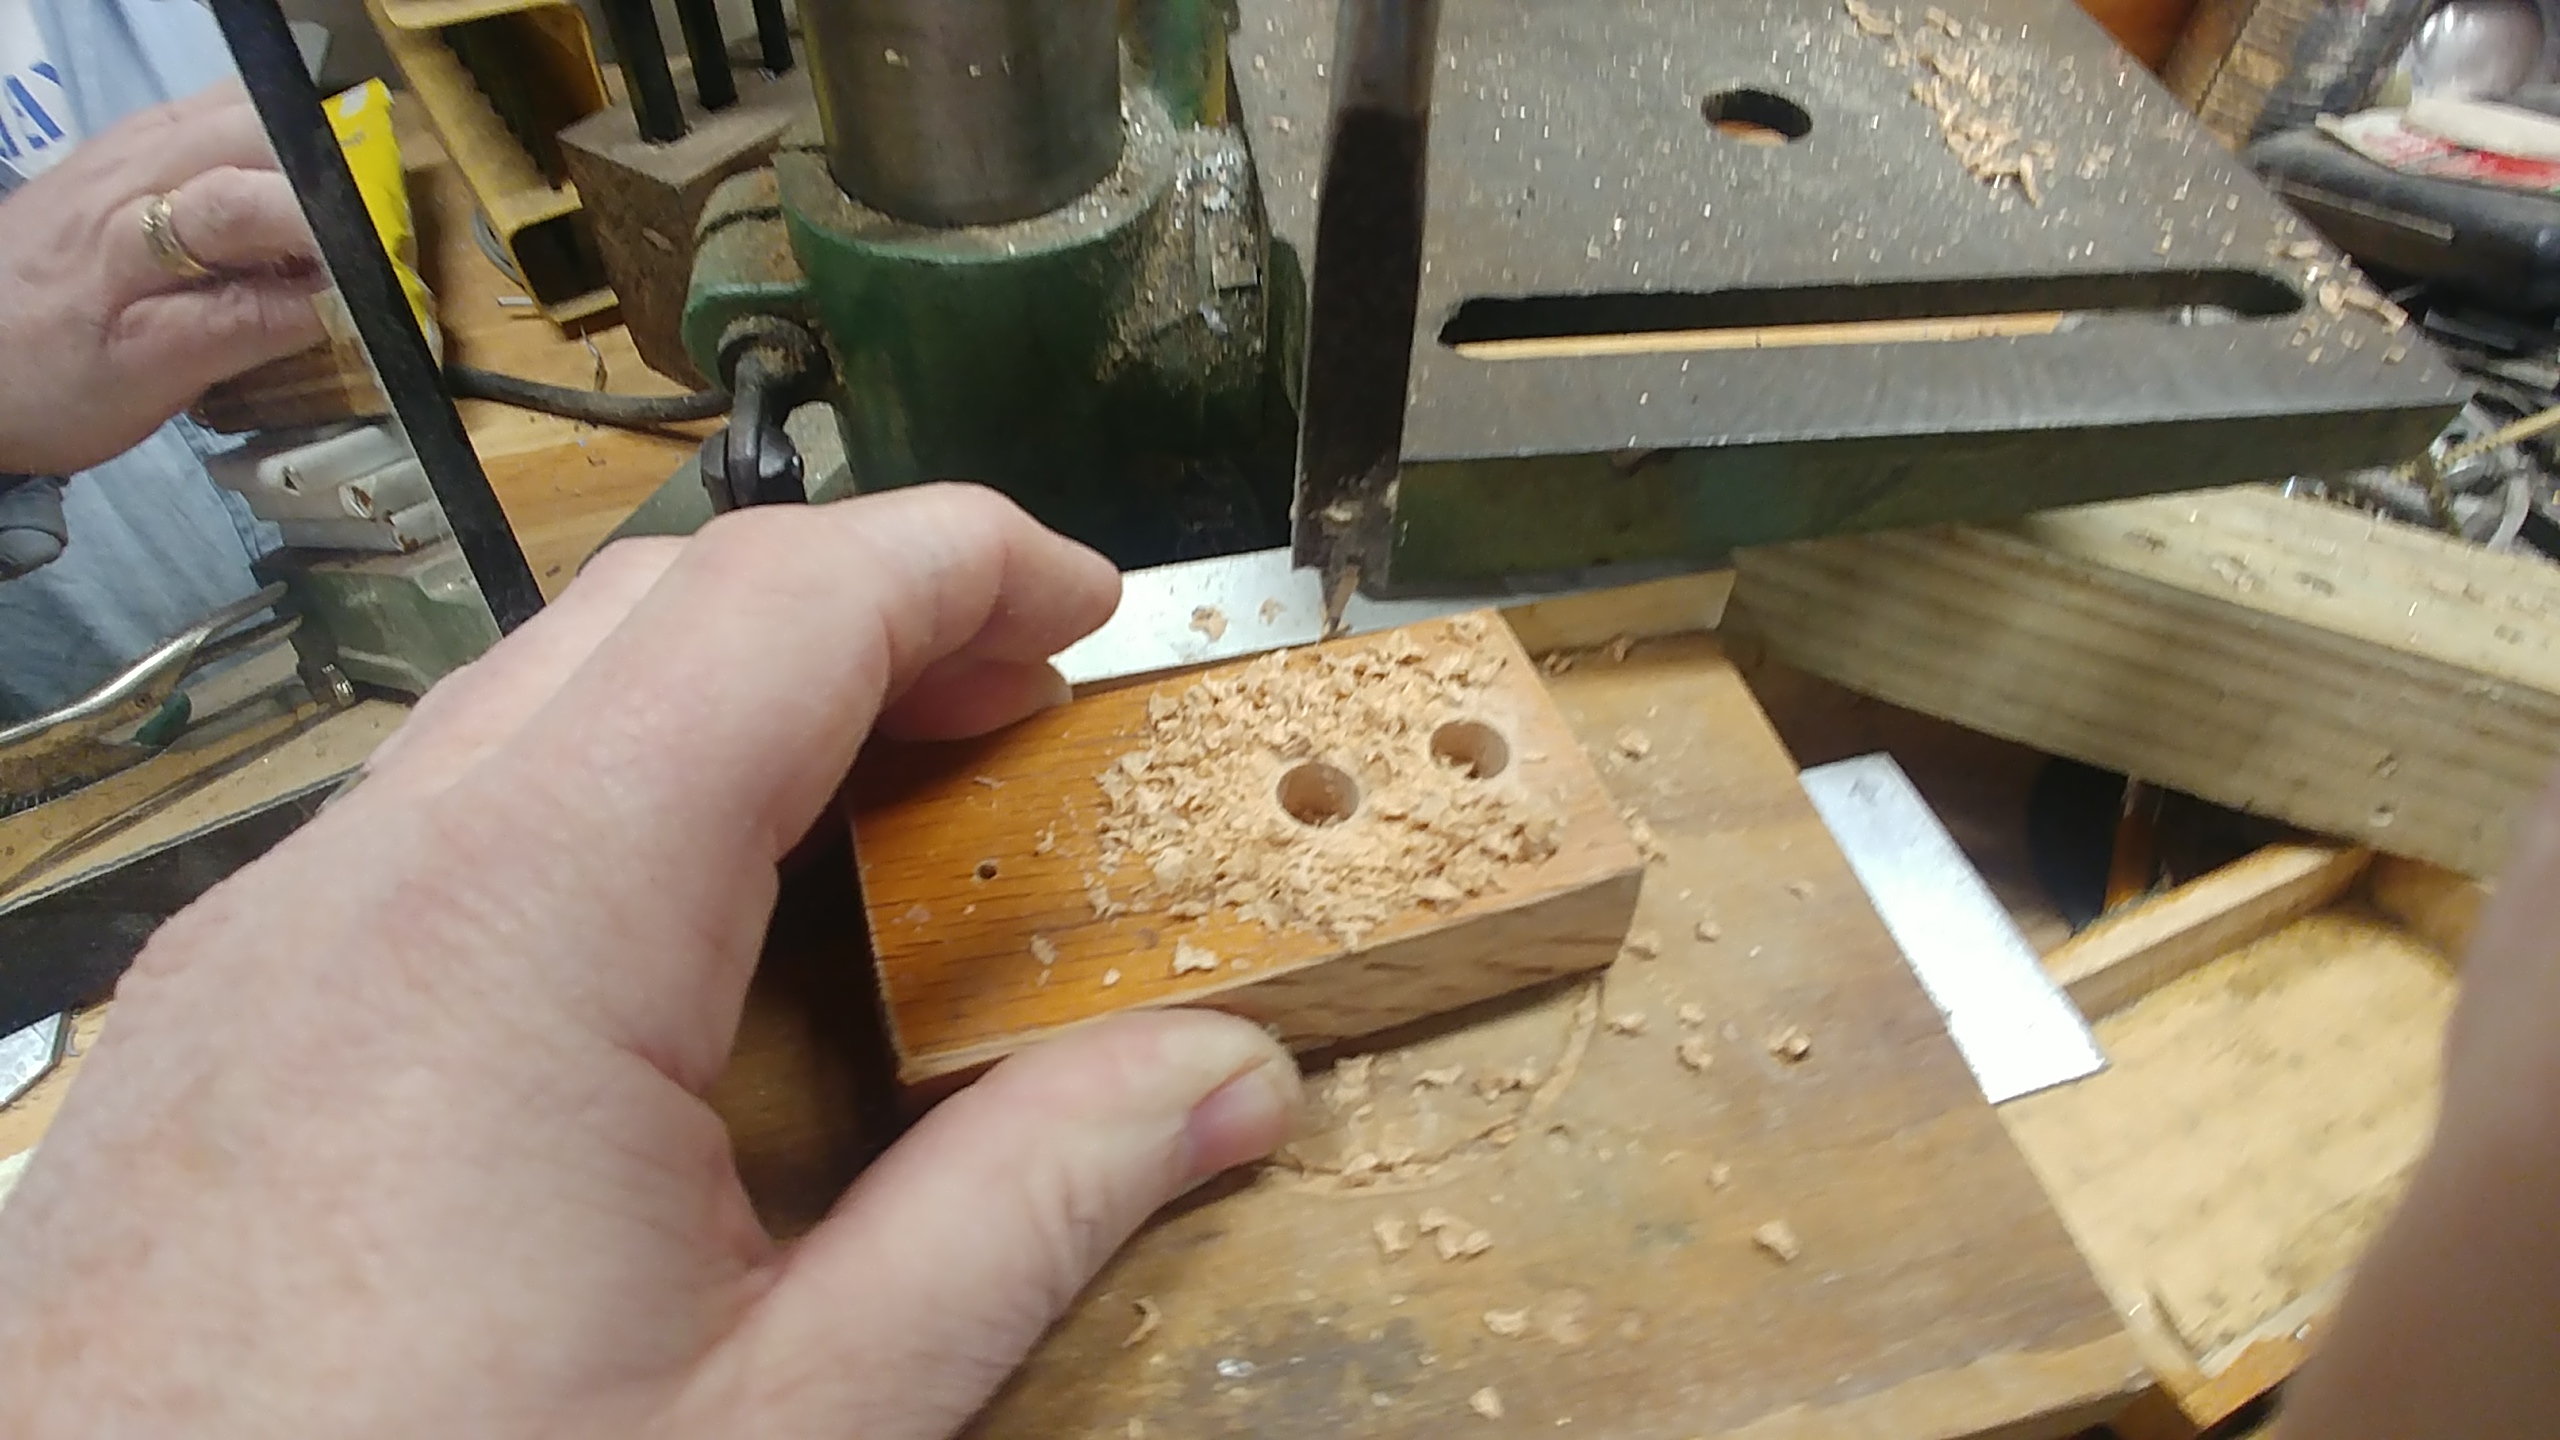
Step two was just to find a hardwood block and drill some holes. I have some oak what was formerly a headboard that I liberated from a trash pile. I cut a small block, sanded off the sharp edges, drilled the holes and gave it a coat of linseed oil just for fun, and the job was finished.
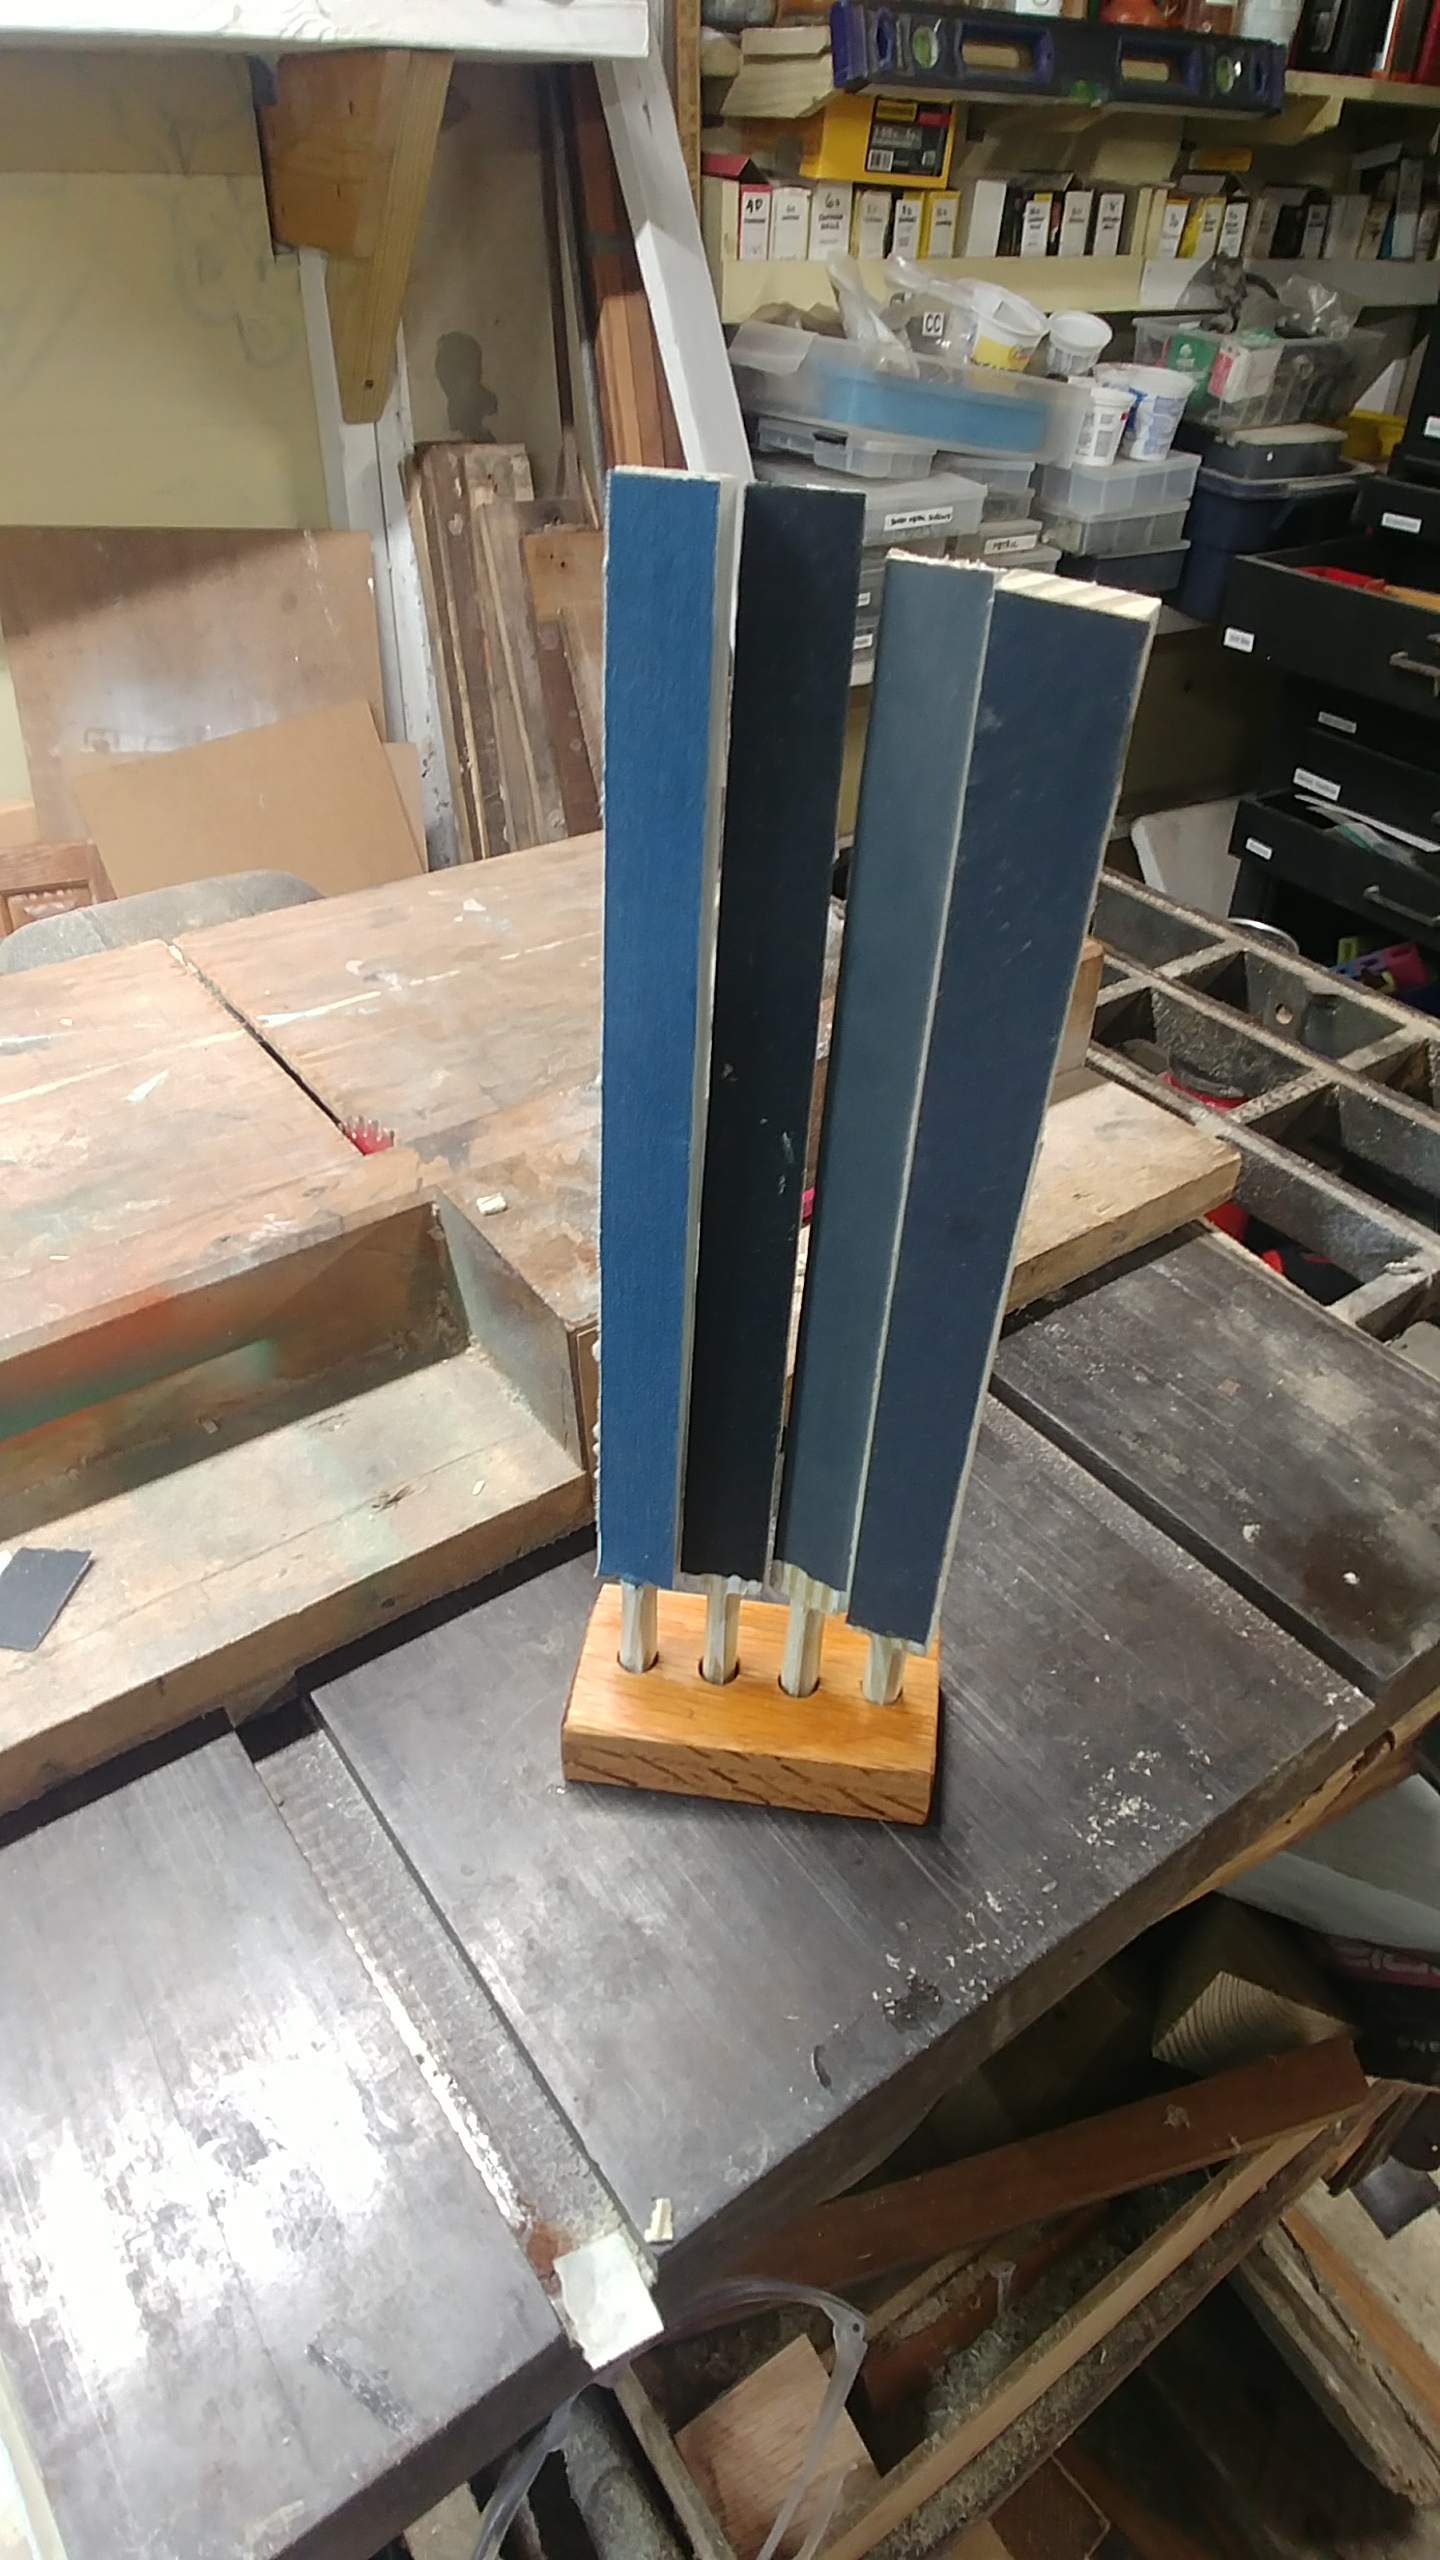
My bench is still a wreck, but I can find my emery sticks now.
Four emery sticks of the same size. I stacked these together and cut the ends on a tablesaw.
The remaining little teeth were popped off using my pocketknife, and then sanded.
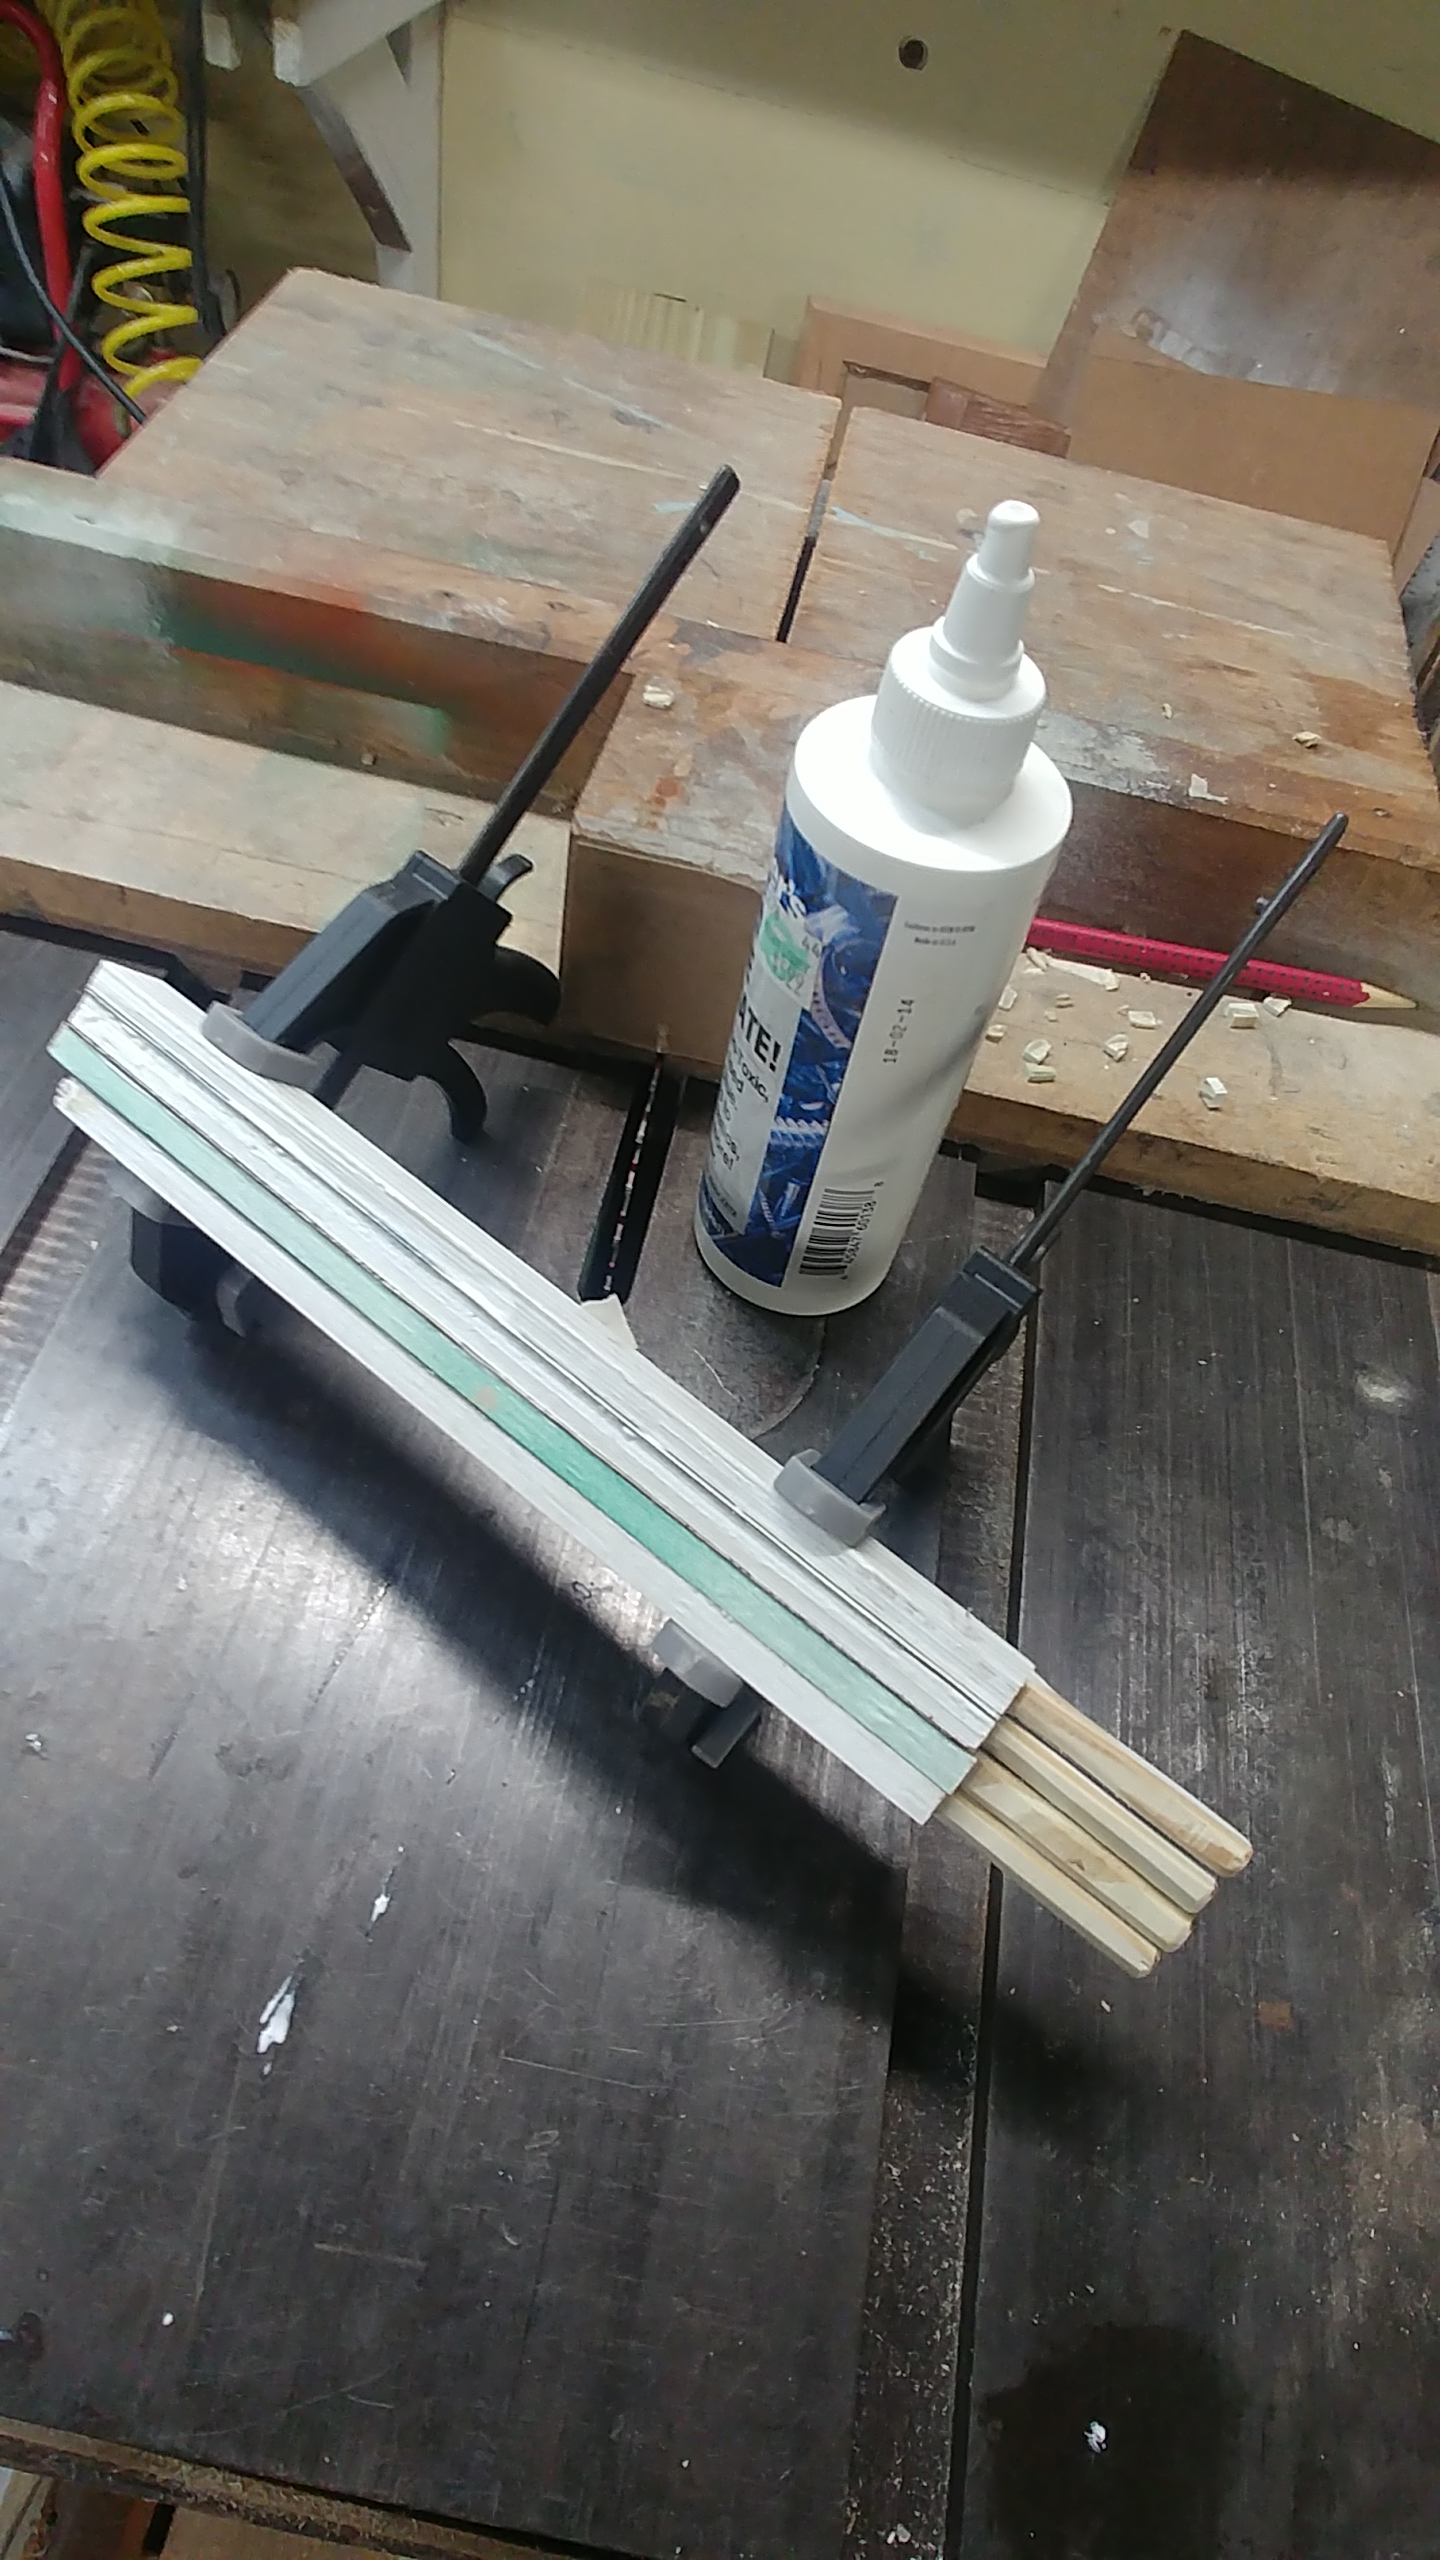
Here I’ve glued on some different grades of sandpaper and am holding them together with clamps until the glue dries. Plain white glue works fine.
I drilled four holes with a 3/8″ spade drill in the drill press
My now-organized emery sticks
My Version Two of this project would probably be easier… instead of a block with holes, I’ll cut a block with slots on the table saw, just a little wider than the thickness of the emery sticks, and dispense with the little handles altogether. I always seem to think of a better way to do something when I’m halfway through a project!
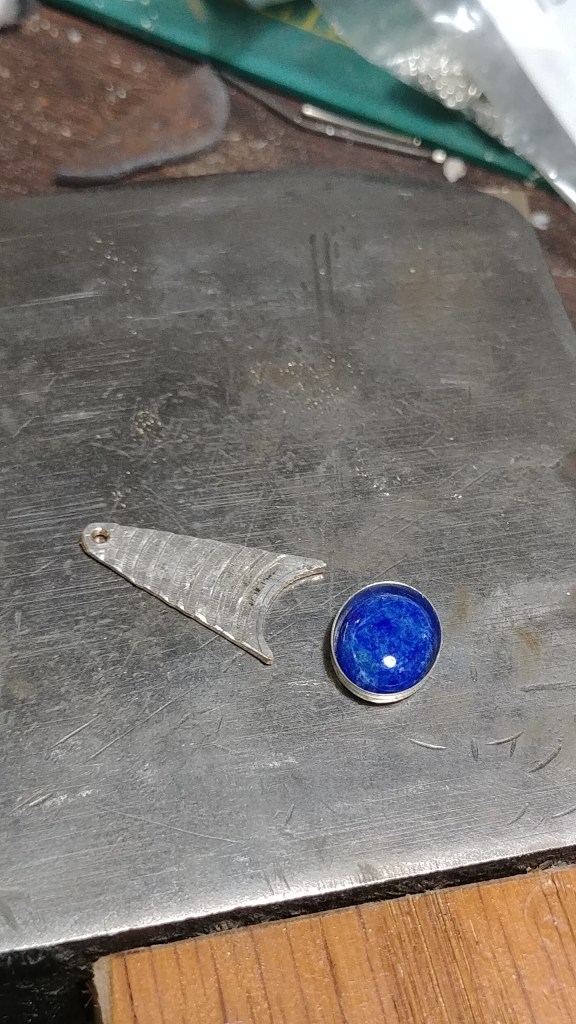
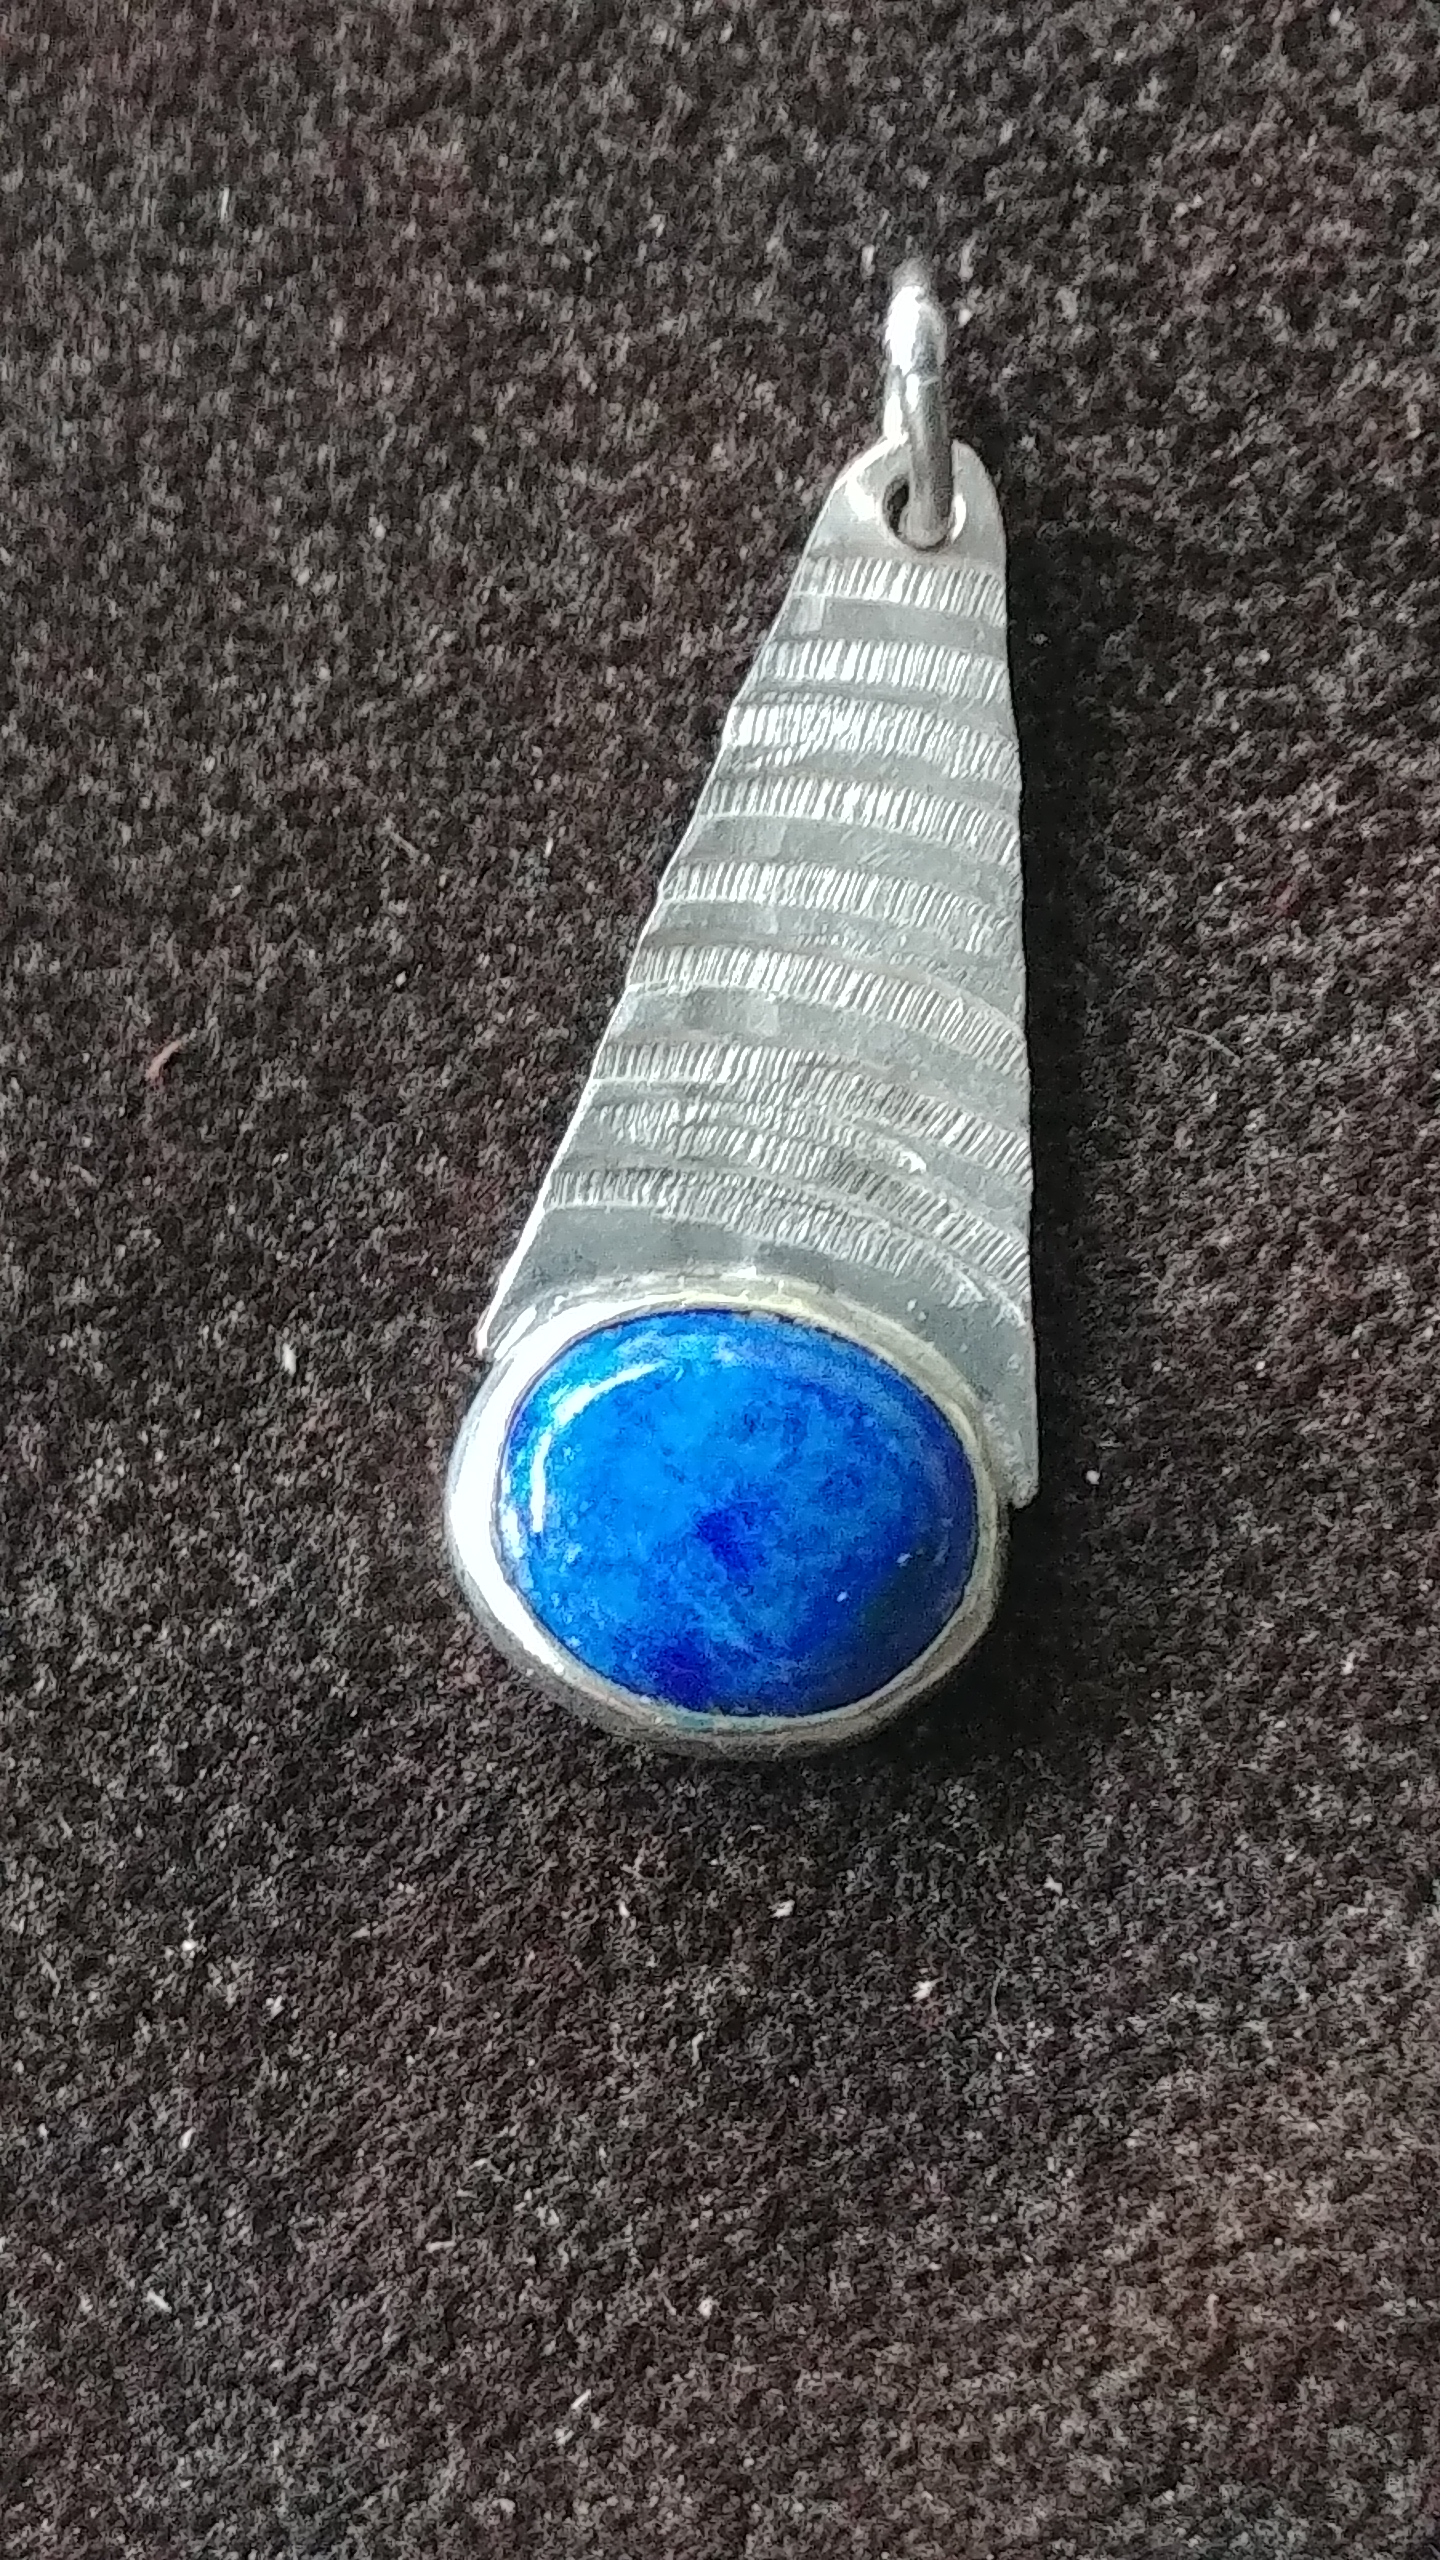
I just got in a nice little pile of 8mm x 10mm lapis lazuli cabochon. I bought these specifically to go with some 8×10 silver bezel cups that I’ve had in my jewelry tool box for a long time. Late night I went to the bench and came up with this simple triangular necklace. Nothing particularly fancy, but on the plus side, it won’t be too expensive either… about $60 including the chain.
The individual elements before settingThe finished necklace
The most difficult part was setting the stone. These stones aren’t calibrated- you can see in the first photo that there’s extra space around the edge of the stone- and initially the fir was quite loose in the bezel cup. This meant lots of burnishing, pushing, cussing and persuasion to get the edges of the bezel to lay down properly. After a longer than expected amount of time, I got a good, solid fit on the bezel.
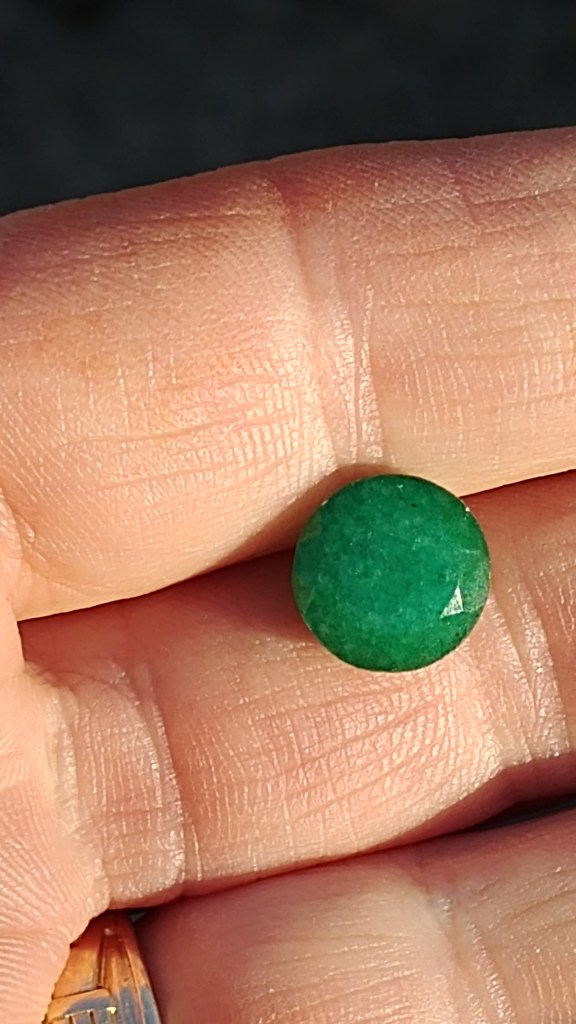
In a recent parcel of stones, I had a chance to order some honkin’ big emeralds and rubies. They’re 11mm round, 5.40 carats each. I’m fairly confident they’re genuine, from a US jewelry supplier (Halstead). But here’s the trick, and the reason I could afford them- they’re “commercial grade,” and so have so many inclusions that they’re nearly opaque.
A commercial-grade emerald
Better grades of emerald in this size are a long trip to crazy town, with stops at four, ten, and twenty five thousand dollars… I stopped searching after I hit those numbers.
So even though the next lower grade of these is sandpaper, I still like them. They have a nice color, and larger stones are easier for me to handle. They are good for practicing fabricating prong settings, a technique in which I’m entirely self-taught (and need practice). And they are the real deal- I have some other stones that I’ve bought that are large, but I’m fairly certain they’re fakes. I’d rather not work with fakes or simulants, I greatly prefer to use the real thing- as much as I can, of course. I’m sure I’ve got several stones in my collection that are probably questionable. I have a group of stones that I call my “pirate collection,” that I’m fairly sure are cut glass or some other fraud. I keep them to remind myself to stay vigilant when buying!
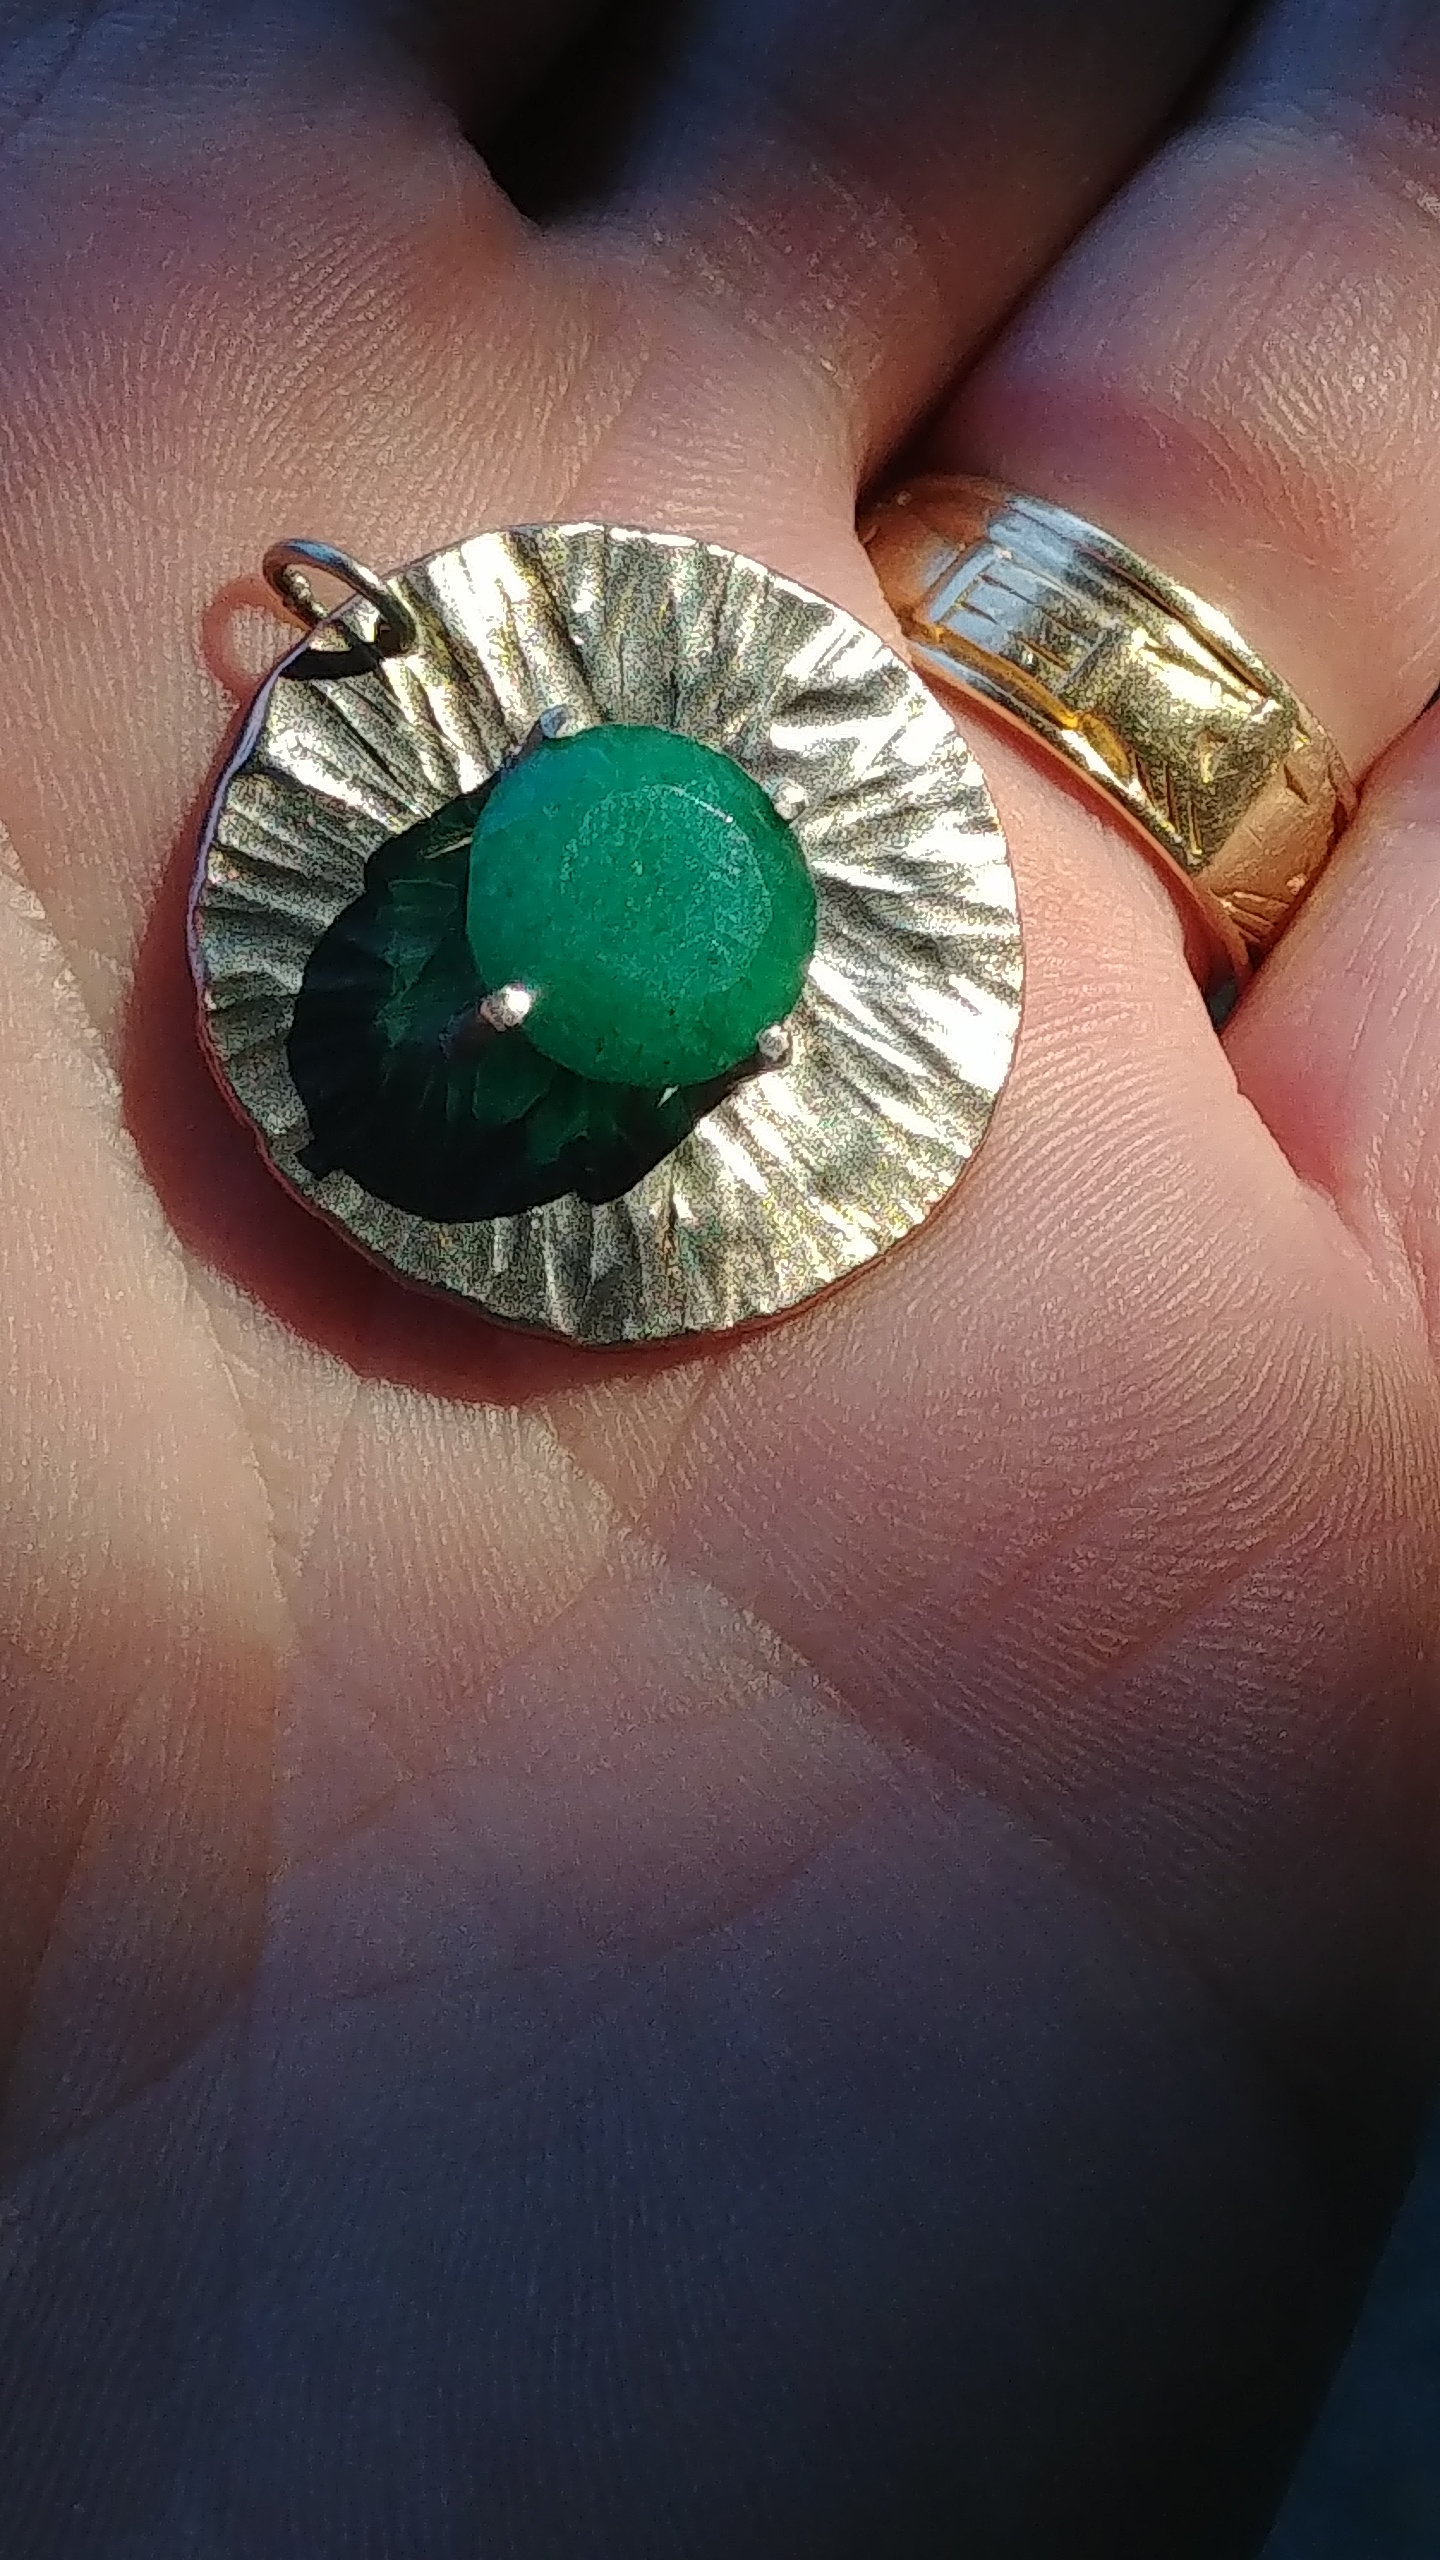
Anyway, back to my emerald. Here’s the first one of these set in a necklace.
A fabricated prong settingThe finished necklace with the emerald set.
There are some fine details about this piece that I don’t like, so I may pull the stone and start over- haven’t quite decided yet. A further refinement would six prongs instead of four… the stone is held securely, but as the prongs are made of fine silver, this isn’t the most robust of settings. Stay tuned!
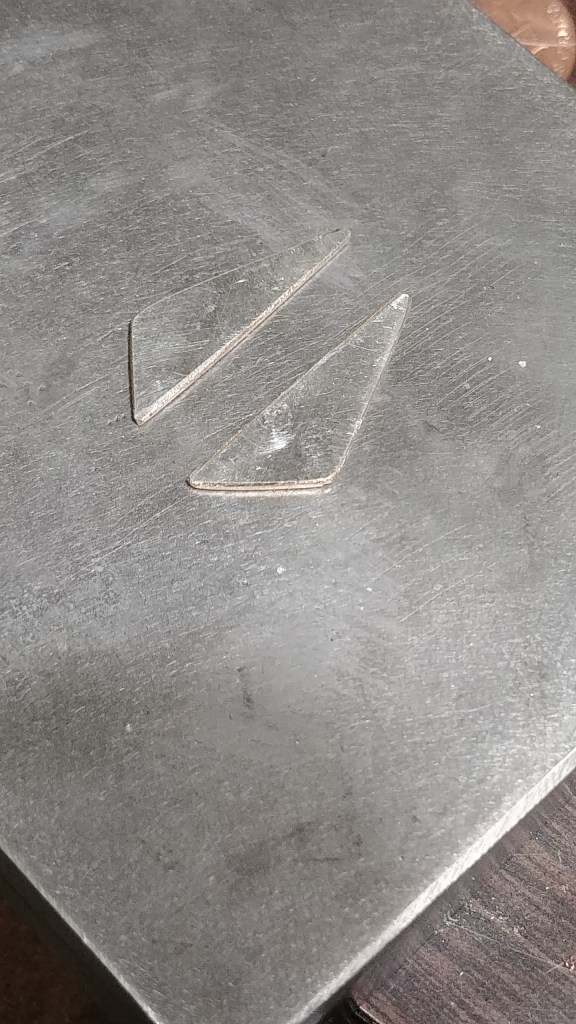
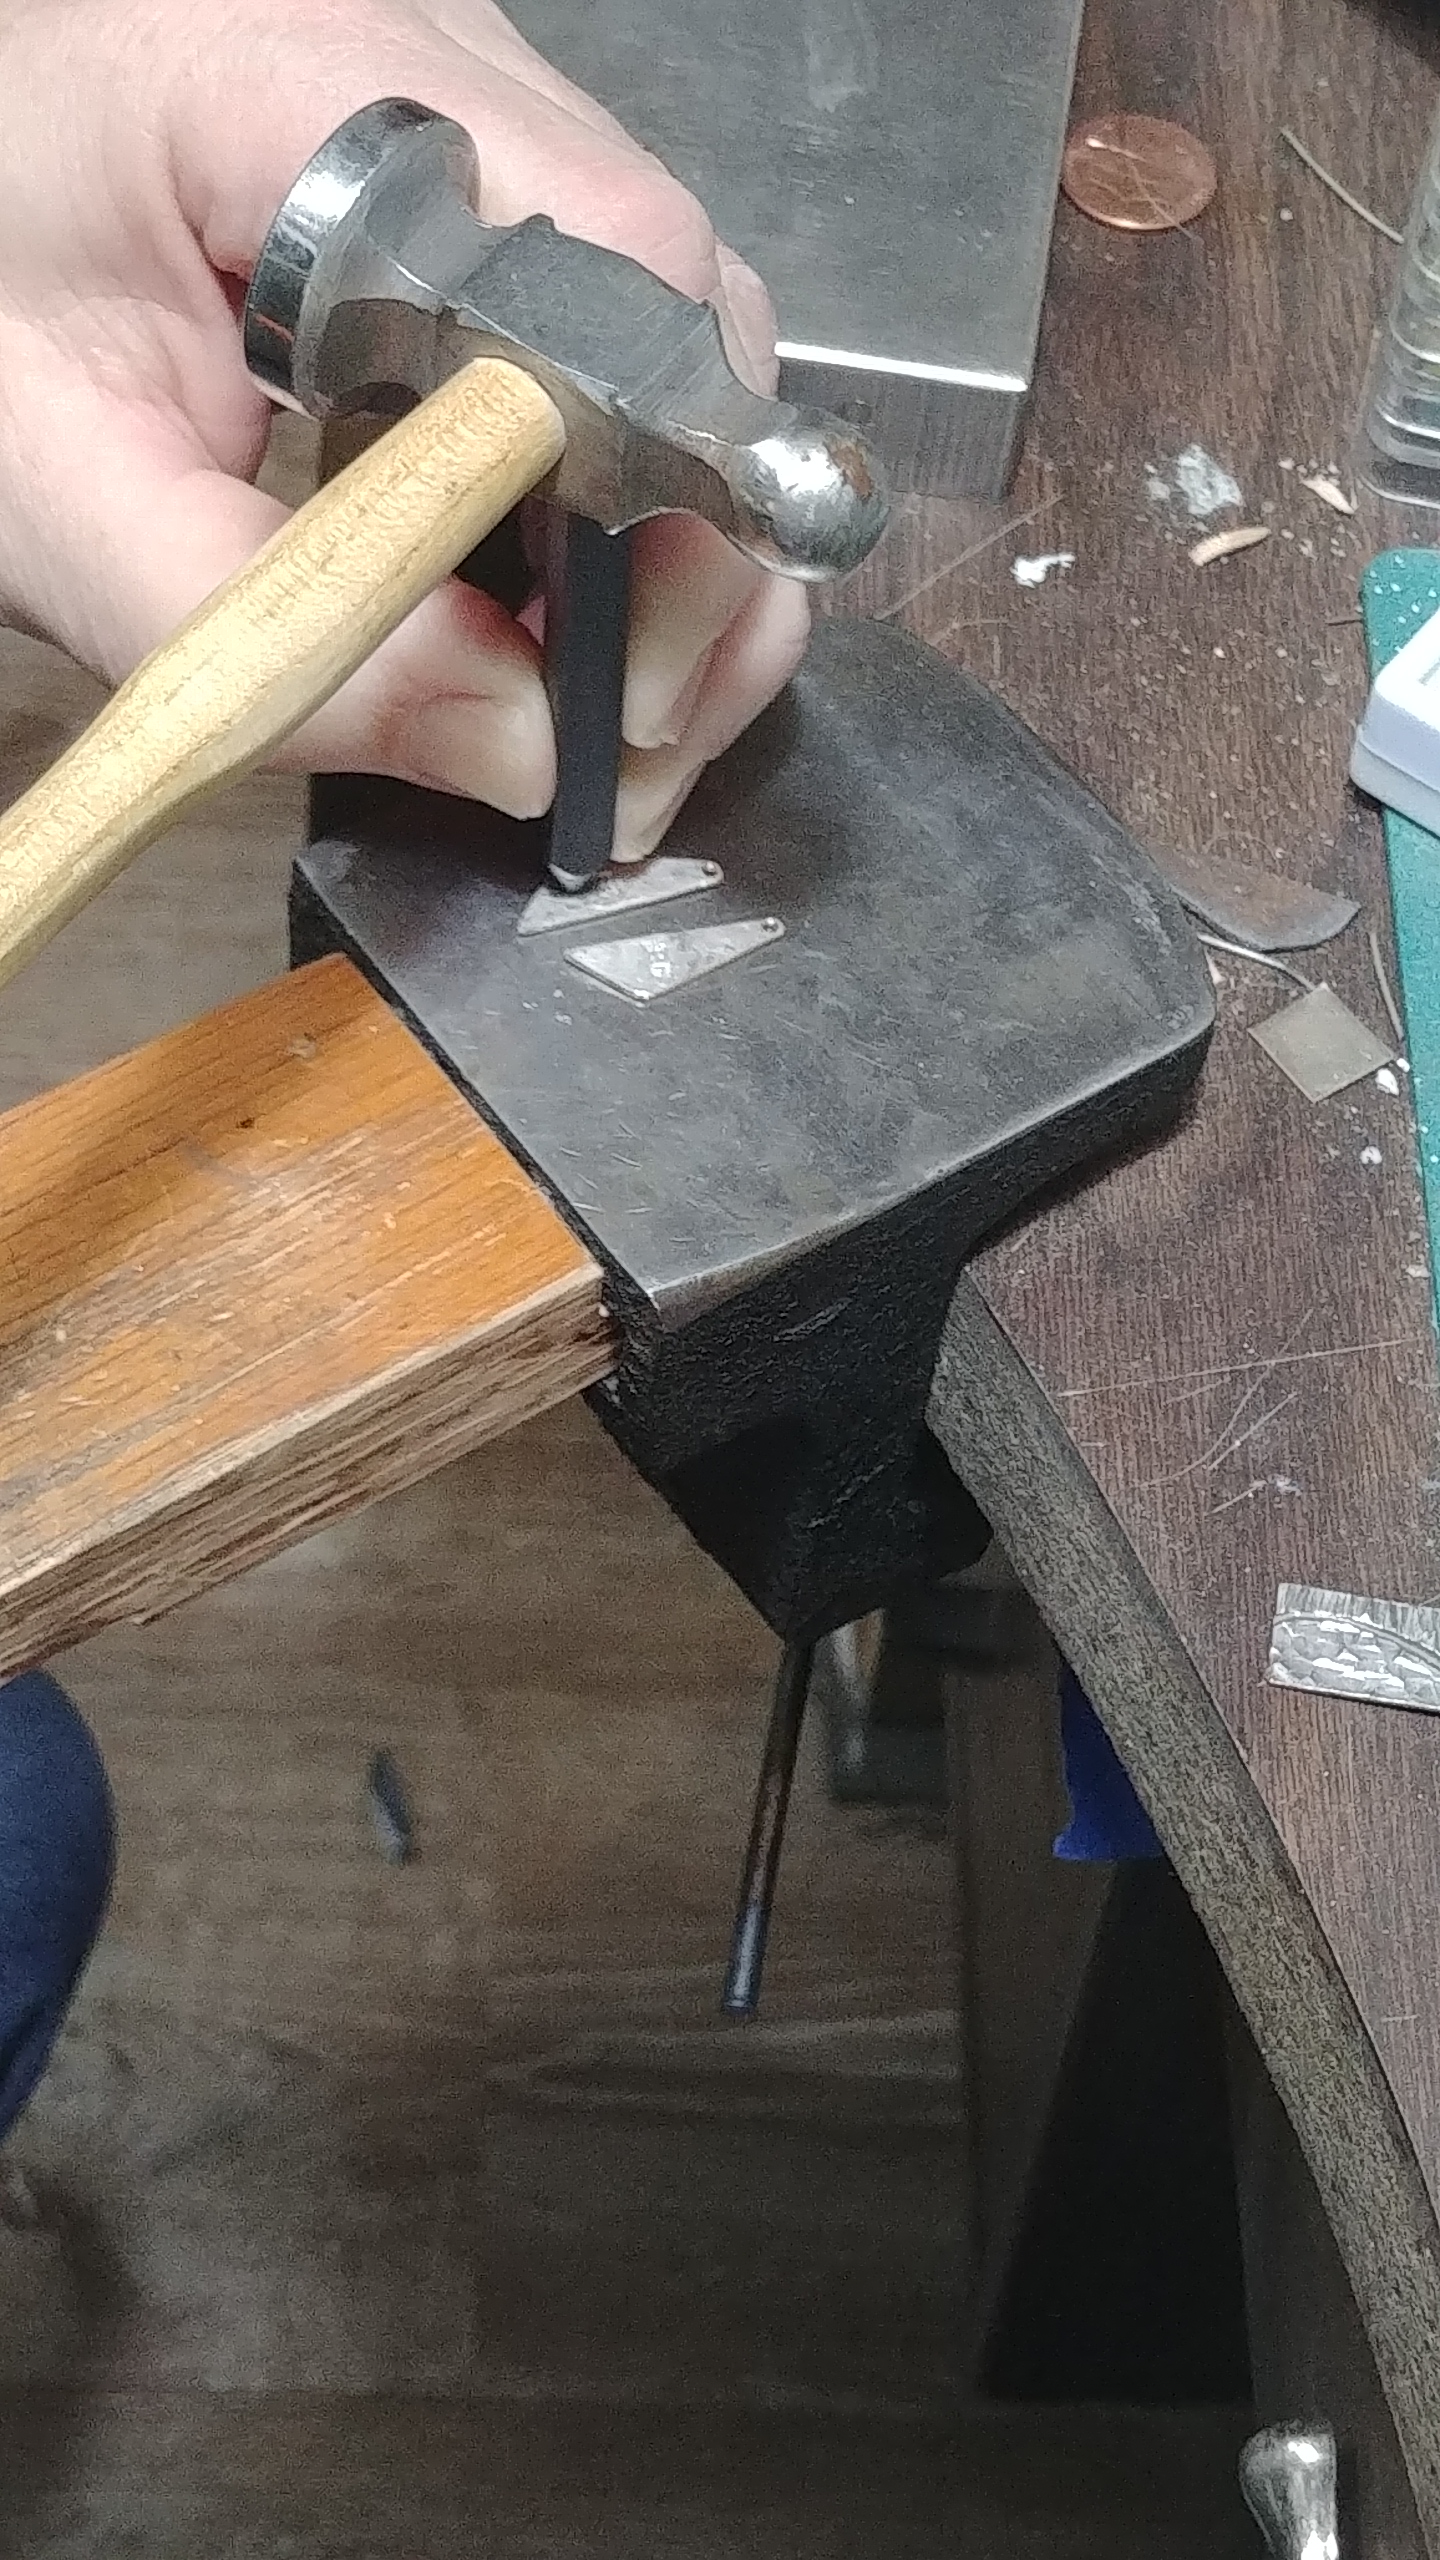
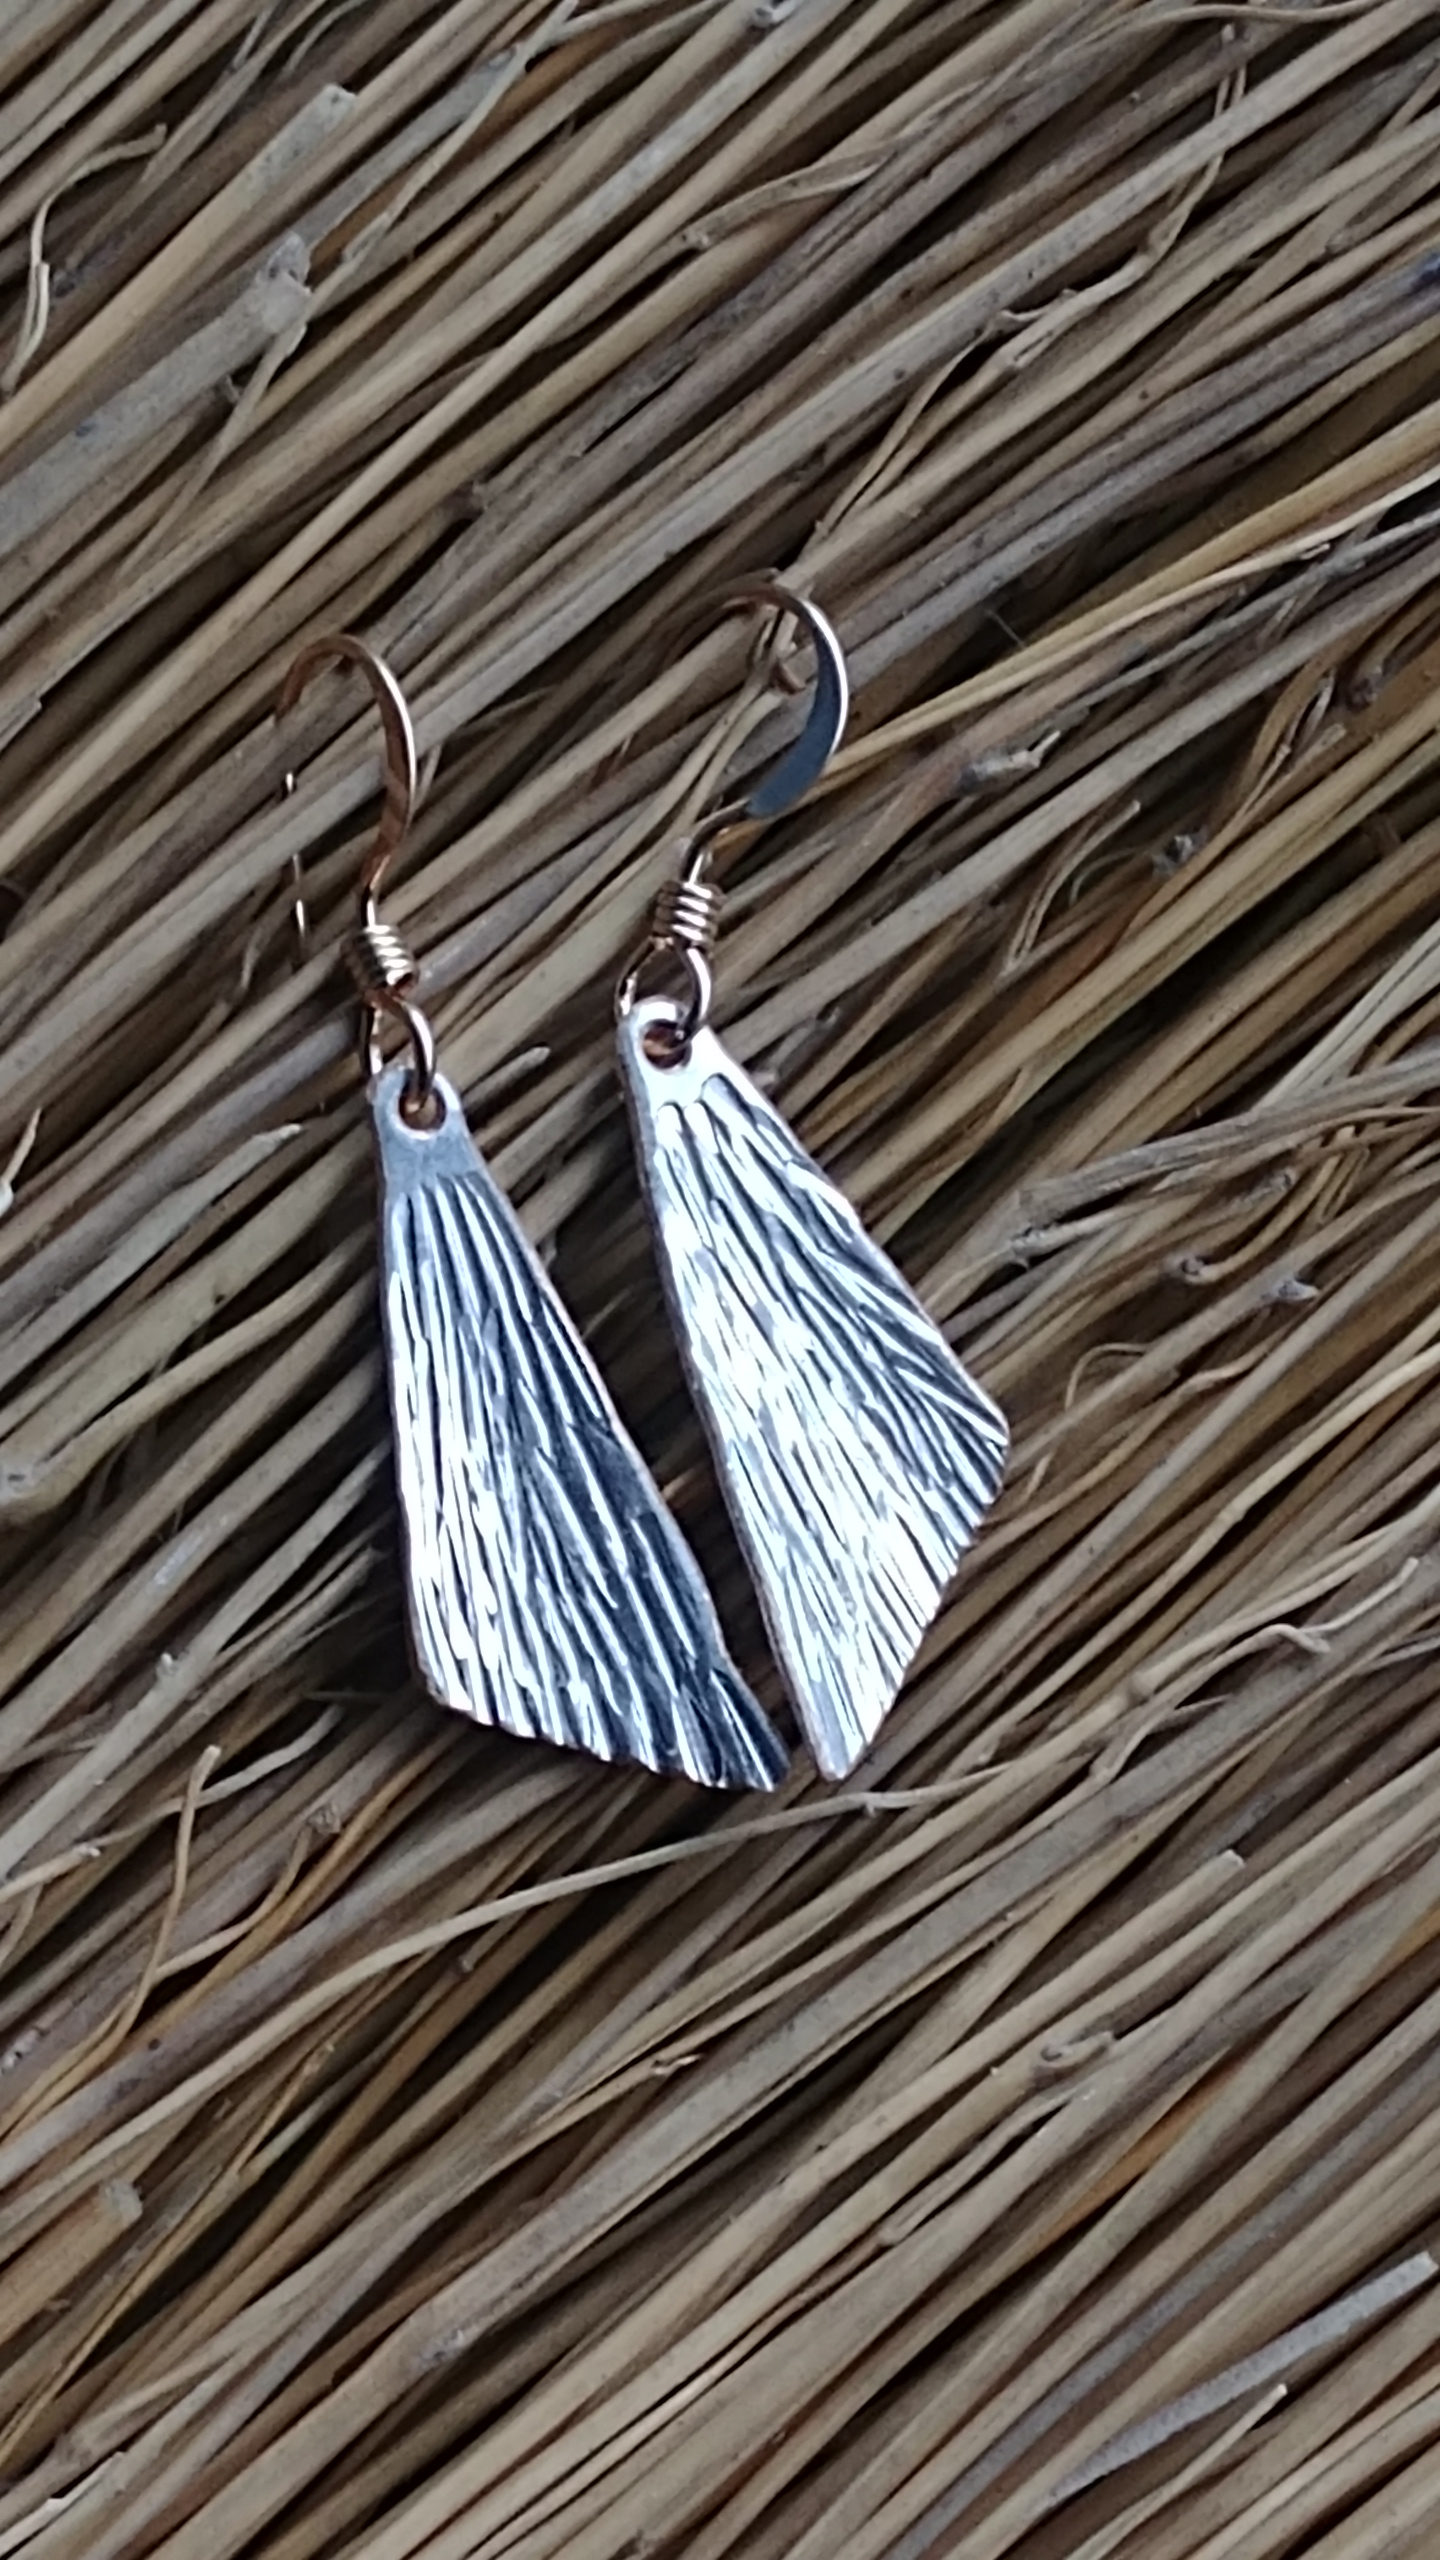
After completing a commission, I had a small silver octagon cutout left over. Trimming the edges left a pair of triangular shapes, so these were filed, drilled, and textured. These earrings were the result.
This opal and silver necklace was completed recently and features a solid Australian opal that was cut and polished in my shop. I have a fairly large amount of opal rough that I bought years ago and am only just now getting around to cutting. This rough wasn’t exactly cheap, but it wasn’t crazy expensive either… some of the saturated color opals that you see in pictures can quickly reach stratospheric prices. My opals will have less play of color, but they are solid and comparatively larger.
Most of my opals are cut freeform, which makes setting them in jewelry a more laborious and time-consuming process. All these factors go into the pricing, which is typically in the $200-$500 range.
Opal and silver necklace, blue highlights with cloud-like inclusions, 2020. Silver on copper, with a 20″ .925 solid silver chain. Sold.
Opal and silver necklace with 20″ .925 solid silver curb chain, 2021.