I hate to admit this, but my jewelry bench is an absolute mess. As part of my ongoing effort to fix this, I noticed that my emery sticks (which are just different grades of sandpaper glued to a piece of wood, a cheap and useful tool at the bench) were laying about, tossed in coffee cups, etc. So I thought of a quick modification to give these a more permanent, easy-to-find-and-put-away home on the bench. To help organize other things like files, punches, pliers, etc., I use several hardwood blocks with varying-sized holes in them, so I thought that cutting down the sticks to provide a sort of handle, and then sticking the “handle” in a hardwood block would be a reasonable solution (although since then, I’ve come up with a possibly better way to make the blocks, more on that later.)
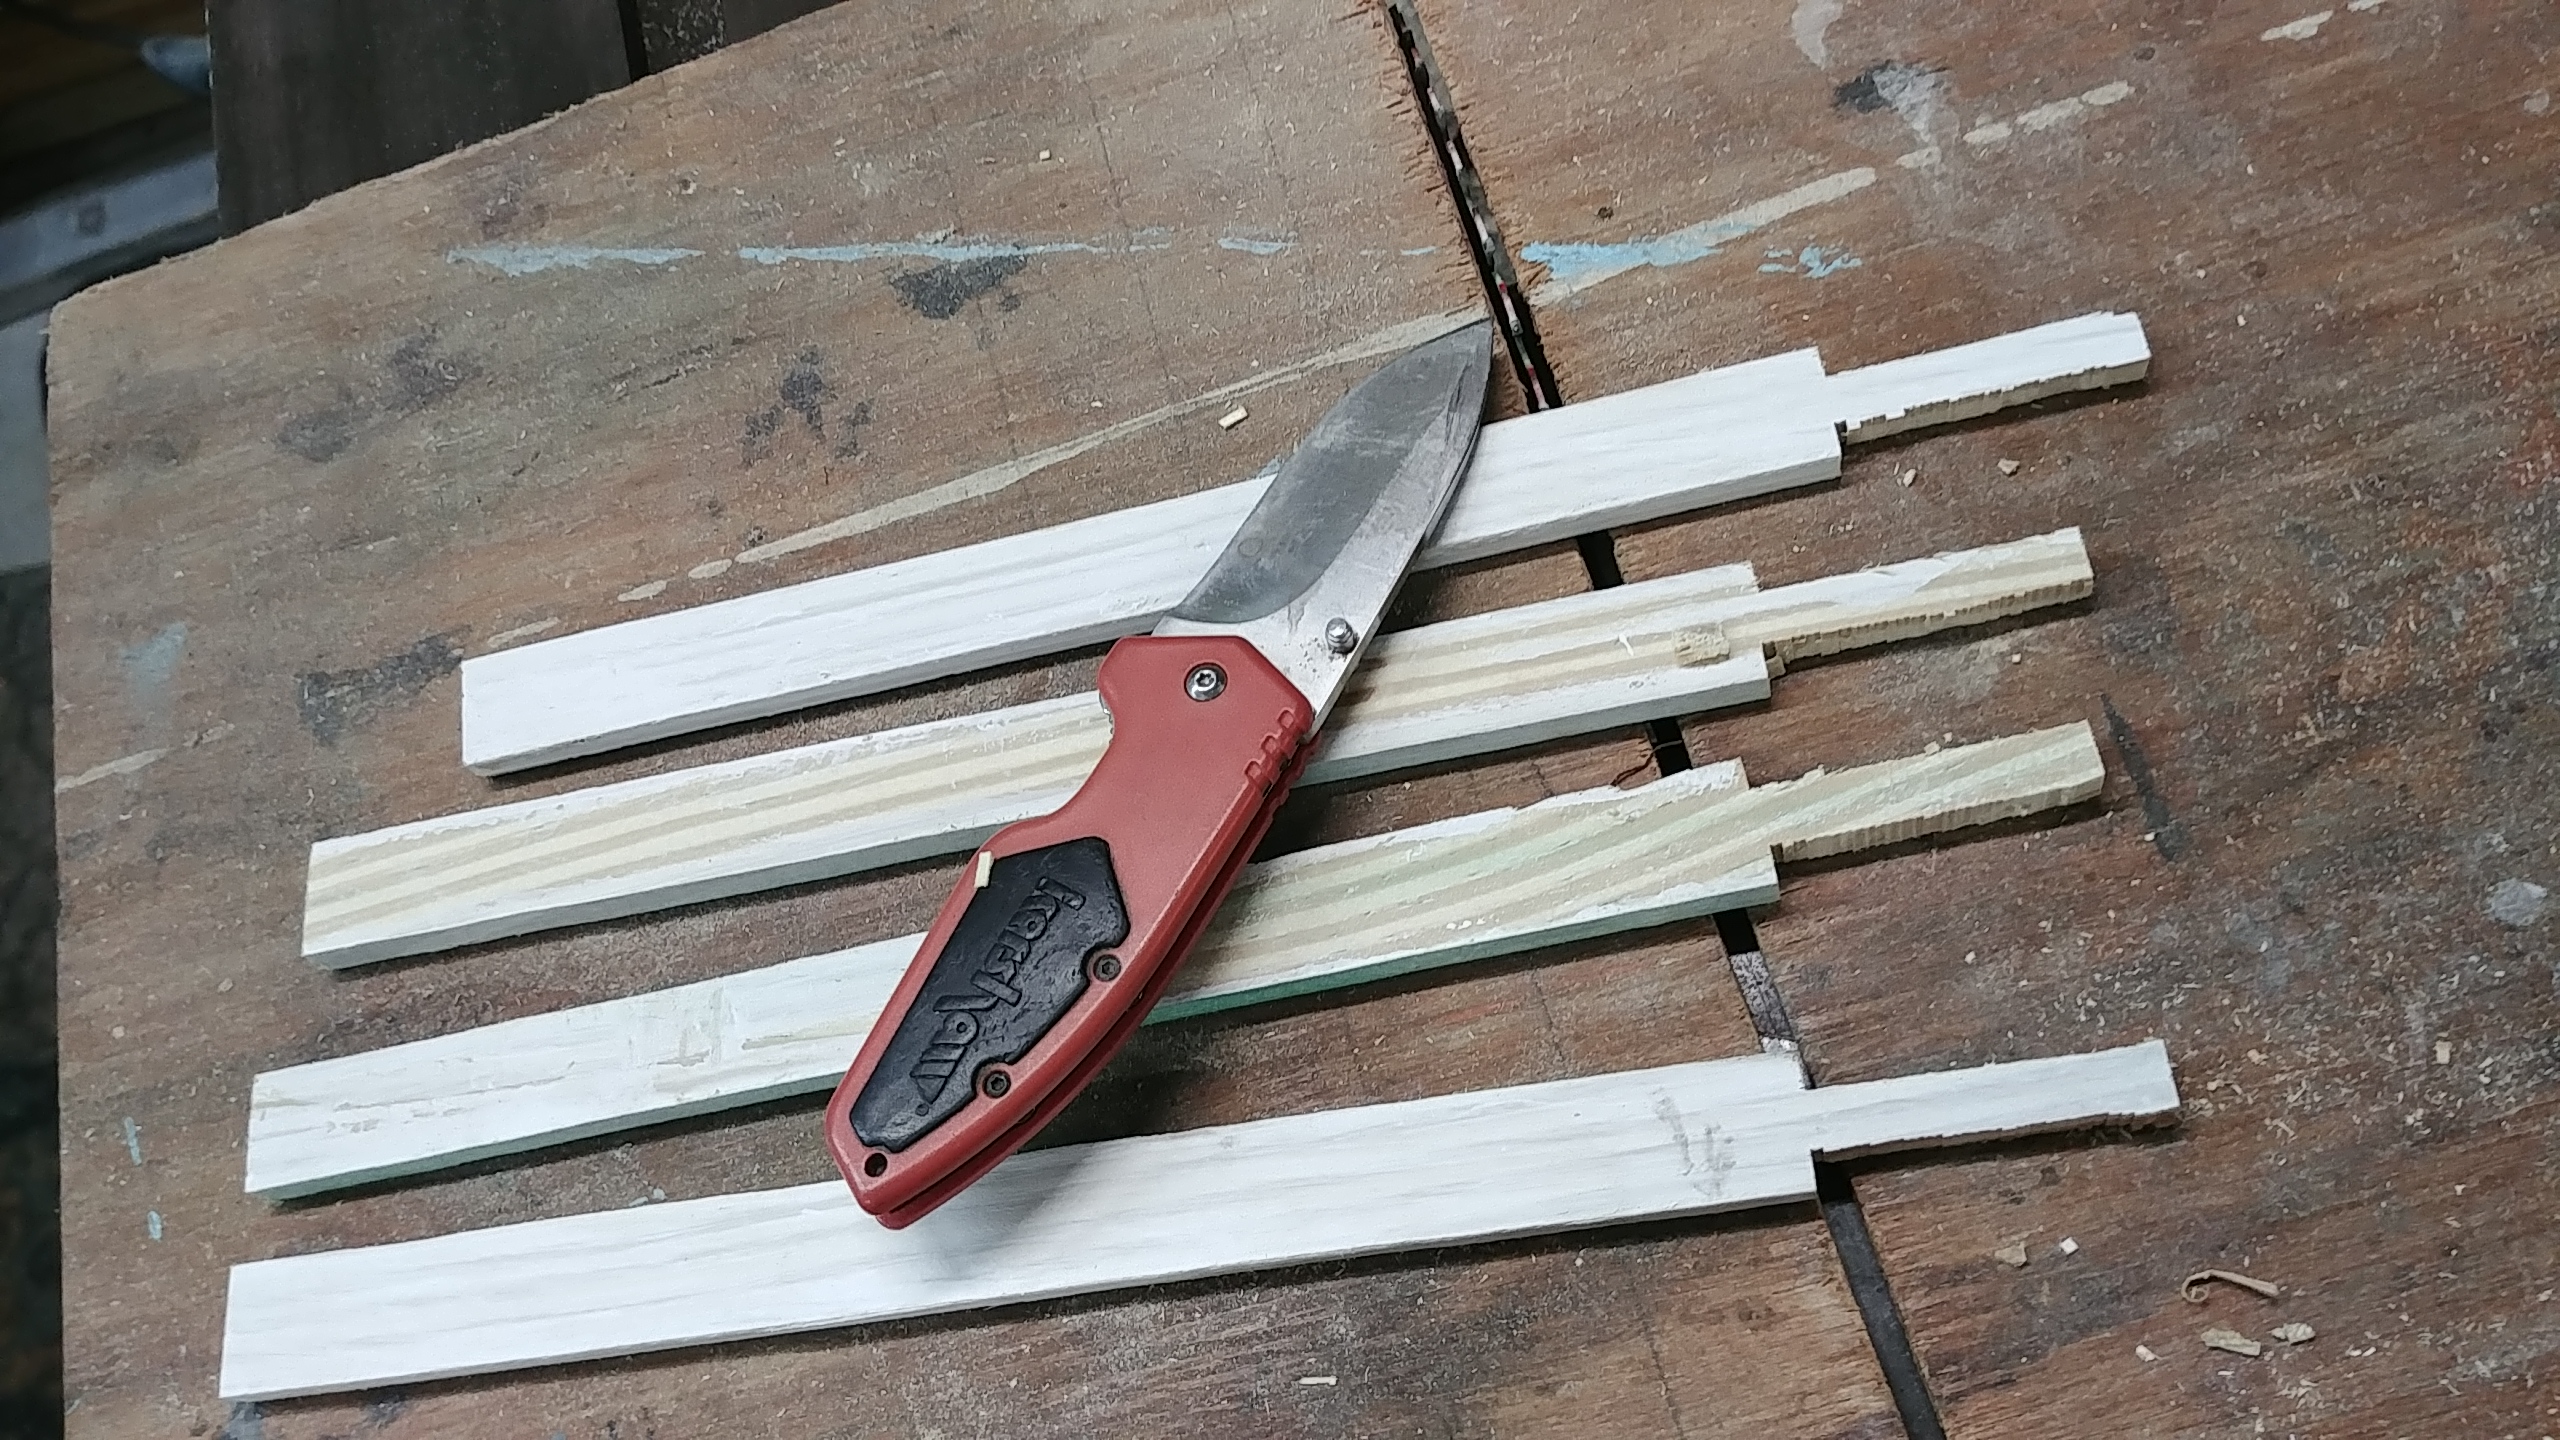
I started by standardizing the size and thickness, which happened to be the same size of some scrap wood that I had left over from a recent deck project. Then on my table saw (everyone should have a table saw… though this could be done with a pocketknife) I cut down the edges by about a third, leaving a roughly 1/4″ square stem. This I sanded to an octagon shape using a bench belt grinder, but this could also be done with a fine file or even another emery stick.
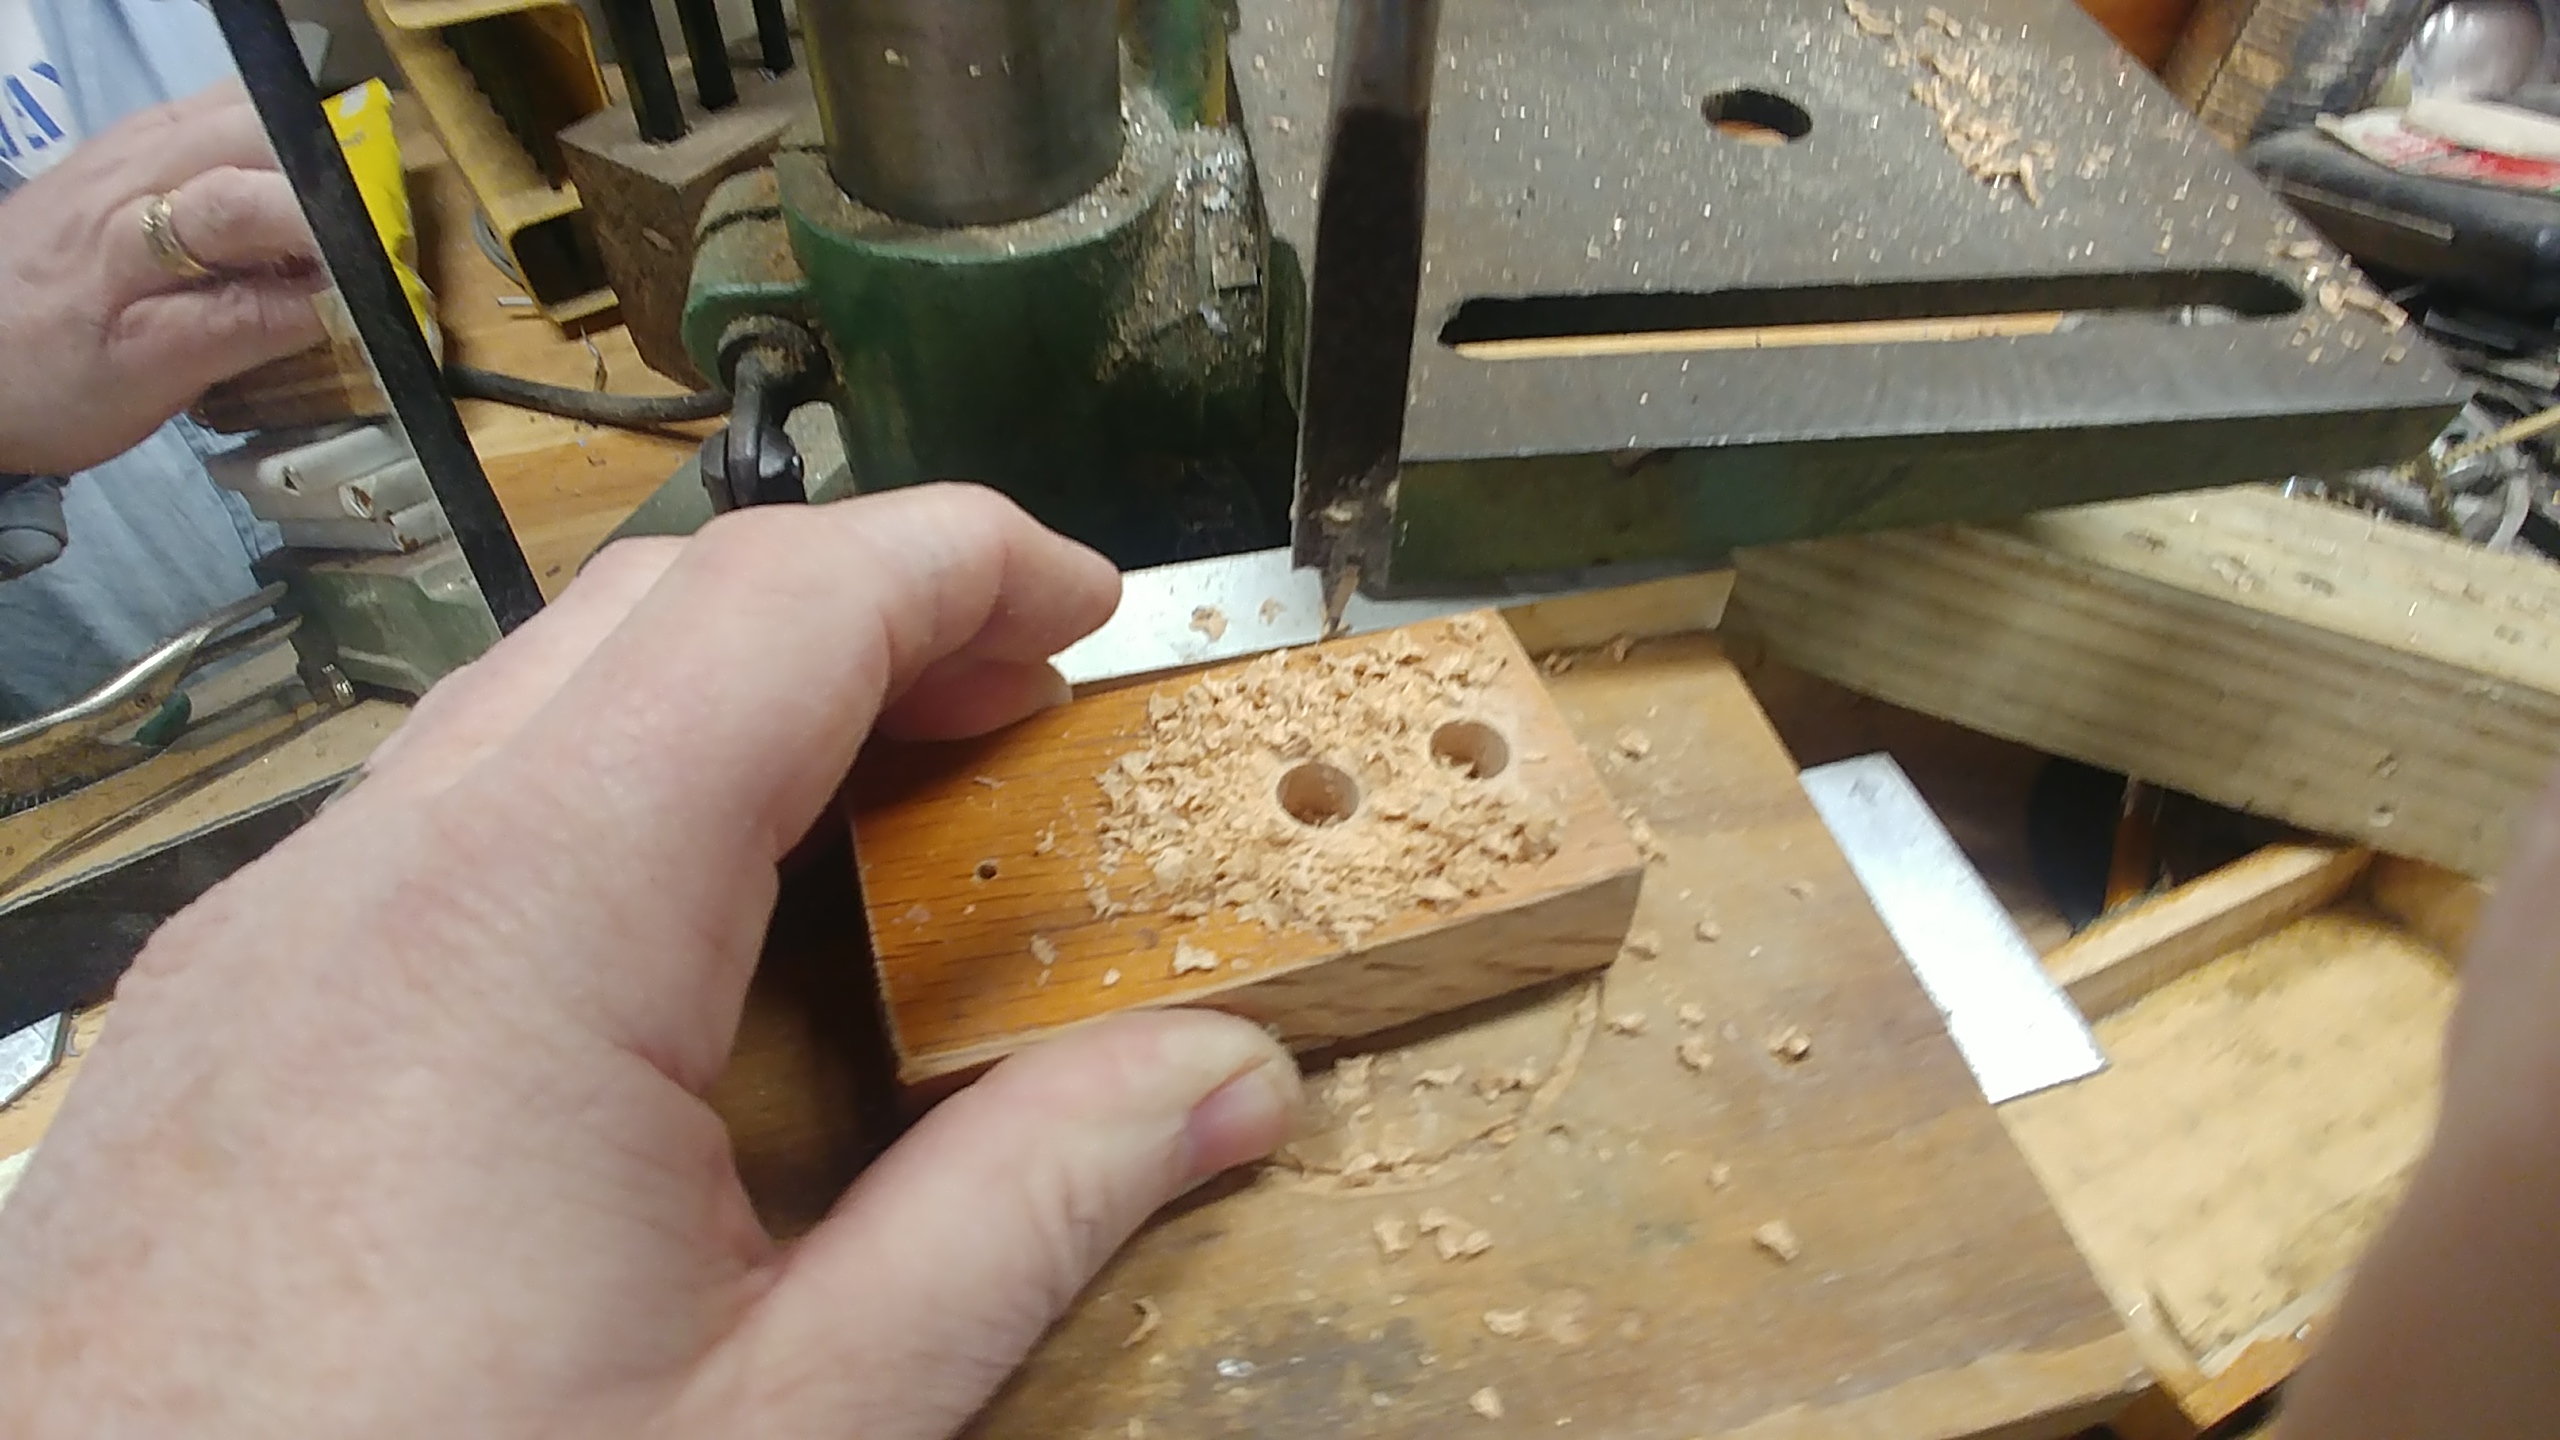
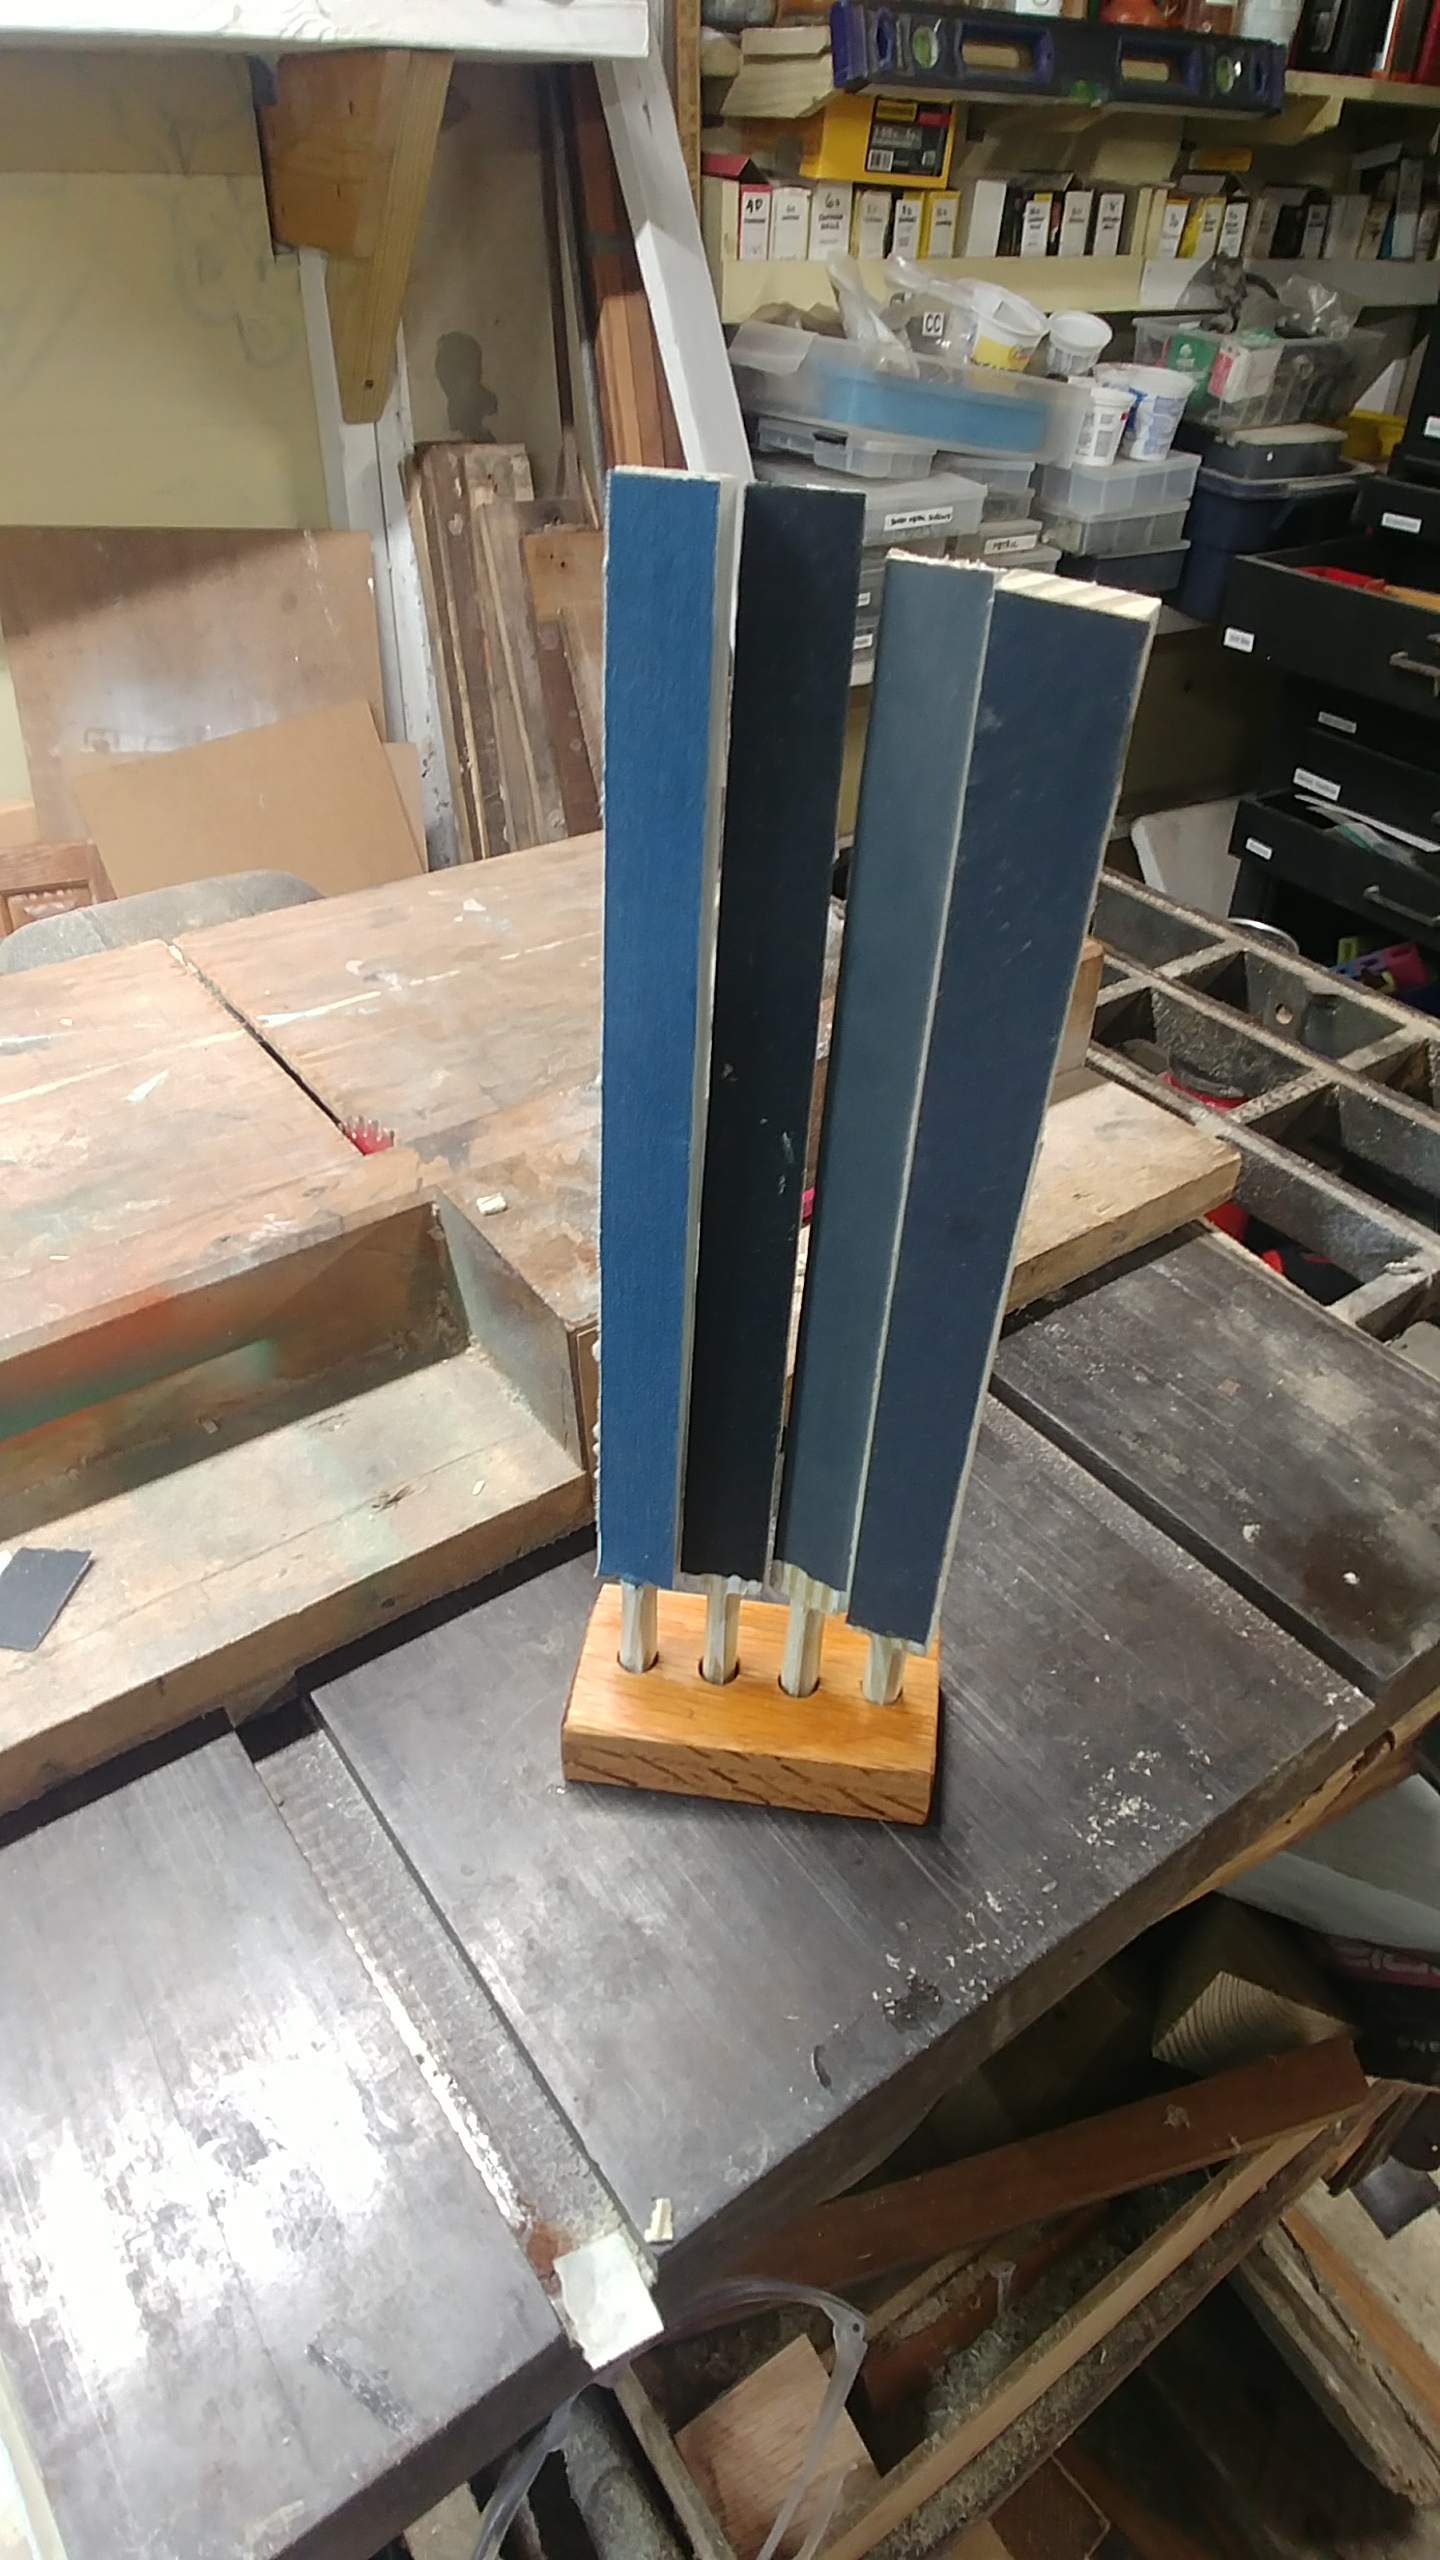
Step two was just to find a hardwood block and drill some holes. I have some oak what was formerly a headboard that I liberated from a trash pile. I cut a small block, sanded off the sharp edges, drilled the holes and gave it a coat of linseed oil just for fun, and the job was finished.
My bench is still a wreck, but I can find my emery sticks now.
Four emery sticks of the same size. I stacked these together and cut the ends on a tablesaw.
The remaining little teeth were popped off using my pocketknife, and then sanded.
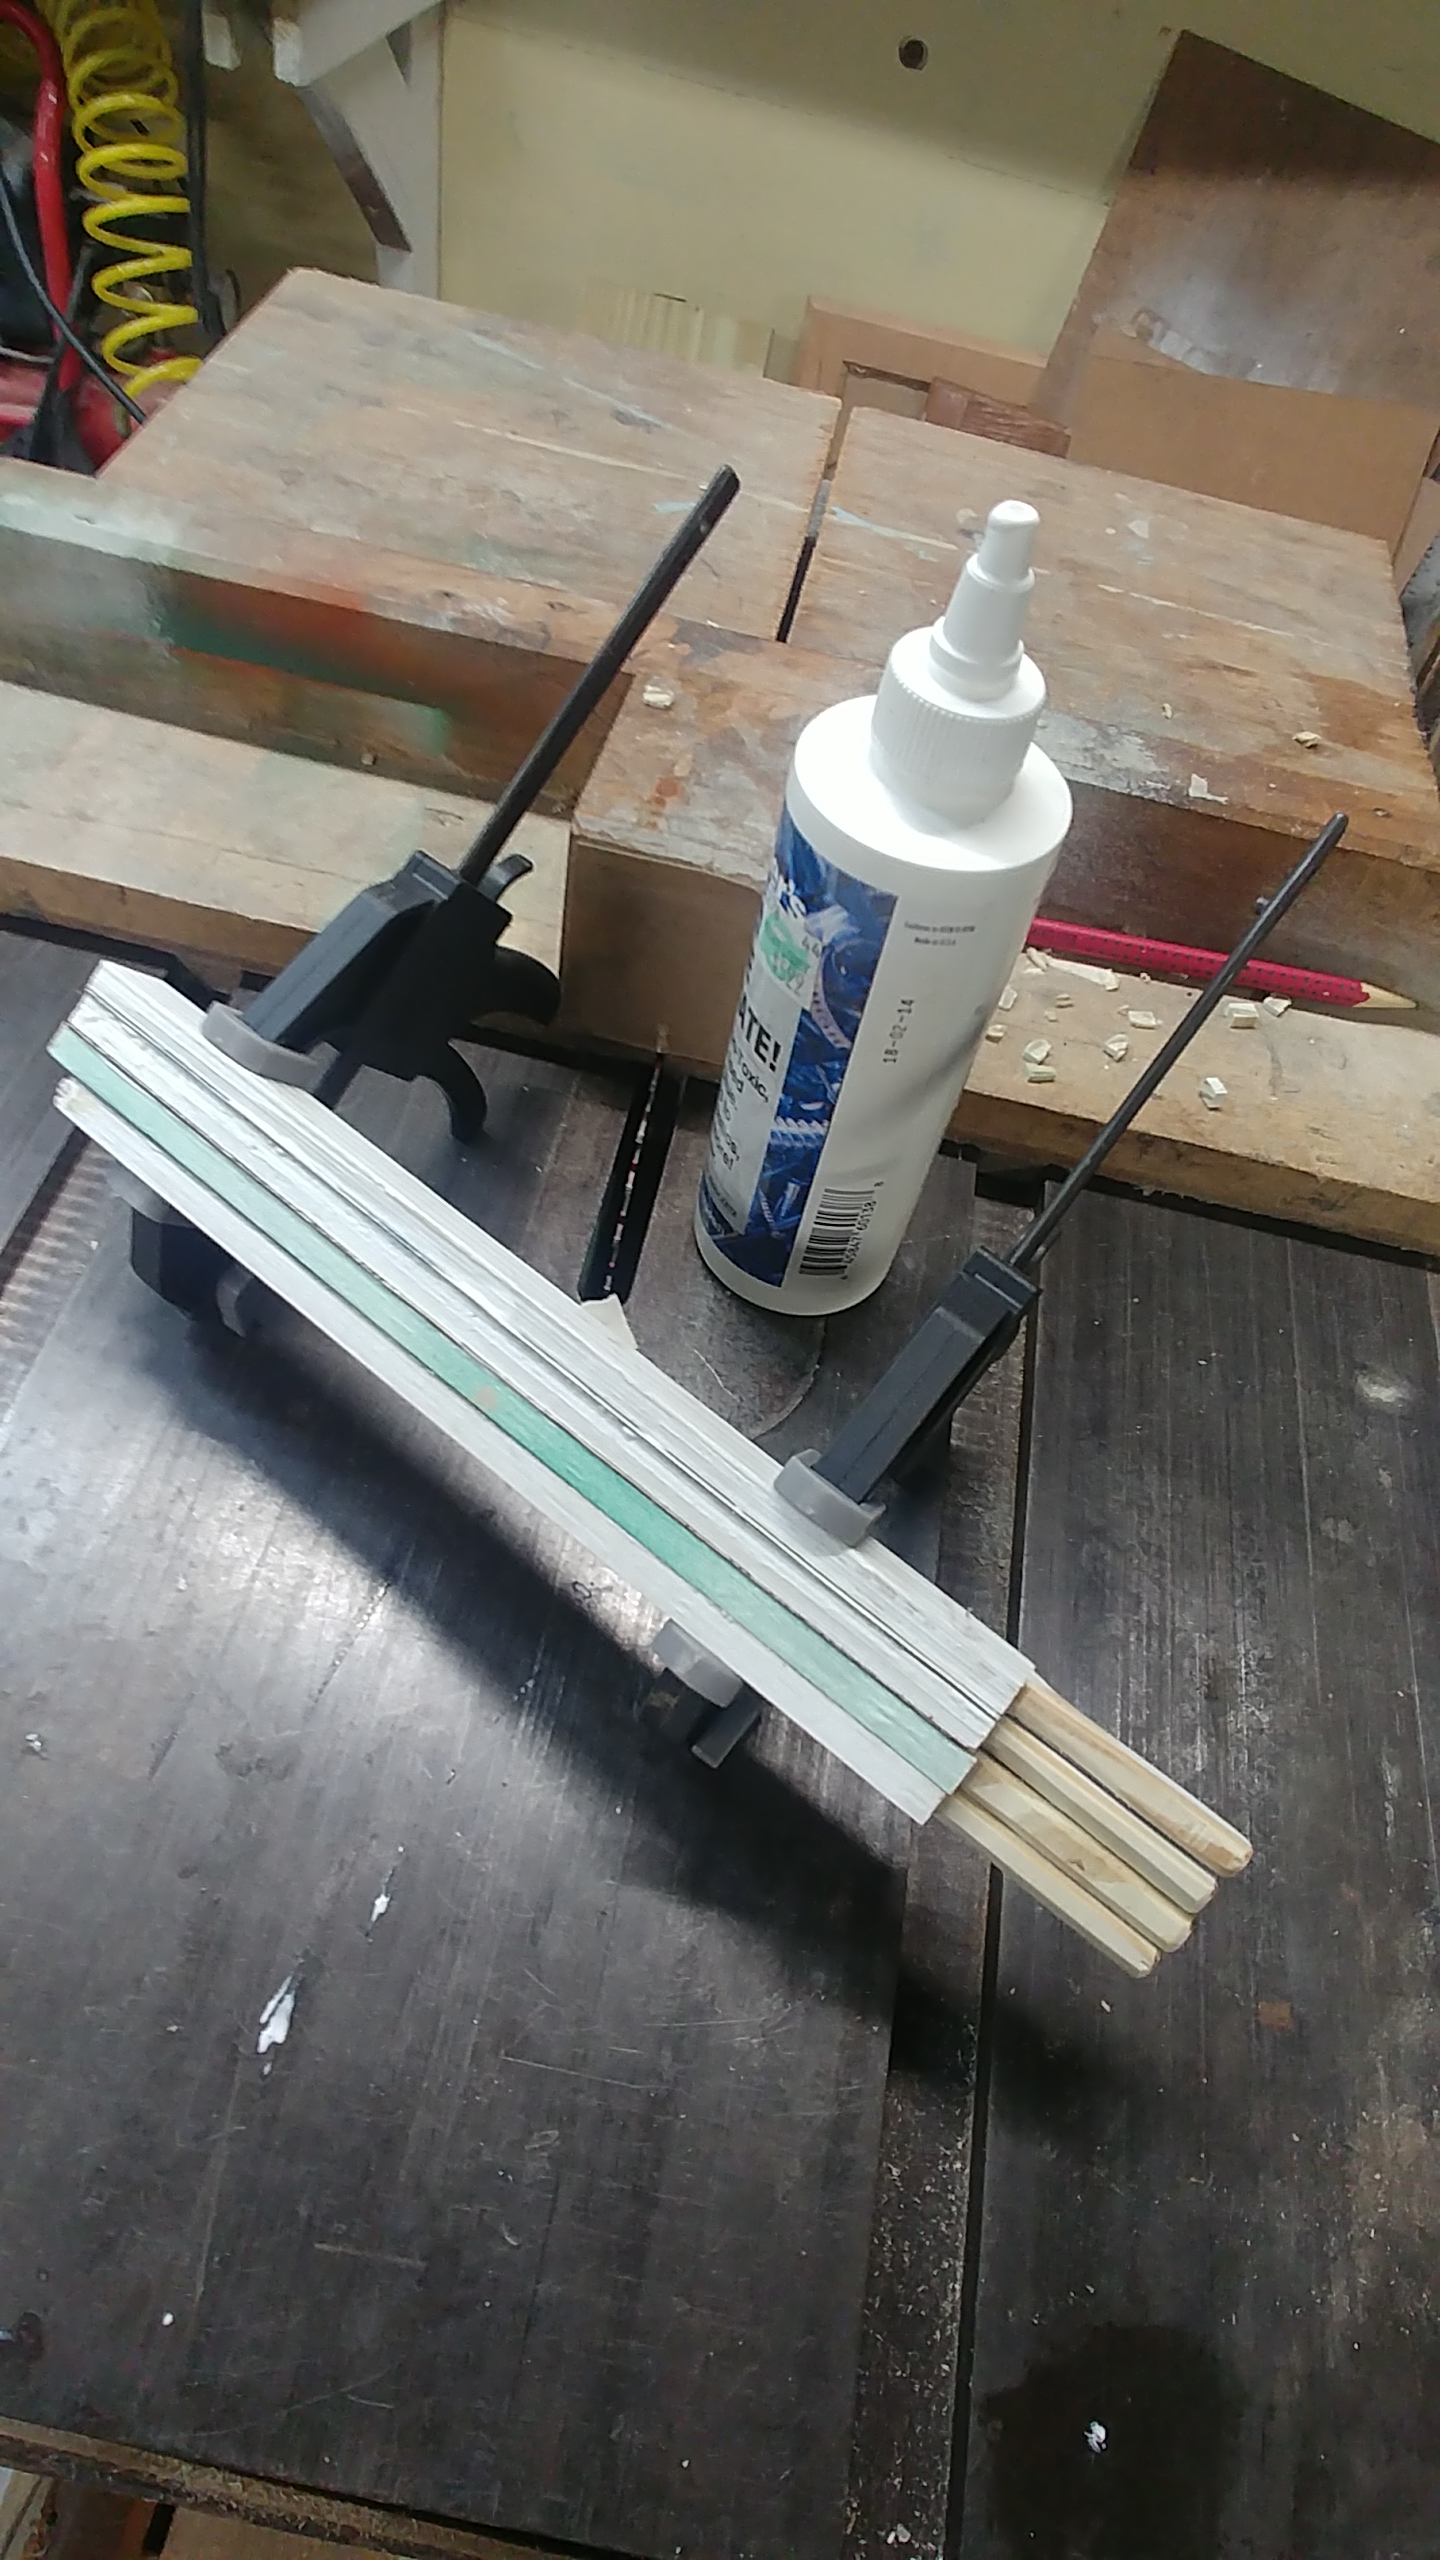
Here I’ve glued on some different grades of sandpaper and am holding them together with clamps until the glue dries. Plain white glue works fine.
I drilled four holes with a 3/8″ spade drill in the drill press
My now-organized emery sticks
My Version Two of this project would probably be easier… instead of a block with holes, I’ll cut a block with slots on the table saw, just a little wider than the thickness of the emery sticks, and dispense with the little handles altogether. I always seem to think of a better way to do something when I’m halfway through a project!
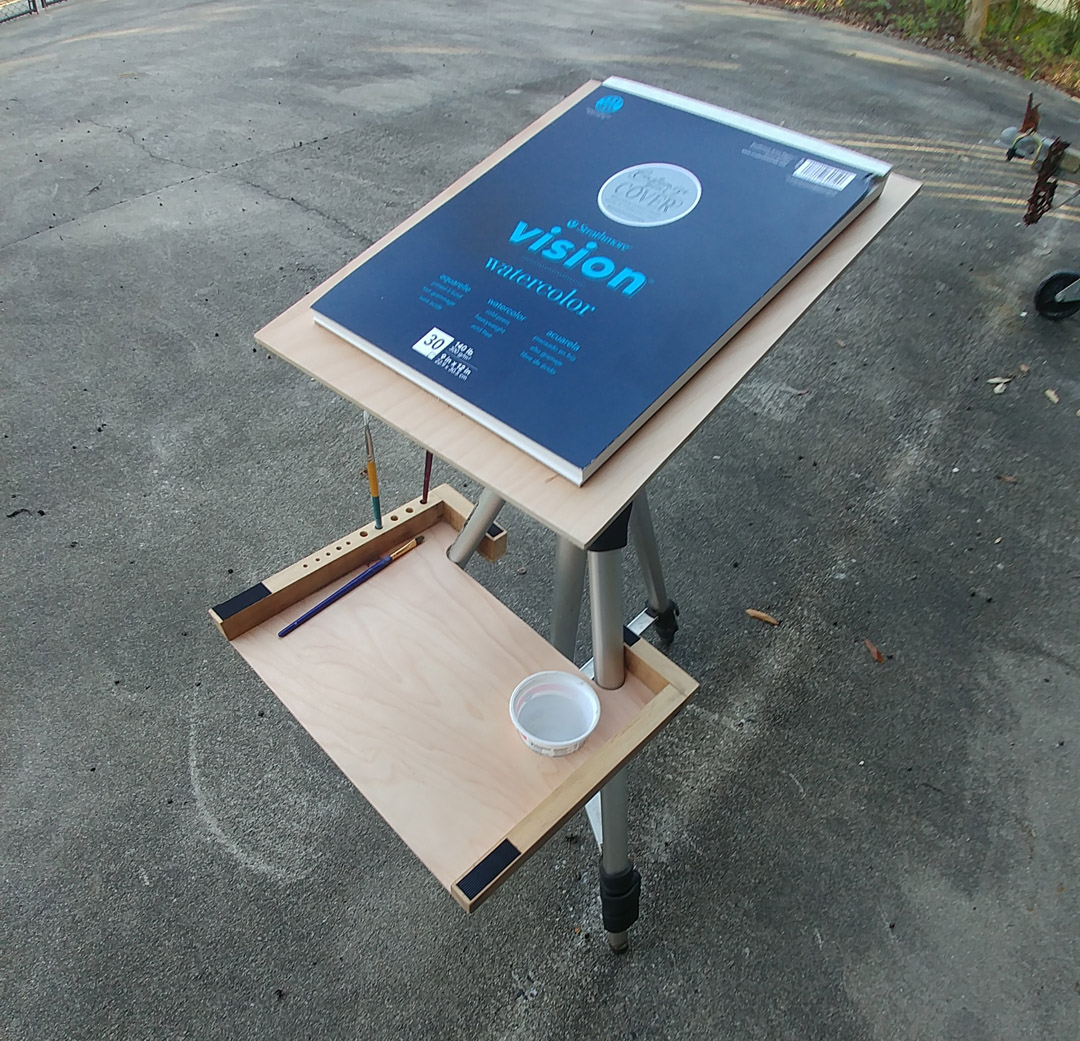
I’ve just completed a pochade box for plein air work. It was a straightforward build, and my box is fairly simple. This is Andy Beck’s design, with some minor modifications. There are some beautiful designs out there, and some are quite fancy. A skilled (and/or well-equipped) woodworker could go really crazy with these things. I like this one because it’s simple and functional.
Building one for yourself should be straightforward as long as you have some tools. In theory, it could be built without power tools, but that would require a good bit of additional time and patience, and (were I to try it with only hand tools) the results would be more crude. The major tools I used were a table saw, a drill press, a hole saw set, and a rechargeable impact driver. I used glue and screws for most parts. Glue alone would probably be strong enough, but I generally use some sort of mechanical fastener along with glue, i.e., nails or screws, for extra durability
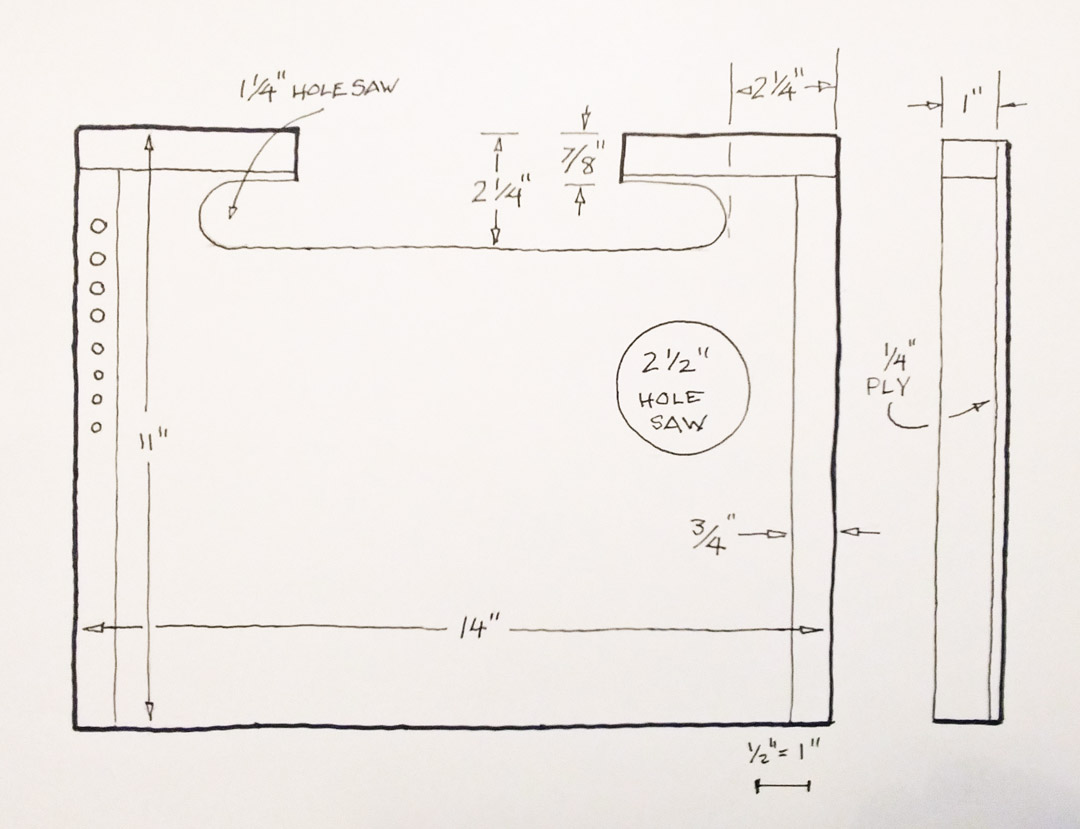
My pochade is basically a shallow box with two parts: a lid that becomes the painting surface, and a tray that hooks onto the tripod legs to hold your palette and water. There are some holes for brush storage as well.
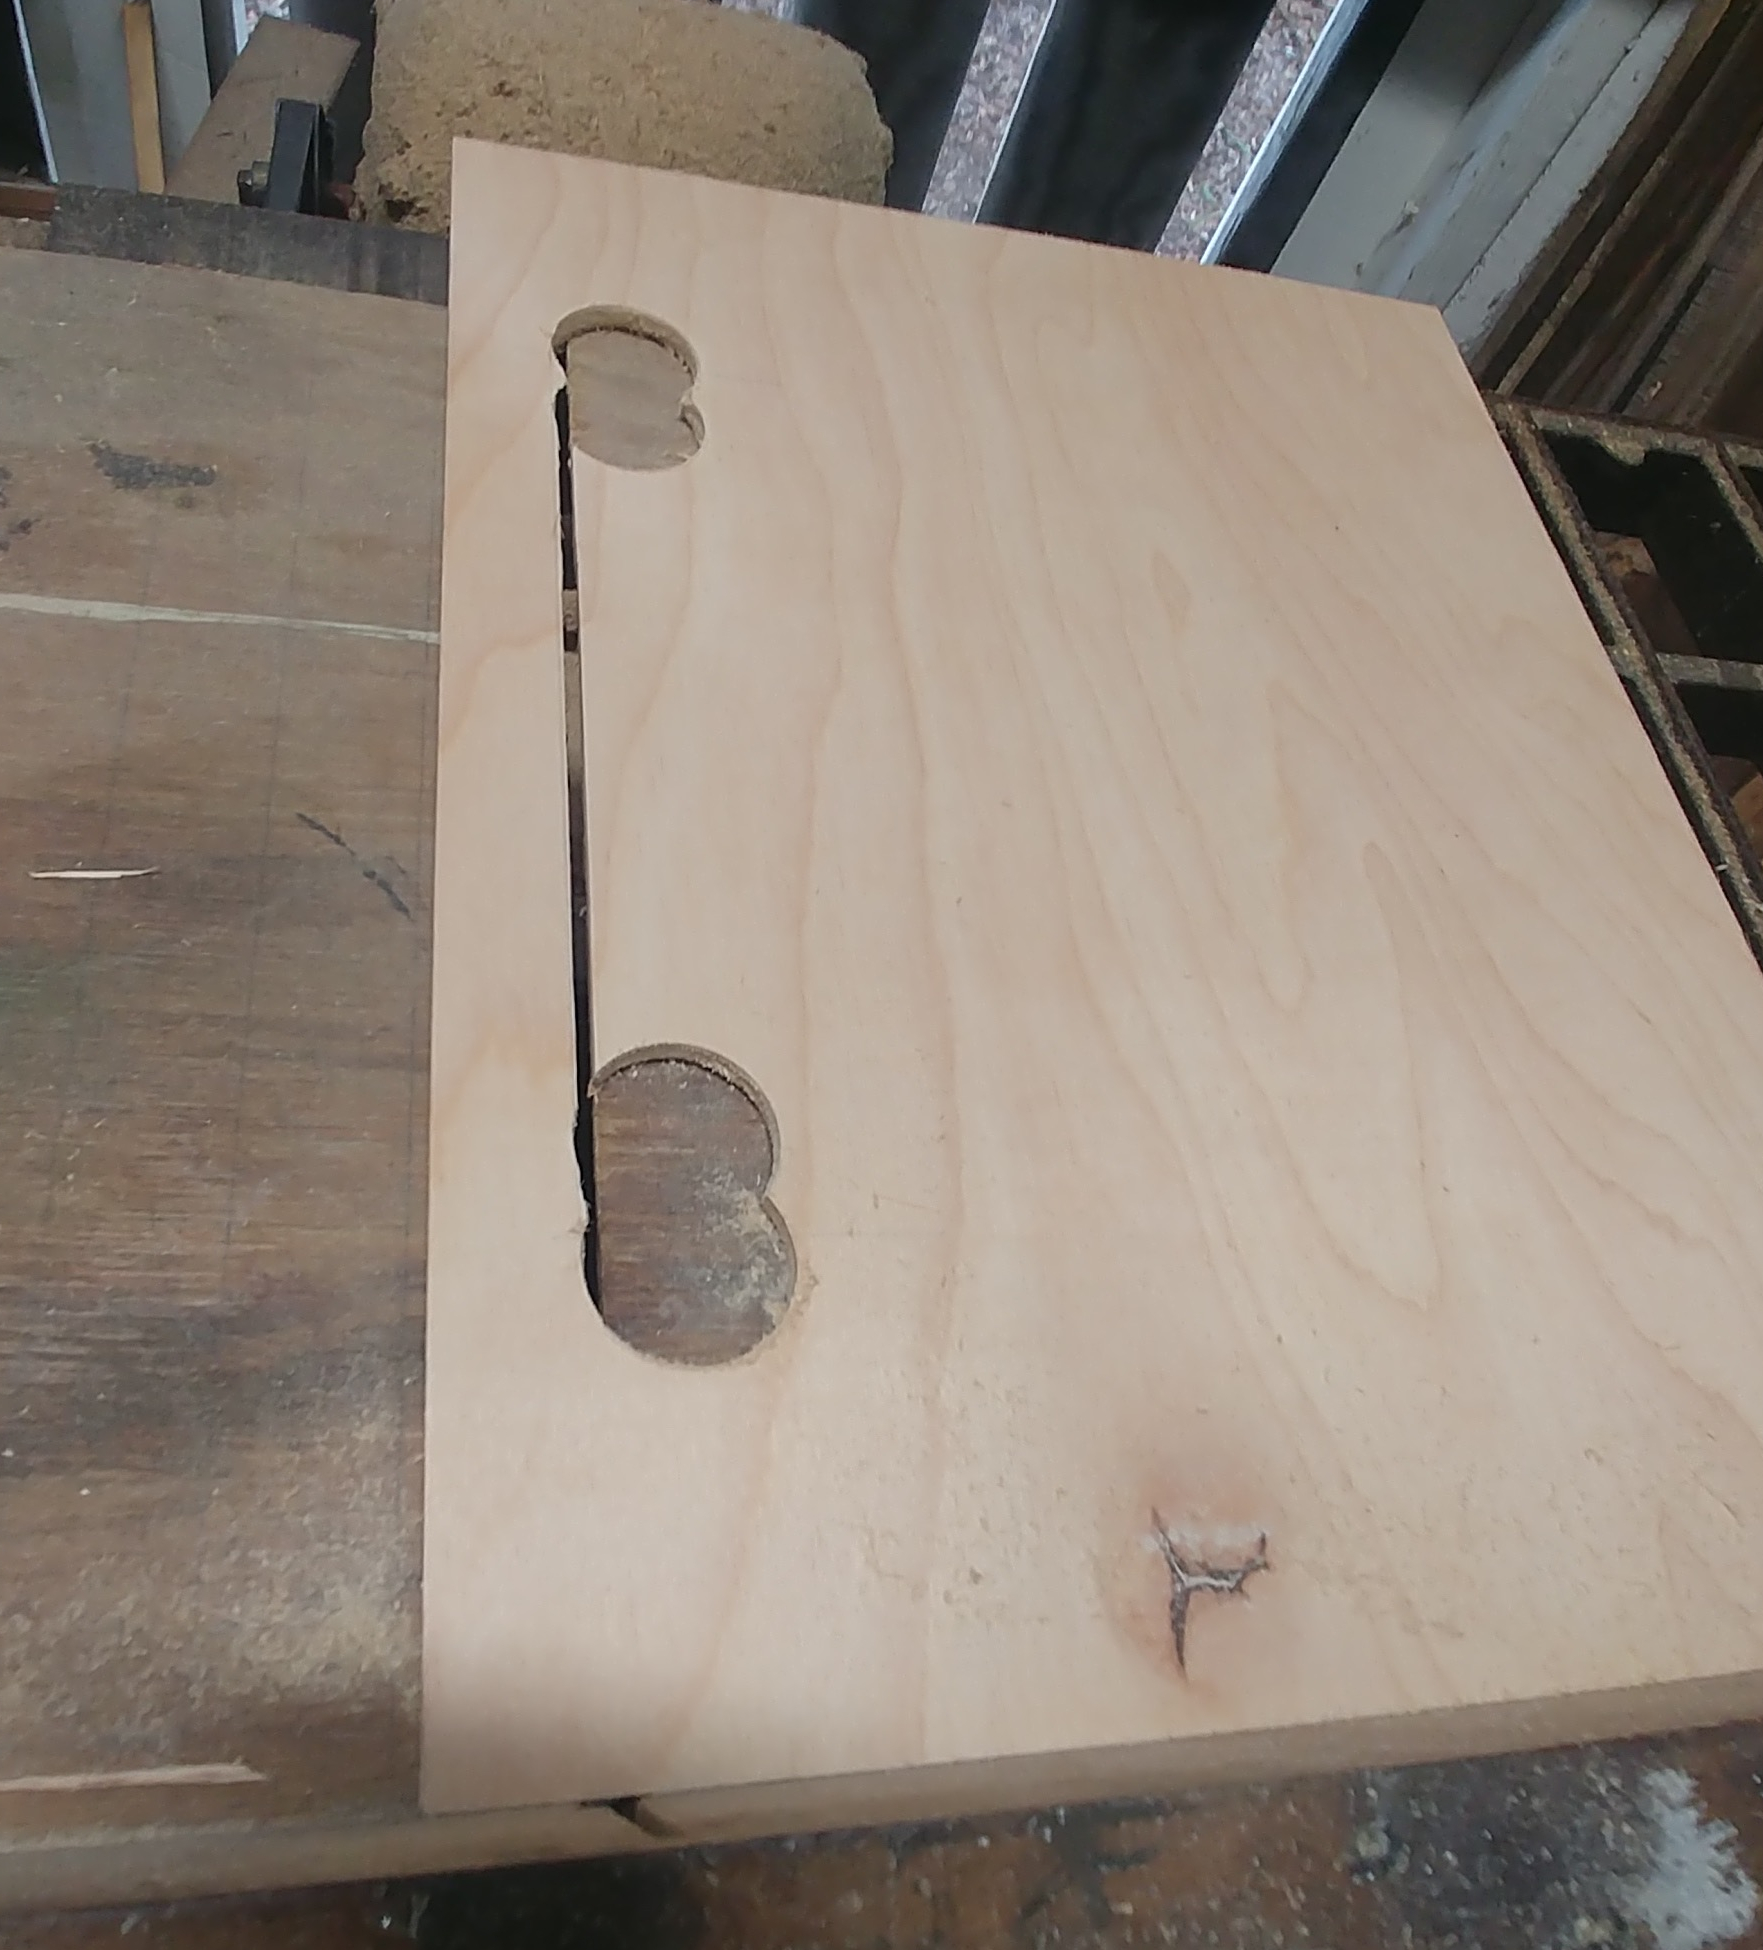
Cutting the slot for the tripod legs
I started my build with two essential things- one, a pad of watercolor paper of the correct size, 9×12 in my case, and two, a tripod. I was able to find an older used tripod locally for twenty bucks, it’s more substantial that the $17 version you can get on Amazon. That would probably work fine as well. The tray measurements given below are based on my tripod’s fat-ish legs… yours may be different. It’s unlikely that your palette tray will sit perfectly level, but it’s nice to get it close. One could easily size the whole box larger for a bigger pad of paper, but bigger isn’t always better in this case. A larger box will be more likely to blow over in a breeze, and there’s more stress on the little mounting nut that holds the top to the tripod. The parts list is short- you only need some plywood for the flat surfaces and some 3/4 x 1″ for the sides. I recycled some hardwood from an old shipping pallet, but anything would do. the other essential part is called a “T-nut,” which is a kind of threaded sleeve with spurs to bite into the wood. 1/4-20 is the thread size on most tripods.
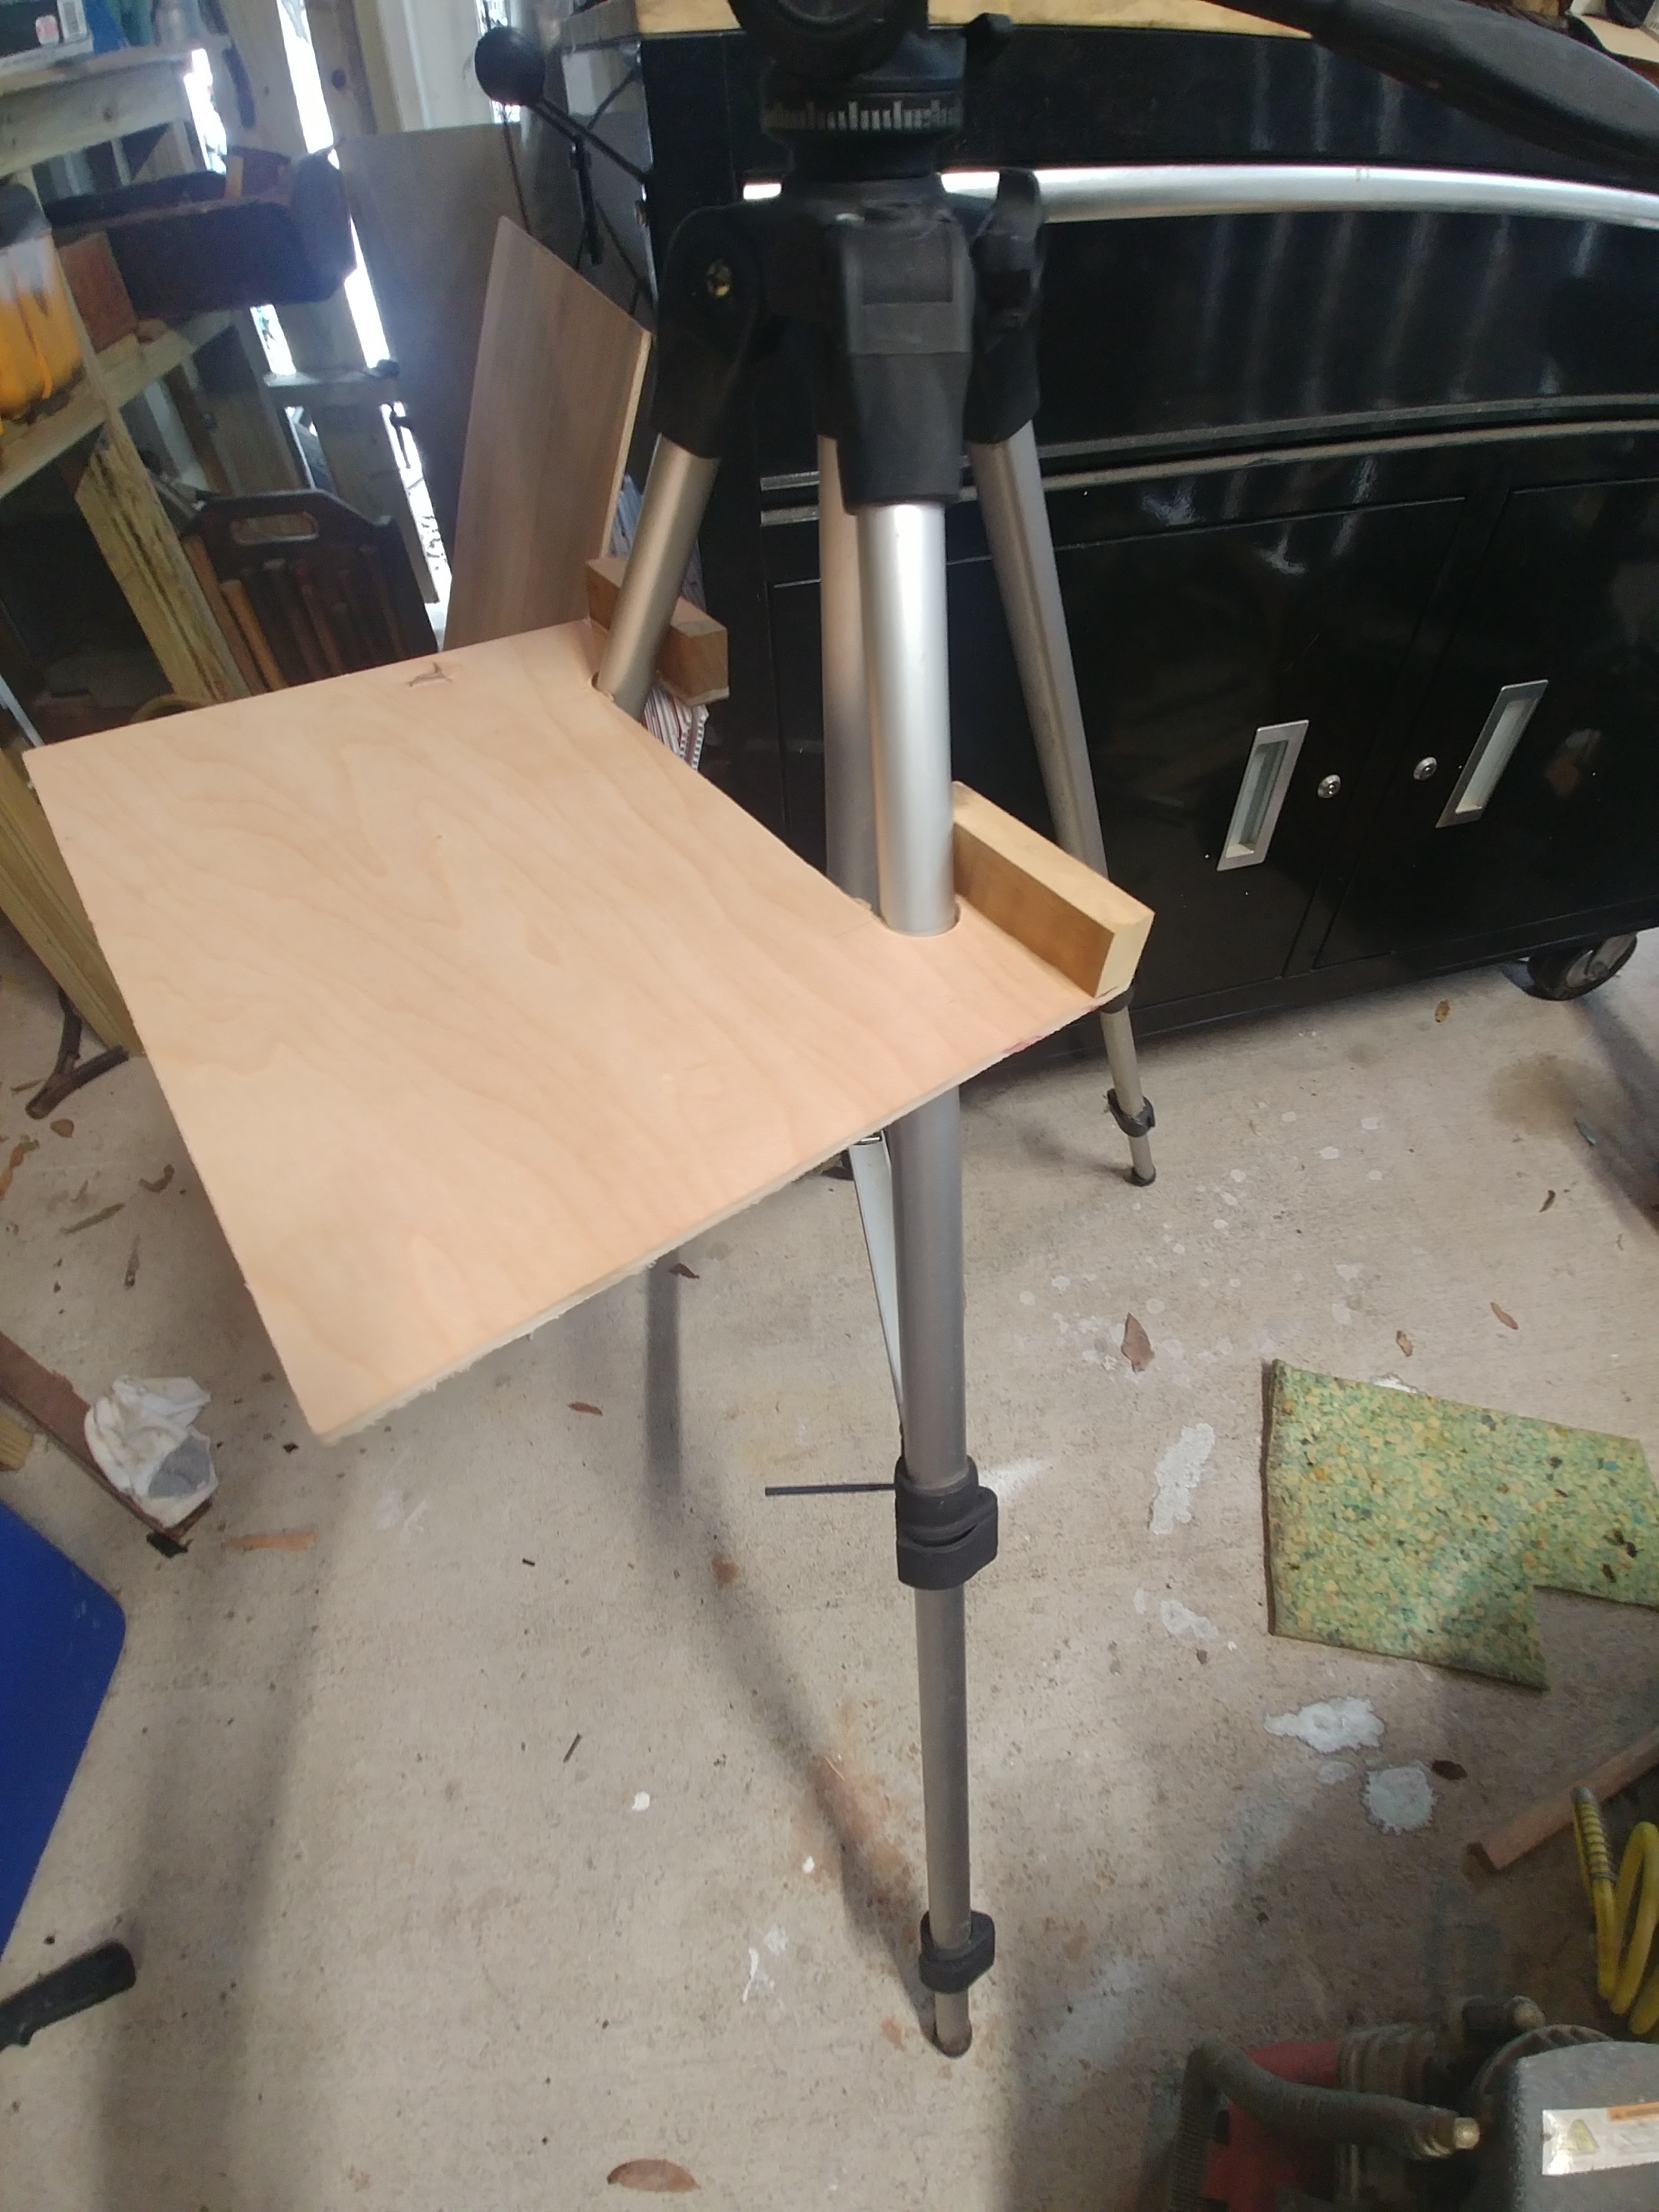
Fitting the tray onto the tripod. With the 1″ sides added, the tray was just about level. It’s a trial and error measurement, but by shifting those back blocks around, you can get it just right!
Just about the only tricky part is figuring out the gap for the tray. It needs to be calculated by trial and error, since it will depend on several things… the size of your tripod legs, the thickness of your box (or put another way, the height of your box sides) In my case, a 1 1/4″ hole saw cut a gap that was just about right. Pro Tip– if you clamp the 1″ blocks with a C-clamp, you can shift them around until the tray is perfectly level.
My lid is where I differed from Andy Beck’s design. I wanted a flat surface with no obstructions, since I normally tape my paper down to the board on all four sides. Andy uses one of the box sides to form a bottom lip, which may come in handy if you like to work at an angle. I figured I could add a small one later should I need it.
The T-nut reinforcement on the lid
A quick note about the lid and its mounting. T-nuts have to be mounted in a particular direction in order for them to work properly. The little spurs are designed to be pulled down into the wood as the screw on the tripod is tightened. They also need a bit more thickness. I cut a small piece of plywood and glued it to the underside of the lid in order to give the T-nut enough wood to bite into, I also countersunk the top surface a bit so the T-nut wouldn’t sit higher than the surface of the wood. After I hammered the T-nut into place, I taped and filled the surface with compound, the sanded for a smooth surface.
The whole thing was finished with a few coats of water-based flooring polyurethate. With a light sanding between coats, this gives a really nice and durable finish. I added some small velcro strips to secure the lid. Not bad overall… total investment was about $35 including $20 for the tripod, and I had it built in about two days off and on, allowing time for glue and finish to dry.